How to replace your Oil Pan

blacksha

Junior Member
Joined
Mar 9, 2011
Messages
5
Reaction score
1
Points
0
Location
Phoenix, AZ
Visit site
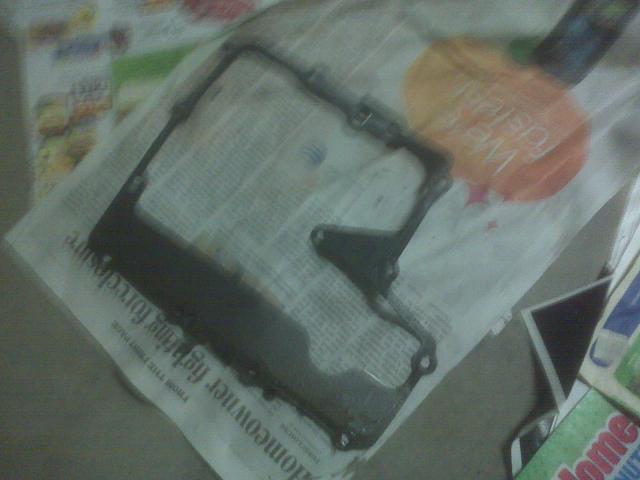
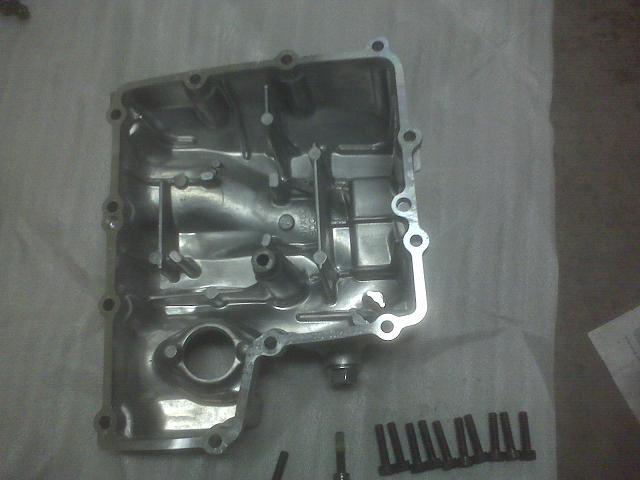
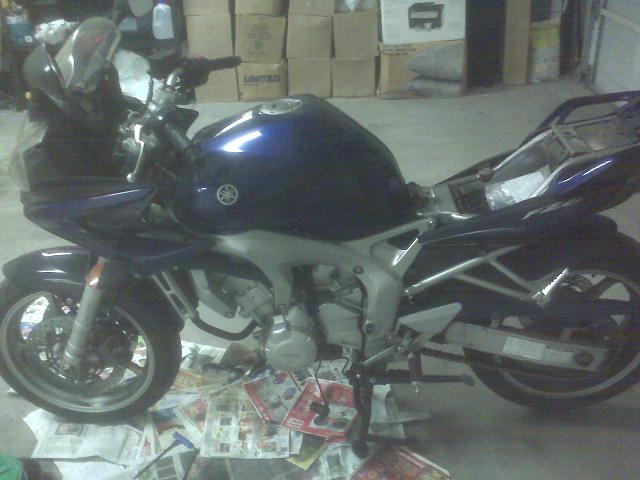
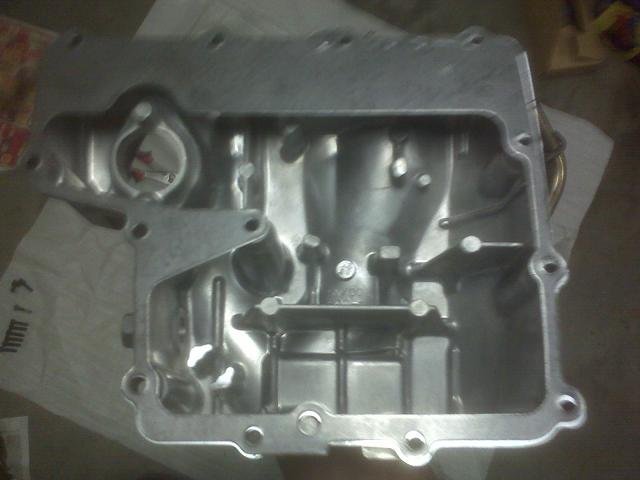
OK, so many of us have done this before, and many of us will not admit we did. But I cracked my aluminum oil pan changing the oil by overtightening the drain bolt. Lots of lessons to be learned here, never use a torque wrench as a breaker bar to break loose a bolt, and when you do use a torque wrench never trust it. Maybe most important, know the rule of gutentight (Good and tight). Just tighten it and tighten it good, being cautious when you tighten as you may be shocked when you do not know your own strength and the pan cracks. Obviously use metric tools. A friend of mine said maybe you do not need to go through so much work, removing the exhaust and water pump, but after reviewing my FZ6 service manual, reading a few posts out there, and looking at the problem at hand--it appeared to me it is actually probably a better idea, otherwise you might spend a lot of time fighting the removal of the oil pan, risking knocking out or bending some things inside your oil pan (and there are a few things in there you do not want to mess up)--I decided I would go the safest route and follow the rules. If anyone has done this without doing all this work please let me know as I would be really curious how easy or difficult it was.

At various points you will need to put your bike up on the center stand. You will find that some of these steps it is easier to have your bike on the regular kickstand for access, while most of the other steps it is best if your bike is on the center stand.

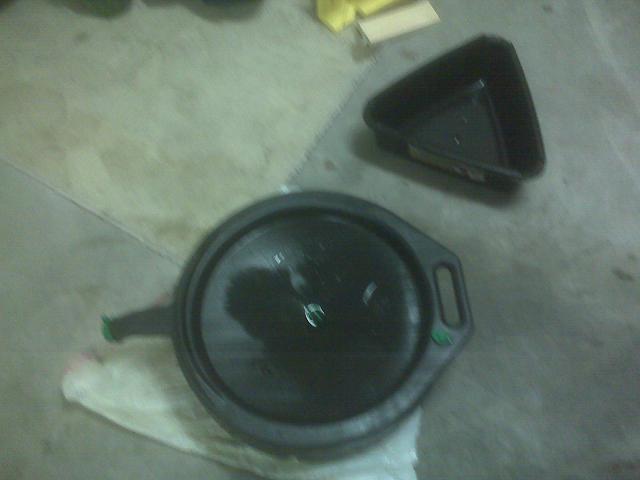
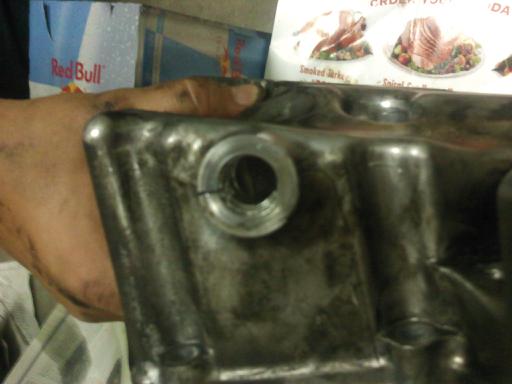
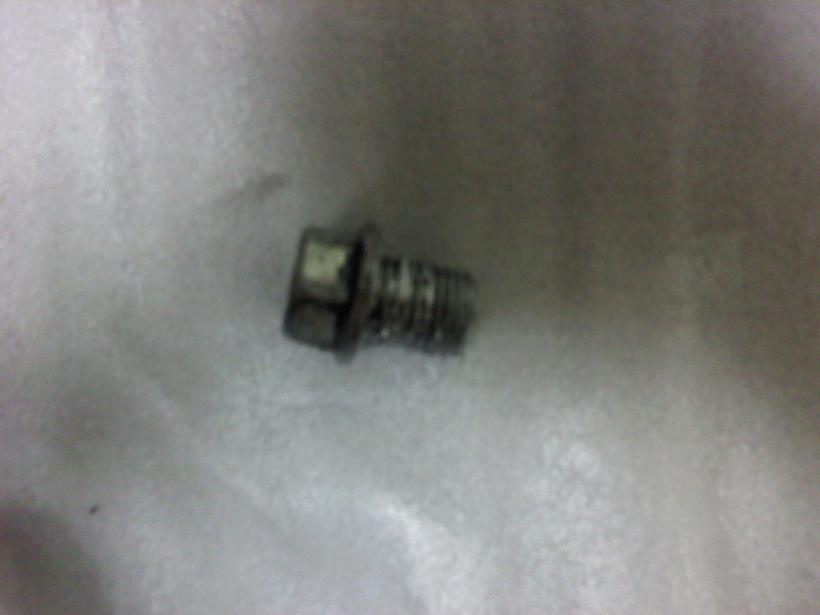
First, drain your oil by placing the proper container underneath your drain bolt and loosening it. This is best done when the oil is a little warm but be extremely careful that you do not burn yourself (been there, done that). Assumed you did this already and that you overtightened the drain bolt and that is why you are replacing the oil pan. Dispose of the oil in a proper container and take to your local Autozone.
01DrainOil.jpg


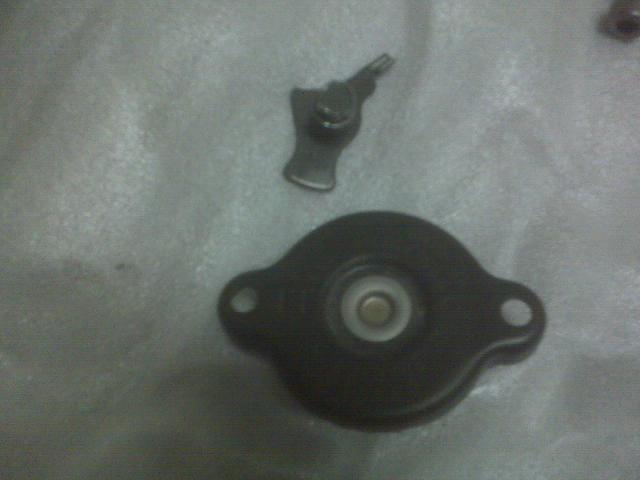
You may want to remove the radiator cap now to relieve some pressure. Better to do this when the engine has cooled. Loosen the lock bolt, remove it, and then turn the radiator cap counterclockwise until it stops. If the engine was warm you should hear a hiss of the pressure releasing from the radiator cap. If the engine is warm do not remove the radiator cap unless you heard this hiss. Wait till its cool enough to do so, then remove the radiator cap itself by pushing down and turning counter clockwise like you would a childproof aspirin bottle. By the way, I noticed by looking at a friend's FZ6 his radiator lock bolt was slightly different than mine--different year, different style. This is an 04.
02DrainCoolant02.jpg


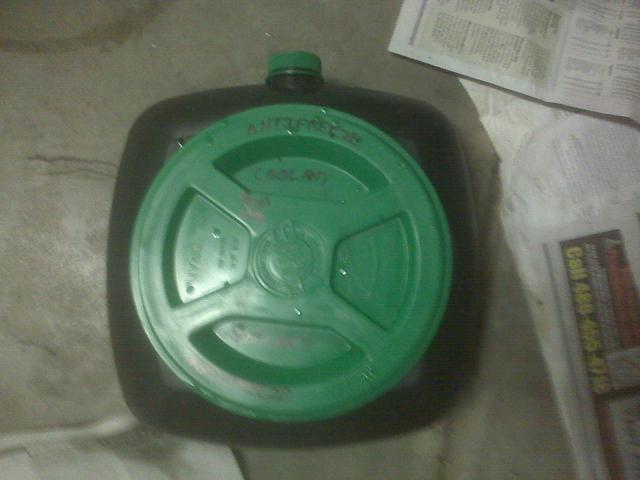
Drain the coolant by loosening the coolant drain bolt on the water pump. Make sure you dispose of the coolant in a properly labeled container and store up high away from children and animals until you have properly disposed of it--check your local regulations. This stuff is poison but tastes sweet.
02DrainCoolant01.jpg


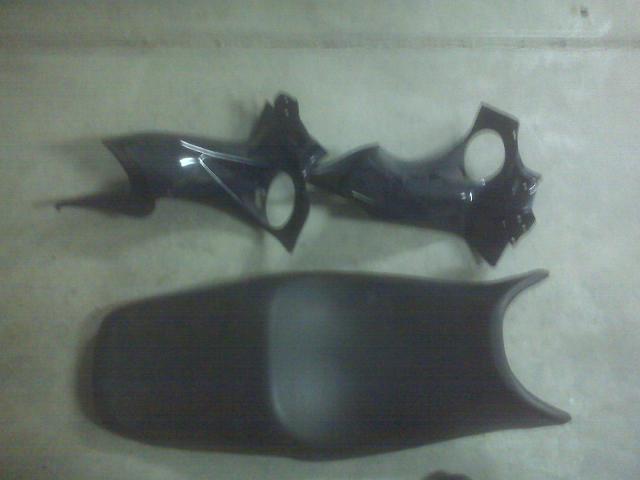
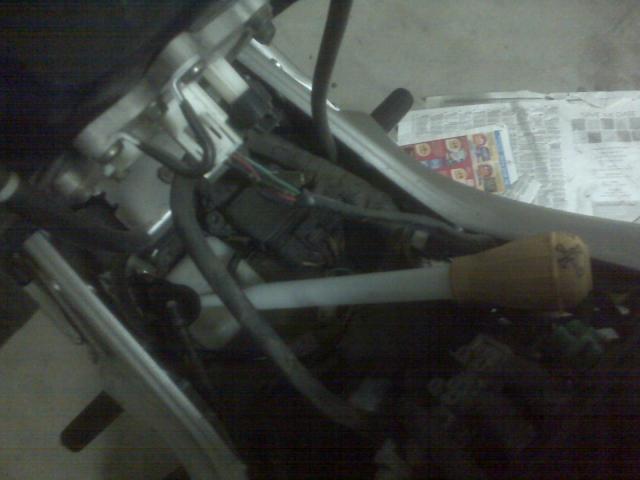
Remove the cowling panels from each side of the handlebars and the seat. This is 1 phillips screw and usually two allen wrench bolts for each cowling. For me it's easiest to turn the handlebars towards the direction of the cowling I am removing. For the seat, I have to use my keys.
03RemoveCowlingsAndSeat.jpg


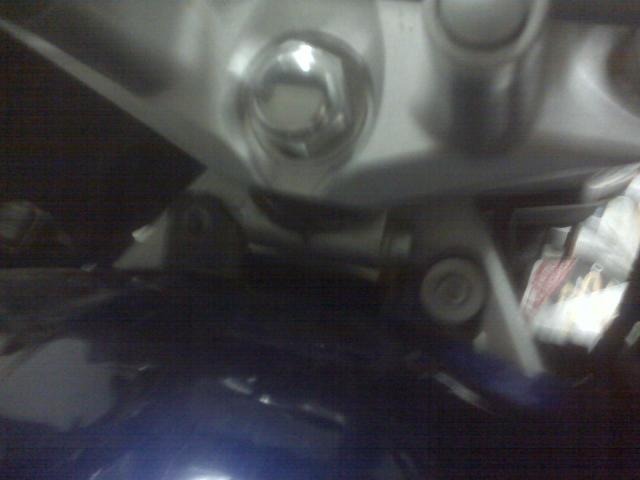
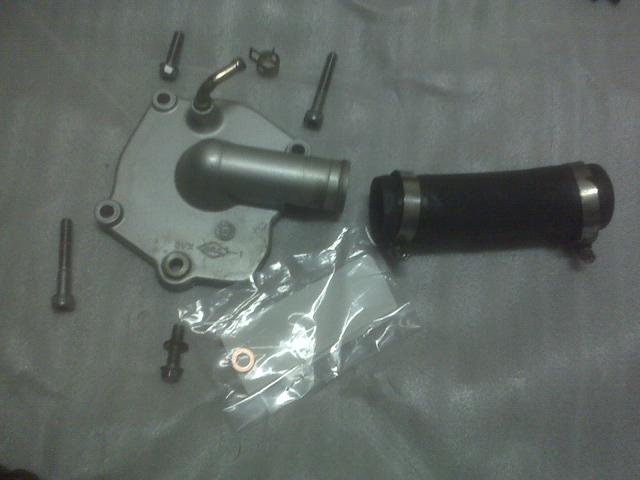
You may not have to do this if you have a different year FZ6. Noticed that on my friend's FZ6, his coolant reservoir tank was in the front by the radiator, whereas mine is under the fuel tank. Remove the fuel tank allen wrench bolts and washers (one size bigger than the cowlings). Picture shown here with one removed.
04RemoveGasTankBolts.jpg


Drain your coolant reservoir by using a turkey baster to extract the fluid. It's just a pop off cap and you can place the hose on a paper towel or something, being careful not to leak coolant on anything, it might damage the paint. Later on, I filled the coolant reservoir with distilled water repeatedly and swished around to flush the coolant reservoir. I don't recommend using a garden hose, but a friend of mine feels it would be fine. Any more experienced comments on this out there? I also recommend flushing your cooling system with distilled water later on before refilling it with coolant.
05DrainCoolantReservoir.jpg


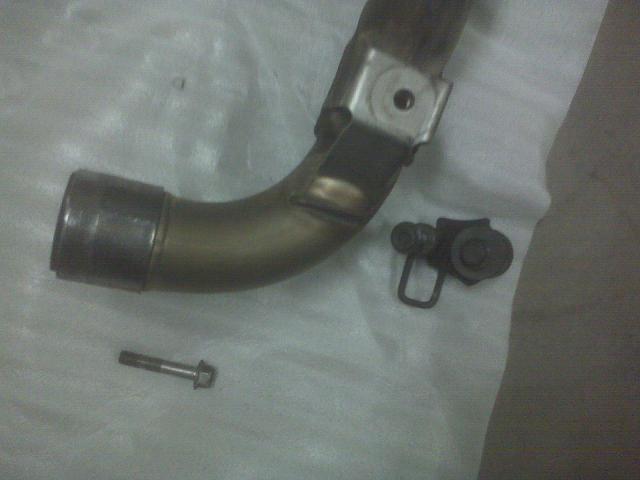
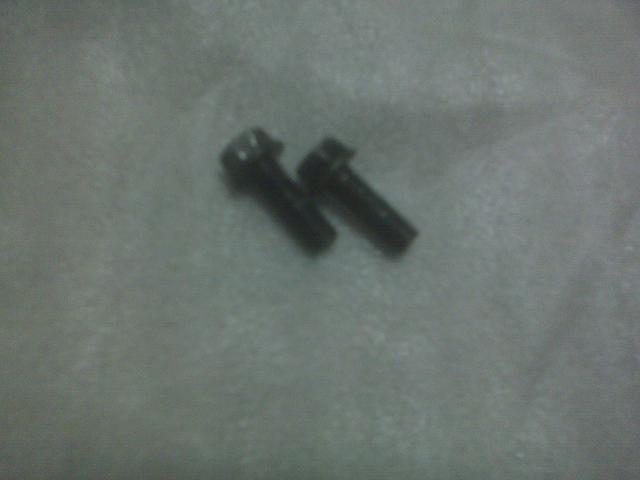
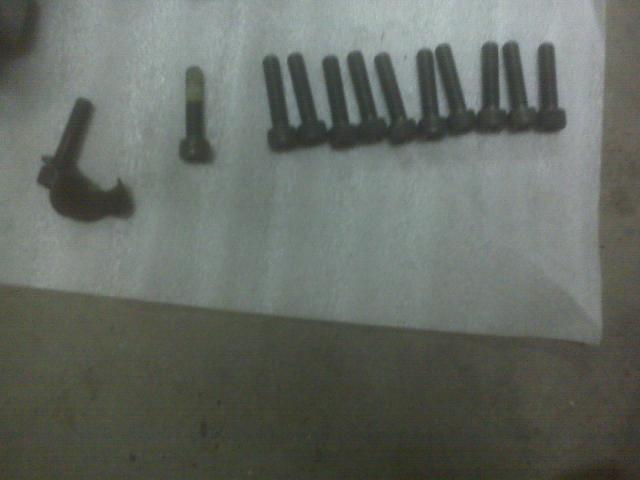
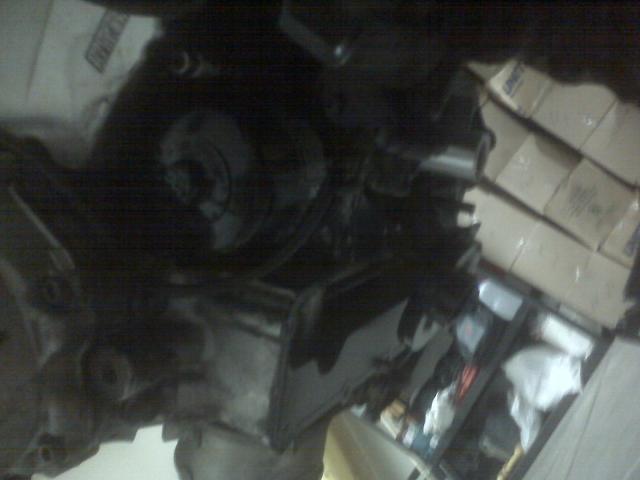
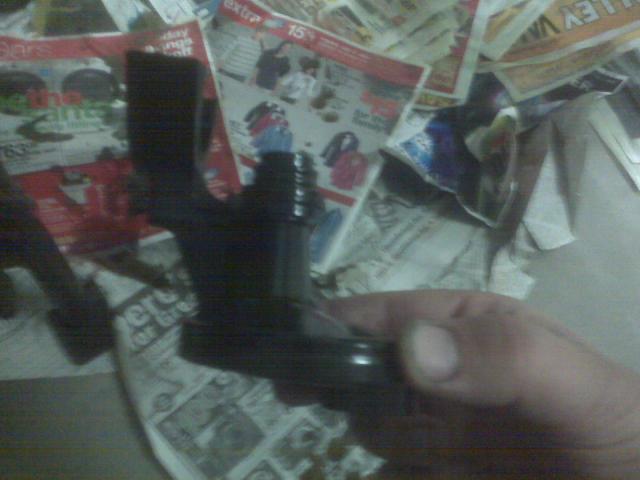
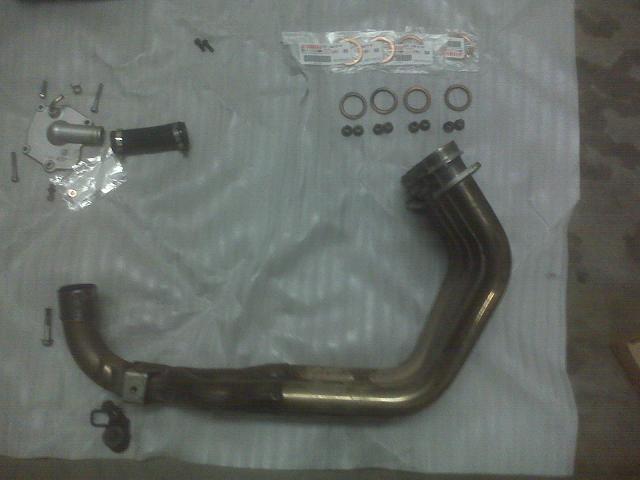
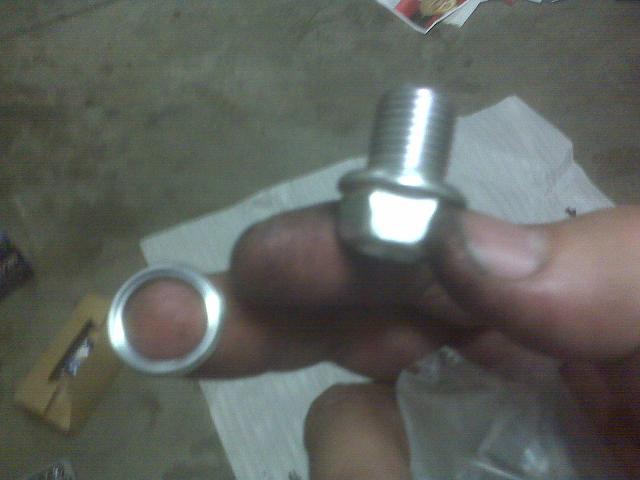
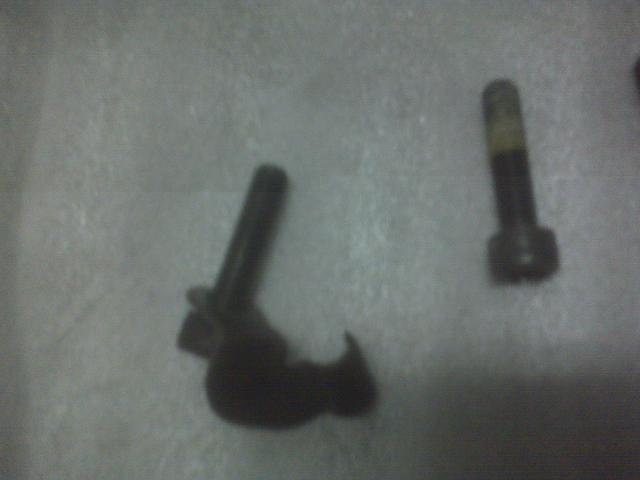
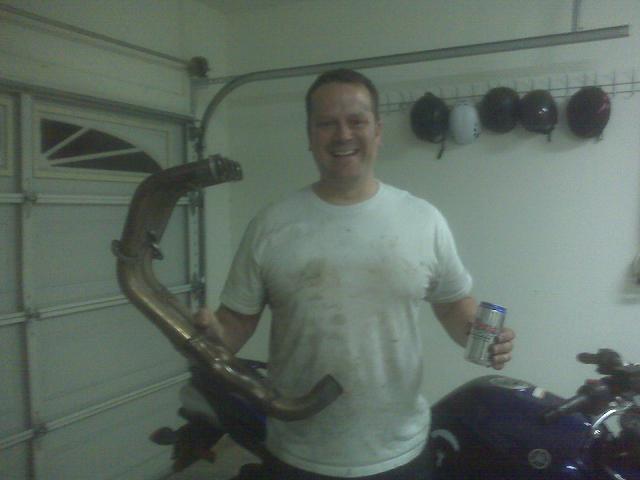
Now is where things start to get fun and interesting. Time to remove the exhaust pipe headers upper assembly from the engine block. I had a little difficulty removing the exhaust pipes and just had to shake it gently until it finally came loose. Some parts of it seemed a little baked on. There are two bolts for each gasket seal on your inline four.
06RemoveExhaustHeaderGasketSeals.jpg


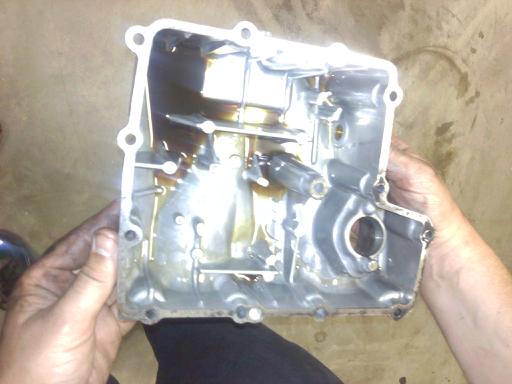
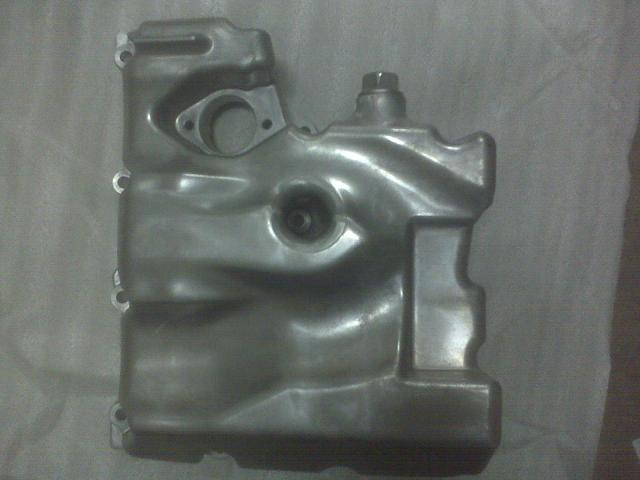
Here is what your engine block will look like after removing the seals. Some old copper gasket seals should fall out. If not, remove them..
07HeadersRemoved.jpg


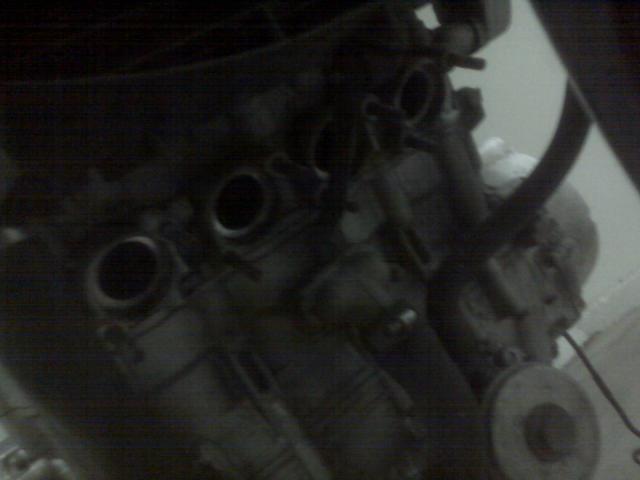
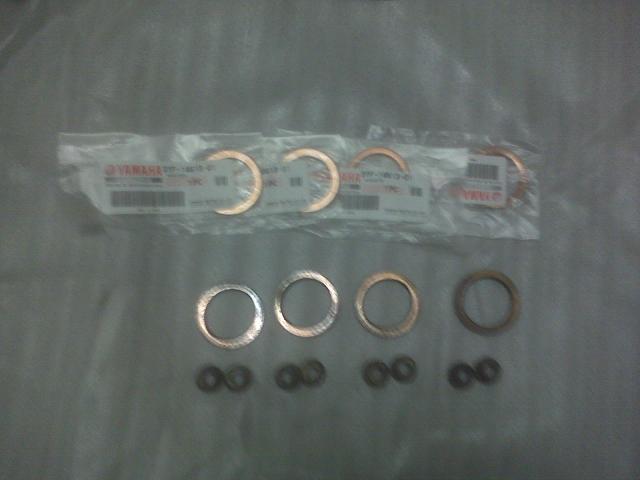
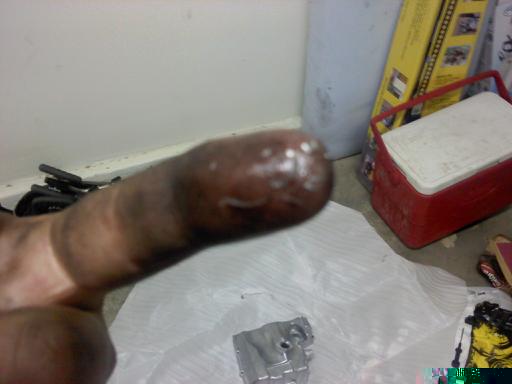
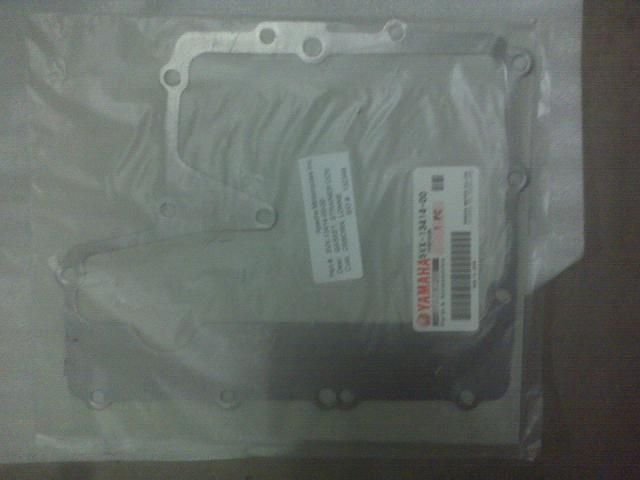
You will definitely need to replace the old copper gasket seals with new ones later on.
08NewSeals.jpg


To Be Continued...
 
Last edited:

blacksha

Junior Member
Joined
Mar 9, 2011
Messages
5
Reaction score
1
Points
0
Location
Phoenix, AZ
Visit site
Remove the lower exhaust pipe assembly by loosening the bolts connecting it to the frame. Notice how the coolant reservoir empties excess fluid on the street while driving through a drain hose placed inside the square bracket. Do not forget to put this hose back inside the square bracket later when you re-install. Now is a good time to clean up and polish your pipes and engine block gasket seals.
09RemoveLowerExhaustFromFrameAndCatalystAssembly.jpg


Time to remove the water pump. Be careful when doing this, as most likely not all coolant has completely drained, and some will spill all over the place especially when you are removing the hoses. Try to do this with your coolant drain pan nearby. Remove the drain bolt and the bolt at the top with standard spanners or socket wrenches. You can remove the bolts to the left and right of the drain bolt with an allen wrench, and you will notice this is particularly difficult as these bolts were sealed with a loctite chemical. Make sure when you replace those two bolts later on that you use loctite on them to reseal. (See later instrutions). Also when you replace the coolant drain bolt later, make sure you use a new copper washer seal. Remove the radiator outlet hose and water pump outlet hose using standard phillips screw drivers. You will have to pinch to unclamp the water pump breather hose, and even if you have strong fingers--ouch, it takes some solid finger strength to squeeze and loosen that clamp. Now is a good time to clean all this up.
10RemoveWaterPumpAndHoses.jpg


Here is what the actual water pump looks like with the cover removed. That is the impaler that turns and pumps the coolant through your engine and radiator to remove heat from the system.
11WaterPumpAndHosesRemoved.jpg


Time to remove the oil level switch. This is done by loosening two small bolts in the next picture. Be careful not to get switch dirty.
12RemoveOilLevelSensor.jpg

12RemoveOilLevelSensorBolts.jpg


Now it is time to remove the oil pan itself!!! Yeehaaa and about time. Here is the oil pan after I just removed it. Notice there is still some old oil in there. No sludge, so that is a good sign. Now notice particularly the protrusion towards the right center of the oil pan near the oil level switch hole. There is one bolt in there that is darn stubborn as heck to remove. That is because it is deep up inside a hole from the very bottom of the oil pan, that I could not even look up into when I put my head underneath the bike because it was too close to even focus my eyes. This is where it comes in handy to have a tiny girlfriend who is not afraid of a little grease to crawl under there and identify for you what is even in there. I tried several tools to loosen this bolt, before finally breaking it loose with a tried and true regular wrench and allen wrench and alot of well thought out and applied torque. It is probably not as bad as I mention here but if this is your first time loosening this bolt, have fun. Persistence and determination is the key as I was literally about to give up trying for good when the bolt broke loose on me. The bolt on the left is the one that holds the oil level switch cable up against the oil pan, and the one right next to it on the right is the nightmare, seemingly hidden and very difficult to reach bolt that was sealed with loctite. Obviously later on, make sure you use loctite to reseal this bolt. Remove the oil pan straight down, because if you are not careful you will damage or bend something inside the oil pan (there are a lot of things in there that you can really damage if not careful), and you might do like I did and actually knock something out.
13RemoveOilPan.jpg

14OilPanBolts.jpg

15SpecialToolsNeeded.jpg


Remove the old gasket. This should come right off.
16RemoveOldGasket.jpg


I drained my old oil pan just to give it a closer examination.
17AfterDraining.jpg


To Be Continued
 
Last edited:

blacksha

Junior Member
Joined
Mar 9, 2011
Messages
5
Reaction score
1
Points
0
Location
Phoenix, AZ
Visit site
And here is the very expensive self-induced crack in the aluminum drain bolt. If you look closely in the picture you will also see the crack in the pan itself, as it is not just contained to the the drain bolt entrance. Be careful not to overtighen your drain bolt!
18HereIsTheCrack.jpg


Here is the old oil pan drain bolt. Look closely and you will see nice metal pieces and chunks from the completely disintegrated and crushed former crush washer.
18YourOldOilDranBolt.jpg


And here is what the inside of your oil pan and the bottom of your crankcase looks like. Inside is the oil strainer, oil pipe, oil delivery pipe, oil pump assembly, and the relief valve assembly.
19YourCrankcase.jpg


Now look closely at my finger. These are some very tiny crushed pieces and what is left of the old crush washer. You will want to make sure you use a new engine oil drain bolt and crush washer.
19YourOldOilDrainBoltCrushWasher.jpg


Here is the oil strainer that accidentally felt out when I removed the oil pan. Be extremely careful this does not get dirty. Be sure to follow the manual when you put the oil strainer back into the bottom of the engine. There is an arrow on the oil strainer that points to the front of your motorcycle, make sure this is facing the right direction. The second picture is the oil strainer at a different angle.
20OilStrainer.jpg

21OilStrainer.jpg


Here is everything removed. Notice in the second picture the oil sensor switch dangling.
22EverythingRemoved.jpg

23EverythingRemoved.jpg


To Be Continued
 
Last edited:

blacksha

Junior Member
Joined
Mar 9, 2011
Messages
5
Reaction score
1
Points
0
Location
Phoenix, AZ
Visit site
Here is the new oil pan approximate cost $195, what an expensive mistake. But a very good learning experience. The second picture shows the new oil pan gasket approximate cost $5. The third picture shows the new oil pan gasket placed on top of the new oil pan. Be very careful tightening the bolts of the oil pan, and do it in a crisscross bolt pattern, a little bit at a time. Tightening too much should be a lesson you hopefully already learned by now.
24NewOilPan.jpg

27NewOilPanGasket.jpg

25NewOilPanInside.jpg


As mentioned make sure you use a new oil pan drain bolt and a new crush washer. I had to order the crush washer separately as it did not come with the new oil pan, although the oil pan drain bolt did. It's possible all three were priced separately--I would have to check the invoice--just make sure you get all three.
26NewOilPanCrushWasherDrainBolt.jpg


Be sure to replace the bolt that holds the oil level switch cable against the oil pan correctly. Also be sure to use medium loctite (either the blue kind or Hondalock 2) on the threads of the bolt that goes underneath the center of the oil pan in that very difficult to reach spot (second picture).
28LocTiteBoltAndOilLevelSwitch.jpg

29MediumLoctite.jpg


All finished!!! Now make sure you put everything back on in reverse order that you took it off. Coors Light is not my favorite beer (I like Sierra Nevada), but it is great to lose a little weight and not a whole lot of calories and my Colorado friends love it. I give this 1 Coors Light difficulty as I did not deserve a special Sierra Nevada for cracking my oil pan like an oaf.
30Finished.jpg


Make sure you refill your engine with new oil. You will need more oil than the normal amount for an oil change becaus most likely all of your engine oil has drained by the time it took you to order the new oil pan and copper gaskets/washers. The manual recommends Yamalube SAE 20W40 or SAE 10W-30 but I live in Phoenix and all the shops seem to use SAE 10W-40 here. Your engine will also require a 50/50 antifreeze/distilled water mix, antifreeze being high quality ethylene glycol with corrosion inhibitors for aluminum engines I use HP Coolant.
31NewOilNewCoolant.jpg
 
Last edited:

Circle

Junior Member
Joined
Jan 1, 2009
Messages
270
Reaction score
8
Points
0
Location
Sydney, Australia
Visit site
Just keep thinking of the education you're getting!
(i know, doesn't help any, but think positive eh!)
Great step-thru w/pics also! :thumbup:
 
Last edited:

chuckfz6ryder

Junior Member
Joined
Jul 6, 2007
Messages
409
Reaction score
1
Points
18
Location
Lakeville MA
Visit site
I can't believe you're smiling, you're a better man than me. Can't imagine what foul language would be spewing from my mouth. At least you punished yourself with a Coors light. I'd have still had the Sierra Nevada.

Glad you were able to do it yourself. An expensive lesson learned, but the dealership would charged much more I'm sure.
 

txlyman

Junior Member
Joined
Mar 4, 2011
Messages
44
Reaction score
0
Points
0
Location
ct, usa
Visit site
I cracked my aluminum pan on my lowered car and that was cake compared to this! Grats on getting your hands dirty and ripping into that beauty
 

blacksha

Junior Member
Joined
Mar 9, 2011
Messages
5
Reaction score
1
Points
0
Location
Phoenix, AZ
Visit site
Thanks all!!!! And yes, let me just say there was some time that passed between the time I self-inflicted the pain and the time where I fixed that bike (the amount of time I had to wait for the order of parts to come in). I will just say that I definitely experienced the full range of motions from anger, to despair, depression, loss of self-esteem, addiction and jonesing (to riding), to needing to seek professional help and rehab along the lines of a celebrity meltdown (Sheen, Spears, Lohan), which then transformed to total motivation and determination to get my bike on the street as soon as possible and learn something, translating to the smiling face in the end. :)
:BLAA:

One last thing to say--double check for both coolant and oil leaks two to three times a day on the water pump, hoses, and pan, for at least a week, before signing your self off as 100%, as this would not be a good leak to have and ignore...always helps just to reinforce that the bike is back in good working order...good luck guys!!!

And a big thanks also to my friend Nars for also helping to motivate me in this...!!!
 
Last edited:

mpthimios

Junior Member
Joined
Jun 26, 2010
Messages
1
Reaction score
0
Points
0
Location
greece
Visit site
So, I did it and cracked the oil pan as well in my 2004 fz6.. good to see I am not the only one :)

I decided to fix the mistake myself, but I would like to ask some questions based on your experience with this:
- In retrospective, did the removal of the water pump help you in anything? It's much extra work and I was wondering if the change can be done without this step.
- You replaced the old copper gasket seals in the exhaust - this is a must do?
- the service manual mentions a 'Dowel pin' - I guess you did not remove it right?

Thanks in advance - and great post!
 

TownsendsFJR1300

2007 FZ6
Site Supporter
Joined
Feb 7, 2009
Messages
12,531
Reaction score
1,176
Points
113
Location
Cape Coral, Florida, USA
Visit site
So, I did it and cracked the oil pan as well in my 2004 fz6.. good to see I am not the only one :)

I decided to fix the mistake myself, but I would like to ask some questions based on your experience with this:
- In retrospective, did the removal of the water pump help you in anything? It's much extra work and I was wondering if the change can be done without this step.
- You replaced the old copper gasket seals in the exhaust - this is a must do?
- the service manual mentions a 'Dowel pin' - I guess you did not remove it right?

Thanks in advance - and great post!

Looking at my 07, all that needs to be removed is the header after drainging the oil. My header bolts(to the head), are accessable without removing the radiator. If the design hasn't changed, the water pump can stay put and unless you remove the radiator, you can leave the anti-freeze in it. Remove the oil level unit too. The dowel pins just line up the pan to the block, I personally would put them back in the pan so gravity doesn't drop it out when re-installing..

We had to replace the oil pan in an 07 FJR, exact same set up, pull the header, the oil sender unit and pan just drops. We never touched the water pump nor drained any anti-freeze..

As for the exhaust gaskets, you can use them again if you have to, but now's the time to change them (their cheap enough) and will prevent any exhaust leaks down the road. Use plenty of penetrating oil on the exhaust bolts and be very gentle with them (even turning back and forth to help prevent snapping off the rusty studs) .

I also wouldn't put the regular drain plug washer on. Go to an auto parts store and pick up a copper drain washer (I think its a 14mm ID). Its re-usable and works great...
 
Last edited:

ozgurakman

Özgür Akman
Joined
Aug 24, 2013
Messages
326
Reaction score
3
Points
0
Location
Turkiye (a.k.a Turkey)
Visit site
thanks for posts, everything is so detailed. I wish photos has more pixels and light, but it's fine. Anyways, thats great servicing for your bike.
If I were disassembled the headers, I would polish them.
 
Top