How To, RR, Front Pads, Lines, Fluid.

W

wrightme43

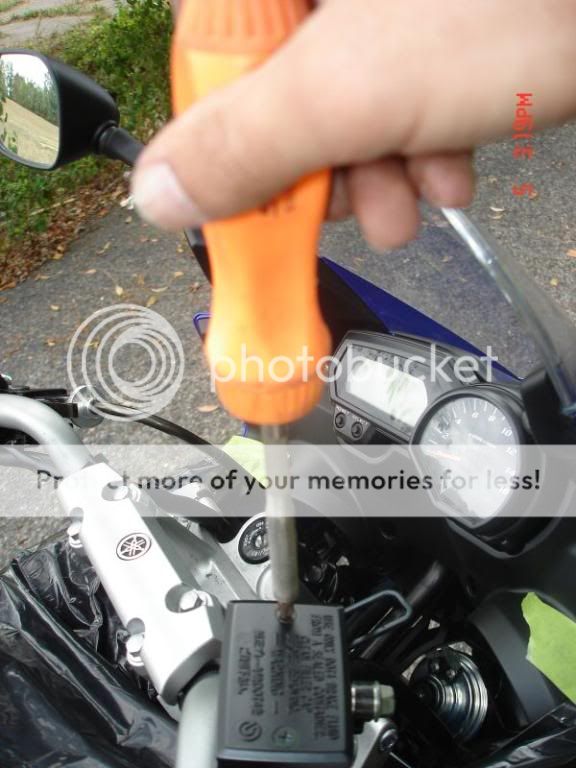
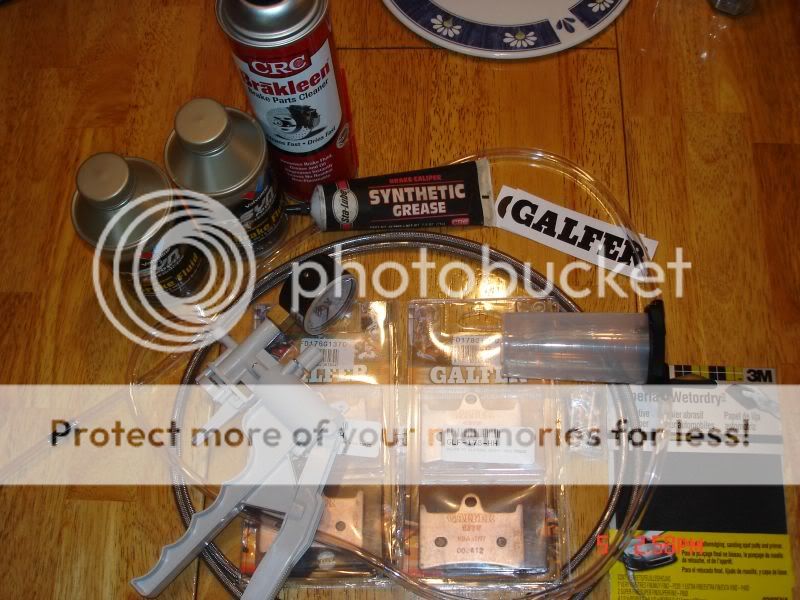
Ok to start I ordered two sets of Galfer HH sintered ceramic pads, a set of Galfer stainless lines in clear, and valve caps from Motorcycle Parts, Gear and Accessories at MotoSport
I ordered them wendsday night late, I have the job done on Friday, less than 48 hours after placing my order. Free two day Fedex.

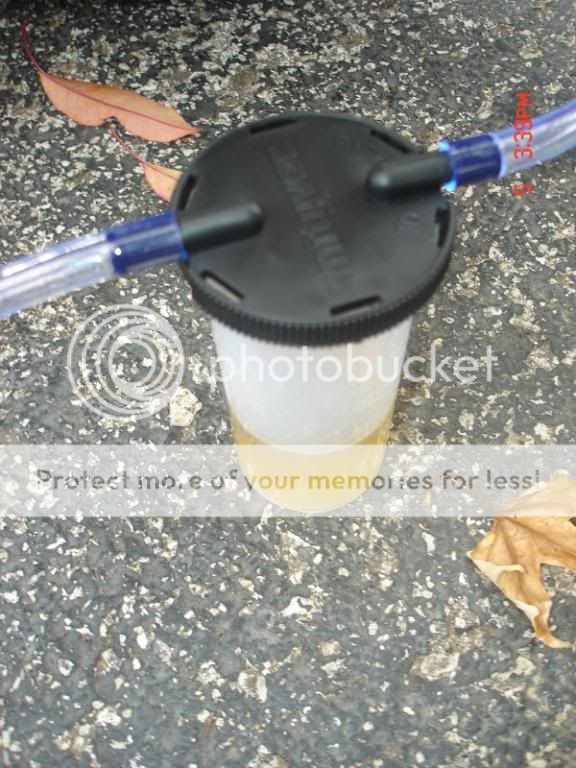
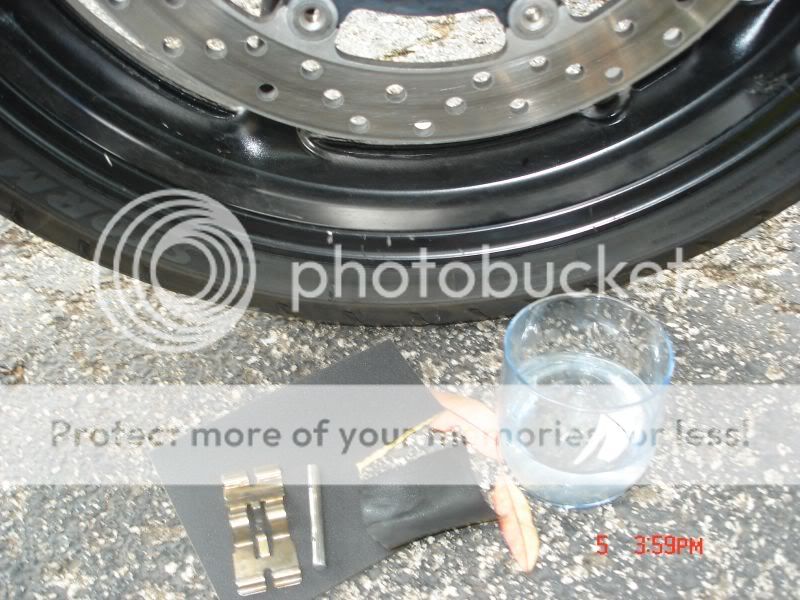
I also bought two bottles synth DOT 4 exceeded fluid. A bottle of brake clean, wet/dry sand paper, and a MityVac. (I have wanted one for years)

-07yamahagalferpadsandlines001.jpg


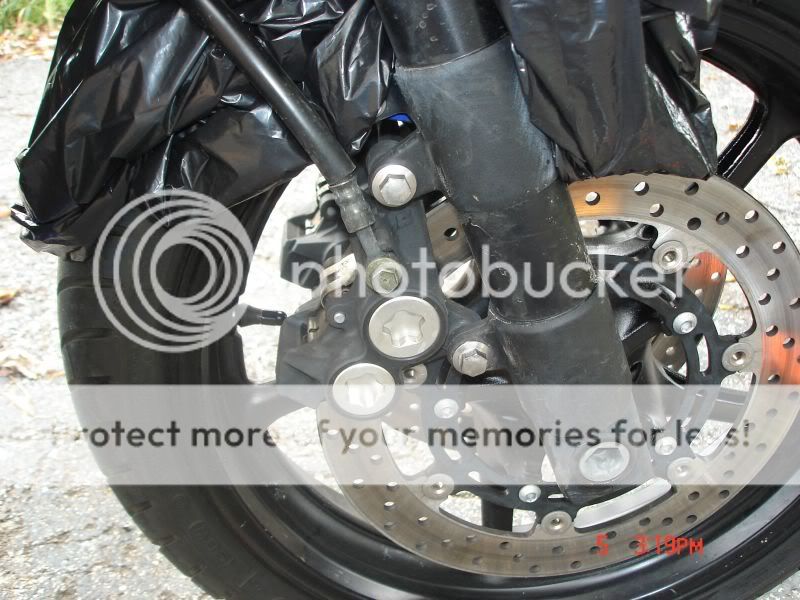
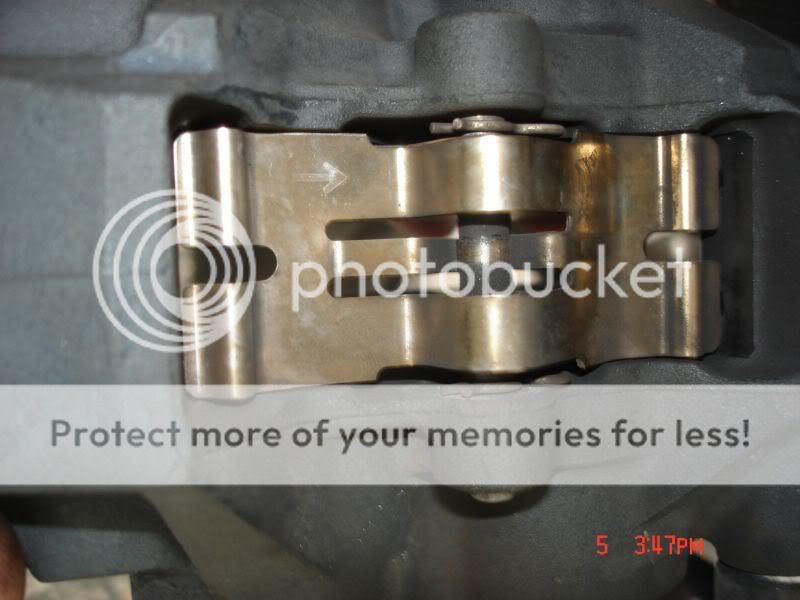
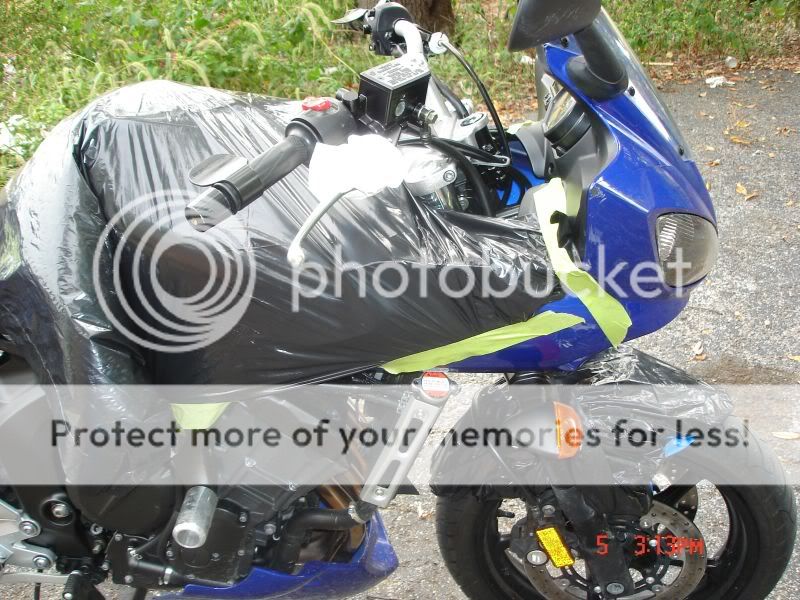
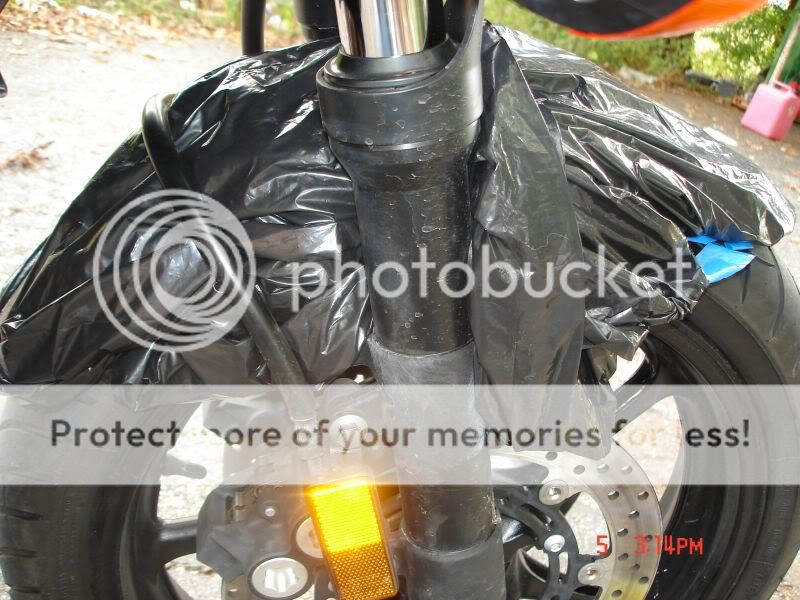
The first step after deciding where to work, is to tape plastic covering any paint you want to keep on your bike. Like so works well.

-07yamahagalferpadsandlines002.jpg


-07yamahagalferpadsandlines003.jpg


-07yamahagalferpadsandlines004.jpg
 
Last edited by a moderator:
W

wrightme43

Next step remove your reflectors with a 12mm box end wrench. If you like keep them, if not throw them away. They are DOT mandated so.....
-07yamahagalferpadsandlines005.jpg


Reinstall the bolts on both sides and bring them to finger tight. Since we are replacing the lines the first thing to do is drain the system. If you have a piece of trash in the system and need to squeeze the lever to dislodge the caliper has to be mounted.
Also this way any spilled fluid will get on the old pads and not contaminate the new pads.
Clean and then remove the master cyl lid.
-07yamahagalferpadsandlines007.jpg


Here is what it looks like inside this should be a nice clear light yellow
-07yamahagalferpadsandlines008.jpg

Break the bleeders loose with a 8mm 6 point socket. Then hook your mityvac up to the bleeder, pull a vacum and open the bleeder.
Here is what comes out.
-07yamahagalferpadsandlines009.jpg

Do both sides and empty the lines and master cyl.
This fluid is full of moisture, what not, and is trash. Pour it on the nearest enviromentalist you can find. I prefer the eyes.
 
W

wrightme43

Now your lines are empty. Now its time to R/R the pads and clean the parts that are reused.
Look closely you will see a round metal pin with two retaining clips. It is very very very important that this is done properly with out losing parts, otherwise you may die. So pay attention, and be sober.
-07yamahagalferpadsandlines010.jpg

The arrow points toward the front of the bike.
I used a scratch awl to to rotate the retaining clips and hook them for removal. Gently into a clean white rag is best, no slinging them across into the yard.
After removal, use the awl to gently push the pin out. At this point the stamped steel guide will fall out with the pads. Remove the stamped steel backing from both pads.
Spray a rag with brake clean and clean all these pieces. The pin will need to be polished back to smooth with sandpaper or emery cloth. Once everything is clean, use brake assembly lube, very thin amount, on the pin.
-07yamahagalferpadsandlines011.jpg
 
W

wrightme43

Take that sandpaper and in a circular motion with water scrub around the rotor on both sides. The idea is make a new surface to bed the pads into so they pair up well.
The pads need the stamped backing clips installed, I had to squeeze the tabs a bit to get them tight again. Push one of the pads in place, slip the pin thru the hole, install the stamped steel holder, arrow towards the front of the bike, thread the pin thru the hole, install the next pad, and push the pin thru into the caliper on the other side.
At this point you have to put the little bitty retaining clips back on. With out these the pads will fall out later.
So dont forget.
-07yamahagalferpadsandlines012.jpg

Do the other side just like this.
NOW
Put some lines on. Its really very simple and self expanitory.
Fill your resivoir with NEW DOT 4 fluid. I dont care, go buy new.
-07yamahagalferpadsandlines013.jpg
 
W

wrightme43

Hook your mityvac up to your shortest line bleeder screw.
Pull a vacum
-07yamahagalferpadsandlines015.jpg

And open the bleeder.
Run one resivoir full, with out letting it empty into the cup and then close it, Refill and do the same on the other side.
Refill and squeeze the lever to push the pads all the way out.
Repeat the beeding procedure for both sides.
Refill the resivoir again and test your brakes. They should feel amazingly firm. Replace your master cyl cap.

Go ahead and replace your rear fluid while your here. The is plenty left in just one little bottle of fluid.
Replace the c
 
W

wrightme43

Bedding brakes.
There are many ways to do this. Some people say it is completly unneeded.
I think it is.
Gently take ride your bike to straight low traffic volume area.
Pull off untill you can see there are no cars coming.
Accel to 50 or so, progressively squeeze the brakes to slow to about 10
Immediatley and hard accel to 50 and squeeze back to 10
Do this at least 6 times. The idea is to get the pads good and hot and not give them time to cool.
Then ride for 5 minutes or so and let them cool.
Back to the same area and do the same thing again. If you want do it from 80 this time.
After this, and the cooling ride your brakes should perform as well as they can, and last as long as they can.
 

lonesoldier84

SuperFlanker Moderator
Moderator
Premium Member
Joined
Apr 19, 2008
Messages
4,463
Reaction score
96
Points
0
Location
Surrey, UK
Visit site
edit: none shall ever see the original content of this post. it is banished to Hades!!

that aside, thanks wright, that was brilliant and will come in immensely handy
 
Last edited:

Avalon786

Member
Joined
May 31, 2008
Messages
641
Reaction score
3
Points
0
Location
Seattle, WA
Visit site
Nice write up! Do the ceramic pads work better than normal ones, whats the main difference? Also when i look at the window of my front brake fluid i cant see any level, so either its full to the top or empty, i'd know if it was empty right? My brakes work fine so i assume its full but just checking. I dont know if i can open the top part to double check or if that'd be bad (maybe it might let air in or somethin?)
 
W

wrightme43

Thanks guys.

Yes they make a huge difference. They are hard, and squeak though. No fade, and dont require heat to work. Quick stops.
 
W

wrightme43

You can open the top, just clean around it, use a good screwdriver, and dont get water in it. Dont leave it sitting open for days either. brake fluid is hygroscopic, it attracks and absorbs water vapor. Its a good thing in a way, but it lowers the boiling point of your brake fluid. If the fluid gets hot enough, really hard riding, and boils on you, then there will be compressable gas in the lines or usually in the caliper itself. This can cause you to die. So new brake fluid every two years. Every 6 months if you trackday or even more if you race. This stuff is serious. I have nothing against the shop mechanics. They just cant ever nor will ever love your bike like you do, and their ass isnt on the line leaned over on your bike.
Treat it like you would a airplane. Everything has to work right, and its broken and wrong unless or untill you know its right.
 

Nelly

International Liaison
Elite Member
Joined
Jul 8, 2007
Messages
8,945
Reaction score
125
Points
63
Location
Co Offaly, ROI
Visit site
Thanks Steve,

I am looking at new lines, I am aslo looking at trading in Norman so I may not do it on this bike.

Nelly
 

4fun

Member #1360
Joined
Feb 10, 2008
Messages
568
Reaction score
14
Points
0
Location
Long Valley, NJ
Visit site
Nice write up Steve, have you noticed a difference with the steel lines? I know under hard braking there supposed to be better.
 
Last edited:
W

wrightme43

Yes there is quite a bit of difference. They are worth it. If you get really bored one day. Take of one of your front wheels on your car. Start the car, and have someone jam the hell out the brake peddle like would happen if a kid ran out in front of you. Watch the lines wiggle and swell.
 

Avalon786

Member
Joined
May 31, 2008
Messages
641
Reaction score
3
Points
0
Location
Seattle, WA
Visit site
You can open the top, just clean around it, use a good screwdriver, and dont get water in it. Dont leave it sitting open for days either. brake fluid is hygroscopic, it attracks and absorbs water vapor. Its a good thing in a way, but it lowers the boiling point of your brake fluid. If the fluid gets hot enough, really hard riding, and boils on you, then there will be compressable gas in the lines or usually in the caliper itself. This can cause you to die. So new brake fluid every two years. Every 6 months if you trackday or even more if you race. This stuff is serious. I have nothing against the shop mechanics. They just cant ever nor will ever love your bike like you do, and their ass isnt on the line leaned over on your bike.
Treat it like you would a airplane. Everything has to work right, and its broken and wrong unless or untill you know its right.

Thanks, i checked this morning and its all fine. I just dont know why they dont make it easier to see! I opened the top carefully and just looked 2 secs to make sure there was fluid and check the color, then closed it up making sure i didnt let anything fall in there (lol!) Bottom line i cant see any fluid or sign of liquid in the window but its full and clean...not very convinient to have to open it up to check!...oh well, now i know :p
 

MarinaFazer

Wonderbread
Joined
May 8, 2008
Messages
2,259
Reaction score
19
Points
0
Location
Santa Monica, California
www.jwci.org
I know what I'm doing this weekend! Sorry to resurrect this thread, BUT question:

My window for my front reservoir is black. So either the fluid is still clear or it's yucky and tainted like the fluid from my Jeep brake lines I did this last weekend. Should I open it or should I just wait until I get new brakes in a few months. Brakes feel fine...could probably be a little firmer. They have 12,000 miles and 1 trackday on em.
 

urbanj

Junior Member
Joined
Jan 8, 2008
Messages
672
Reaction score
9
Points
0
Location
Vancouver, Canada
Visit site
You could rock the bike and move the handle bars to see the line in the sight glass. most likely it's fine and showing full hence why it looks all black. Just pop it off and take a look if you are really concerned. either way you'll be changing it when you swap everything over.
 

Cali rider

Well-Known Member
Joined
Oct 7, 2007
Messages
1,328
Reaction score
51
Points
48
Location
Buena Park, California
Visit site
I know what I'm doing this weekend! Sorry to resurrect this thread, BUT question:

My window for my front reservoir is black. So either the fluid is still clear or it's yucky and tainted like the fluid from my Jeep brake lines I did this last weekend. Should I open it or should I just wait until I get new brakes in a few months. Brakes feel fine...could probably be a little firmer. They have 12,000 miles and 1 trackday on em.

Change the fluid, it's cheap and easy. In addition, if you are doing trackdays you don't want water in the system to create a spongy lever (or worse yet a full vapor lock) while braking hard.
 

MarinaFazer

Wonderbread
Joined
May 8, 2008
Messages
2,259
Reaction score
19
Points
0
Location
Santa Monica, California
www.jwci.org
OK, I'll pick up some DOT4 fluid tonight. If I just have a tube for bleeding the brakes, should my procedure be the same as my Jeep? Hook up to the bleed nipple. undo the top of the reservoir, undo the nipple valve a bit and then pump easily (making sure the levels don't fall low enough to drop in the master cylinder). Then close up the nipple valve et voila. Right?
 
Top