• Welcome to the Yamaha FZ6 Forums. Member registration disables ads and allows you to post and share. Register Here.

Catastrophic engine damage/noise?

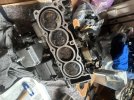
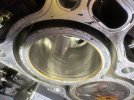
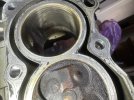
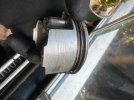
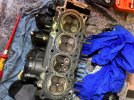
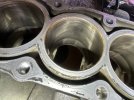
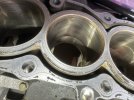
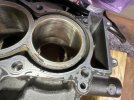
Send photos of the inside of the cylinders. If there isn’t any scoring and the cross hatching is in good shape, you should be able to reuse the rings.

With the head off, now would be a good (and easy) time to check the valve clearances.

Get a gasket scraping tool to remove the old head gasket, it makes life easier and ensures that you don’t gouge the head with a utility knife (not to mention much safer for your fingers).

Clean the carbon off the heads, valves and pistons with brake cleaner.

As you remove pistons, use a Sharpie marker to note which cylinder they were removed from.

Get some assembly lube for reassembly - you don’t want to put the engine together dry or have a dry start. Lube all rotating surfaces (bearings, cam journals, buckets…if it turns or rubs it gets lube).

I haven’t read the FSM for reassembly in a while…but if it recommends using Yamabond sealant…don’t substitute with something else…use the sealants called out in the FSM. With that said…I’ll probably read that section tonight just to have the procedure in my head for future questions.
 
Cheers, I'll get some photos once I get the head off tomorrow. I've removed the timing chain already; doesn't the engine need to be timed to do the valve clearances?

In terms of assembly lube: is it a replacement for engine oil? (Where instructed to lubricate something with engine oil that is.)

I'll get the yamabond sealant, all the gaskets and seals I'm getting are OEM. I'll be sure to mark up the pistons. although is it strictly necessary to remove the other three pistons? As I mentioned, the cylinders all look great so far. Also I just took off the main bearings and they all looked great, although I'll replace them all whilst I'm at it regardless of the condition.
 
To add, while the heads off (and super cheap).
Decarbonize the valve area (combustion chamber).

Prop the head upside down, add Seafoam (or equivalent) to each quench area.
Let sit for awhile and watch for ANY leakage of fluid from the intake valves and exhaust valves.
it should stay dry. If little leakage, a valve lapping may fix it. If real bad fluid leakage,
more would be needed..

With the low mileage, I suspect you'll be ok ^^...

Sounds like your doing fine...

.
 
Assembly lube is different from motor oil in that it is sticky and won’t run from where it is placed.

With the head removed Valve clearance can be checked without reference to engine timing. However you will need to clock the cam and hold it in place while you take measurements. It’s very easy to hold the cam in position by hand at the sprocket/gear.

Since you have it all apart you might as well remove the pistons so they can be cleaned ain’t with the combustion chambers. You’ll be surprised how much carbon you’ll find.
 
Hey, thanks for all of this. Is it necessary for me to take apart the cylinder head and clean all the valves and springs? I’d rather avoid that if possible as I feel it may be challenging to put it all back together unless someone can tell me otherwise.

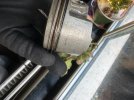
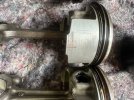
My new (used) crankshaft arrived today and the new piston rod is on its way so I think I can order the bearings, as I know all the numbers I need. In my uneducated opinion, all the pistons look pretty good, the cylinders are all smooth and I can’t catch a nail anywhere. Light cross hatching is also visible.

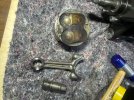
The connecting rod pin on the failed cylinder was tight to get out; I had to tap it with an extension bit of a ratchet and soft hammer. Is this normal? I’ll measure it according to the FSM. I’ve removed all the pistons so will go about removing the rings and cleaning it all. What’s the best way to approach this? I have a small ultrasonic cleaner if that helps…

Anything else I should be considering before ordering all the parts? I’ll measure the new crank journals today but it all looks pretty good visually.
 

Attachments

  • IMG_8972.jpeg
    IMG_8972.jpeg
    775 KB · Views: 10
  • IMG_8973.jpeg
    IMG_8973.jpeg
    669.7 KB · Views: 10
  • IMG_8974.jpeg
    IMG_8974.jpeg
    900.2 KB · Views: 9
  • IMG_8975.jpeg
    IMG_8975.jpeg
    1,019.1 KB · Views: 9
  • IMG_8976.jpeg
    IMG_8976.jpeg
    564.7 KB · Views: 9
  • IMG_8978.jpeg
    IMG_8978.jpeg
    974.4 KB · Views: 9
  • IMG_8977.jpeg
    IMG_8977.jpeg
    611.3 KB · Views: 9
  • IMG_8979.jpeg
    IMG_8979.jpeg
    717.6 KB · Views: 9
  • IMG_8980.jpeg
    IMG_8980.jpeg
    697.3 KB · Views: 9
  • IMG_8981.jpeg
    IMG_8981.jpeg
    736.6 KB · Views: 10
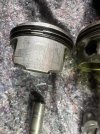
Just in addition, cylinder 1 is the piston with the small horizontal marking on the piston. To me it looks minor and I can’t catch a fingernail on it. The cylinder itself looks great.
 
All the pic's look really, really good.

Brake cleaner on the pistons/rings would work fine.
I still would measure the end gap of at least one set of rings to get an idea

As for the head, I'd clean and then check with fluid (upside down). If no leaks, I wouldn't bother.

Is there much build up inside the runners and valve stems?
Depending on how those look, maybe some cleaning, removal of the valves isn't difficult
but a tool is needed for at least spring re-install..

Definitly check with a straight edge across the surface.

Your doing really, really well!


.
 
Photos look good. No need to disassemble the head…just get the carbon off.

Theres no reason to remove the rings from the pistons…leave them on. The pistons and rings can go in the ultrasonic…it will loosen the carbon but not likely remove it. But after a 20 minute bath they will be easy to clean.
 
I think I can order the bearings, as I know all the numbers I need.
You did the plasti-gauge measurements already?

edit: never mind, I see the plasti-gauge is just for checking wear of old bearings, and final check for new replacements.
There is a good rundown on the sizing from partzilla here (note the 2 different formulas depending on whether main bearings or conrod big end bearings, see pg. 5-67 and 5-72 of factory service manual)
 
Last edited:
Photos look good. No need to disassemble the head…just get the carbon off.

Theres no reason to remove the rings from the pistons…leave them on. The pistons and rings can go in the ultrasonic…it will loosen the carbon but not likely remove it. But after a 20 minute bath they will be easy to clean.
Yes,I think it's good that the rings stay on the pistons that they are on now.
They'll cleanup well as Gary had mentioned.
The used rings have worn-in to each piston and cylinder and developed an even wear pattern together;mated together.
 
You did the plasti-gauge measurements already?

edit: never mind, I see the plasti-gauge is just for checking wear of old bearings, and final check for new replacements.
There is a good rundown on the sizing from partzilla here (note the 2 different formulas depending on whether main bearings or conrod big end bearings, see pg. 5-67 and 5-72 of factory service manual)
[/URL]
Plastigauge is a way of measuring the clearance between two surfaces where conventional measurements aren’t possible. You can use any bearing (that isn’t too tight) as long as you know it’s actual size/thickness. With the Plasigauge in place the bearings and/or rod caps are torqued to spec. The caps are then removed so you are able to measure the amount that the plastigauge has been crushed. This value provides the current clearance which can be checked in the FSM to determine the correct/required clearance. With this knowledge the correct bearings can be ordered. The new bearings should be checked in the same manner to confirm that they are in fact in spec. It’s a ponderous process, but it ensures the the rebuilt engine will get adequate lubrication.
 
Cylinders look great, nice to see cross hatching still intact.

The wrist pin that was stuck looks like it may have gauled a bit in the piston. (On the rod that spun a bearing. Probably wasn't getting a full dose of oil, for a while.

Since you are changing out the crank, that rod and piston, all should be well. Check new piston to wall clearance with a feeler guage, just to make sure it is within spec, but should be OK.

Just for grins, maybe check the old crank passages for obstruction going to the bearing that spun. There has to be a reason that it spun, likely lack of sufficient oil for a still unknown reason.

You will sleep better when you know exactly why it failed, root cause.
 
With the new owner (poster/victim...) having only put approx 600 miles on it since acquired,
I suspect the PO knew of the knocking (issue) and got rid of it.

I'd guess crappy old oil, low oil, an over rev, ??? That bearing /rod was just the first
(and luckily only) one to fail (possibly slightly tighter clearance').

And with being diagnosed early, kept it from the scrap pile..

Should be a great runner once done..

.
 
you are able to measure the amount that the plastigauge has been crushed. This value provides the current clearance which can be checked in the FSM to determine the correct/required clearance. With this knowledge the correct bearings can be ordered.
This is the traditional way, and I thought it would be the case here too.
But the FSM does not allow for any calculation based on the plasti-gauge reading. If the clearance is too much, you are directed to order the original bearing size based on the numbers stamped in the engine. The sizes are color coded so there is no way to use the clearance measurements for sizing.
It's probably possible to turn the crank and use over-size, but you would have to know the numbers that correspond to the color codes of the bearings. I would guess that R6 race teams had that info and did crank work.
 
Cylinders look great, nice to see cross hatching still intact.

The wrist pin that was stuck looks like it may have gauled a bit in the piston. (On the rod that spun a bearing. Probably wasn't getting a full dose of oil, for a while.

Since you are changing out the crank, that rod and piston, all should be well. Check new piston to wall clearance with a feeler guage, just to make sure it is within spec, but should be OK.

Just for grins, maybe check the old crank passages for obstruction going to the bearing that spun. There has to be a reason that it spun, likely lack of sufficient oil for a still unknown reason.

You will sleep better when you know exactly why it failed, root cause.
Hey Ben. Is the wrist pin still useable? I measured the outside diameter of the pin and the diameter, of the hole inside the piston that it slides into and they were both well within spec. It needs a little tap to get back into the piston but once inside, the rod moves as freely on it as the other three pistons.
I'd much rather know exactly why the issue happened, I've still got the old crank and will have a look at it today.

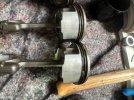
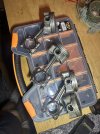
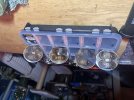
Yesterday I disassembled the oil pump and the pressure relief valve and the both looked clean and great. I gave them a clean with brake cleaner, a little bit of fresh oil and reassembled. The pistons have all had a good clean with brake cleaner and a tooth brush and now look good. I put them all in the ultrasonic cleaner for 20 minutes and they all look pretty good now, rings included. I gave them a light rubbing of fresh oil as I won't be reassembling for a few days yet/

In response to another commenter, the new crank journals look great so I don't think it's necessary for them to be polished.

And finally in regards to the bearing shells: I compared the number on my crankcase and the new crankshaft to get the correct main bearing shells and have ordered them. The same goes for the rod bearings - compared the number on the crankshaft to the numbers on the rod big end caps. So I'm thinking they'll all be fine, but of course I'll do the plastigauge measurements using the old mounting bolts to make sure the oil clearances are in spec.
 
IMG_8994.jpegIMG_8995.jpegIMG_8990.jpeg
Just some photos of the pistons after cleaning - I didn’t remove the rings.

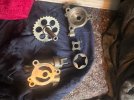
Also a photo of the disassembled oil pump. Looks perfect, measured clearances and all well within spec.

I checked the old crank for blockages in oil passages, also the crankcase and couldn’t find anything suspicious in either. Still unsure what the root cause of the spun bearing was. Like I say, I think the bike was quite neglected mechanical and probably ran for a long time with very few oil changes, likely the same coolant from the factory…
 
I purchased my FZ6 S2 with a similar coolant issue:it looked So Very Dirty inside the cooling system,as the original factory coolant seemed to have never been changed.
I did a special system flush the first time which included a small ratio of white vinegar and the rest distilled water;I then kept flushing the system many times with distilled water as recommended by another S2 owner from Canada online and the flush water was finally pure clear water when drained.

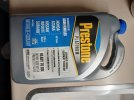
I installed Prestone Platinum for Asian vehicles from a local Autozone store which is an ethylene glycol blue coolant and I'm glad my thermostat and water pump seals have survived the abuse of leaving the same factory coolant in there for 17 years;the engine cooling system operates as it should.
 

Attachments

  • 20260107_104059.jpg
    20260107_104059.jpg
    594.6 KB · Views: 1
Last edited:
Hey, thanks for the input. I’ll likely flush the coolant system a few times when I reassemble.

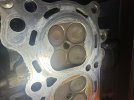
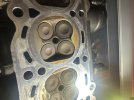
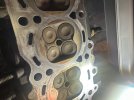
I’ve been cleaning the cylinder head mating surface, almost got the majority of the old gasket off. I’ll clean the carbon build up from the valve surface, although does this cylinder head look like it’s needs milling? There’s a few very faint scratches which I’m slightly unsure about…
 

Attachments

  • IMG_9002.jpeg
    IMG_9002.jpeg
    654.3 KB · Views: 9
  • IMG_9003.jpeg
    IMG_9003.jpeg
    612.9 KB · Views: 10
  • IMG_9004.jpeg
    IMG_9004.jpeg
    595 KB · Views: 10
  • IMG_9005.jpeg
    IMG_9005.jpeg
    643.8 KB · Views: 9
  • IMG_9006.jpeg
    IMG_9006.jpeg
    656.2 KB · Views: 9
Back
Top