Custom undertail, FE, and chain guard (lots of images)

nnowatzk

Junior Member
Joined
May 7, 2009
Messages
20
Reaction score
5
Points
3
Location
Grand Forks ND USA
Visit site
Quick follow-up:

Stupid idea #1: Painting the nuts and washers. Most of the paint started to come off or loosen up when the bolts were torqued down. And, since they were not stainless, it was only a matter of time before they started to rust. Which leads to...

Stupid idea #2: Using Hex bolts from Lowes that looked nice but were NOT stainless steel, so they started to rust like mad.

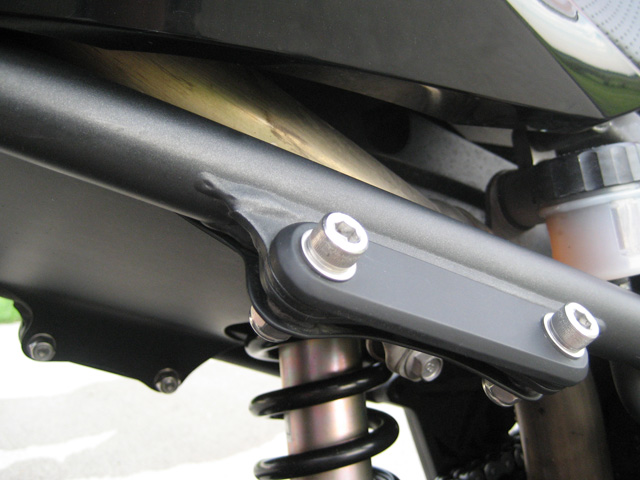
So, I replaced all the hardware with stainless. For all the small bolts, I used button-head hex bolts this time instead of the cap-head ones that I originally used. I like the look of the dark hardware versus the shiny stuff, but at least now I don't have to worry about rust.

stainless01.jpg


stainless02.jpg
 

sunanuus

Junior Member
Joined
Apr 9, 2009
Messages
13
Reaction score
0
Points
0
Location
calgary
Visit site
chain guard bracket

well i broke the bracket which hold the the chain guard towards the back end and lost the broken part.I used a thin sheet of metal and made a brack and used jb weld it was good until i rode it for half hour but it came off again.i have grinded the whole jb weld and dont know what to do.i can ride it without it no problem but still want to fix it need help,pl. advice.thanks for the help in advance.

singh
:thumbup:
 

nnowatzk

Junior Member
Joined
May 7, 2009
Messages
20
Reaction score
5
Points
3
Location
Grand Forks ND USA
Visit site
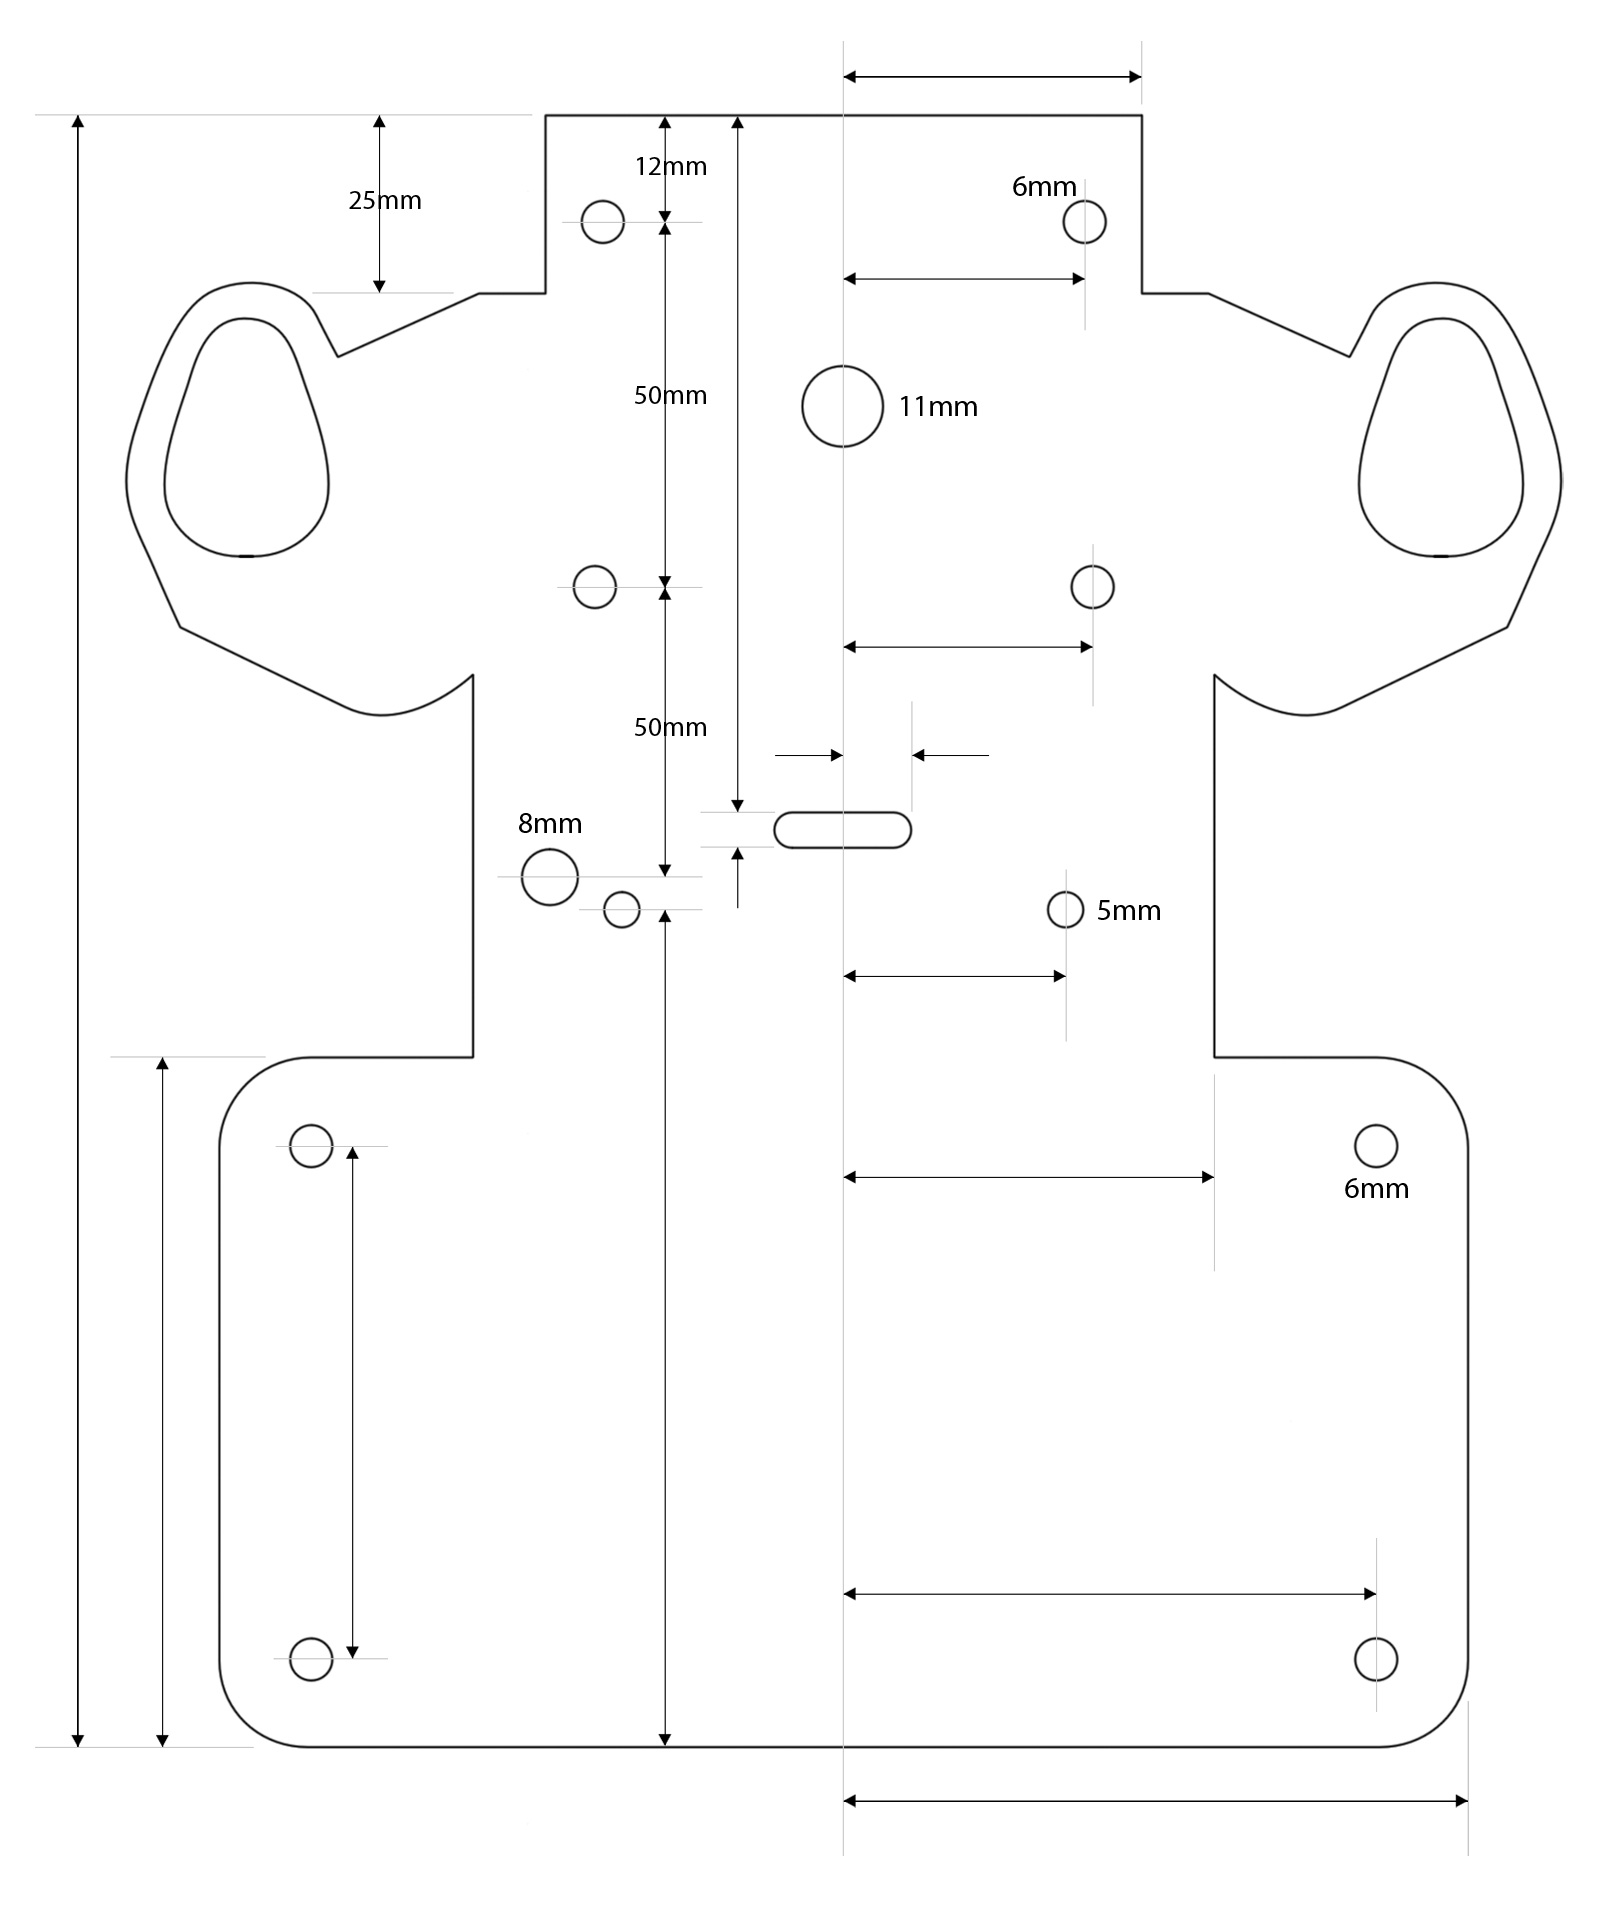
Got some requests for details on the FE. Here is a drawing that I started on awhile back, but never finished. Now I can't find the original paper template, so hopefully this will do. Anyway, the best thing would be to scale and print it actual size - no ruler required. :D

fePlan.jpg
 

LeaN69

Senior Member
Joined
Sep 9, 2010
Messages
260
Reaction score
5
Points
18
Location
CNJ
Visit site
Sorry, I have too many irons in the fire. If I don't finish painting the house this summer I'll be in trouble! I can post more details about making the blanking plates if anyone's interested in making their own.

.

Would you be able to provide me with a STEP files if possible? or even 2d DWG I'd like to make the chain guard in particular, but you can provide me with all files that would be great.

Actually was going to do it myself but never got around to taking measurements. :(

Thanks for any help in advance.

-Russ
 

nnowatzk

Junior Member
Joined
May 7, 2009
Messages
20
Reaction score
5
Points
3
Location
Grand Forks ND USA
Visit site
Whoa, STEP files, that's a new one, had to look it up! :D

The FE plan was laid out in Photoshop, so unfortunately I can't convert to either of those file formats. Don't have the software to do it from scratch either. Sorry! :don'tknow:
 

LeaN69

Senior Member
Joined
Sep 9, 2010
Messages
260
Reaction score
5
Points
18
Location
CNJ
Visit site
All I really need are the dimensions and I can make everything. Do you have PDFs of the umdertail and chain guard?

Thanks

-Russ
 

nnowatzk

Junior Member
Joined
May 7, 2009
Messages
20
Reaction score
5
Points
3
Location
Grand Forks ND USA
Visit site
I'm afraid I'm not much help there either. The chain guard and undertail were both made drawn out by hand on the stock metal and fabricated to fit as needed - no plans used, and none ever derived from the finished parts. Maybe a good winter project if I can find the time, but no guarantees.
 

Cloggy

Euro Mod
Elite Member
Joined
Oct 5, 2007
Messages
4,886
Reaction score
113
Points
63
Location
Alkmaar Netherlands
Visit site
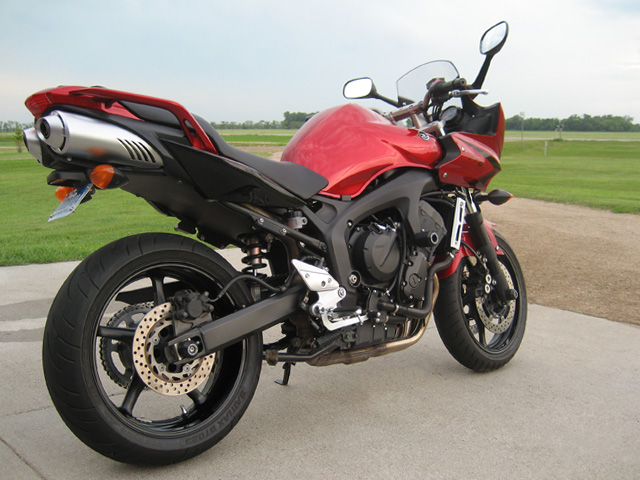
Here’s the undertail and fender eliminator that I proposed in a previous thread

Nothing too fancy, but after a few hundred miles it seems to be working just fine. I haven’t washed the bike since installation, but the underside of the tail will definitely be a lot easier to clean up, and the chain guard is easy to remove and clean too. It remains to be seen how well the powder coat will hold up, especially when riding on gravel.

Materials and cost:
16 GA steel sheet: $20.00
¼” x 1” aluminum: $2.50
Nuts/bolts/washers: $10.00
Powder coating: $60.00

Tools:
5” bench vise, jig saw, hack saw, hammer, drill, clamps, and some files. Pretty rudimentary stuff, and not ideal for fabrication like this. A drill press and a metal brake would have helped a lot.

I’m not sure how detailed to get here, so I’ll let the photos do the talking and answer specific questions as they come up.

Just to help figure out the general size and shape of the undertail, I started with a rough cardboard mockup that I could bolt into place:
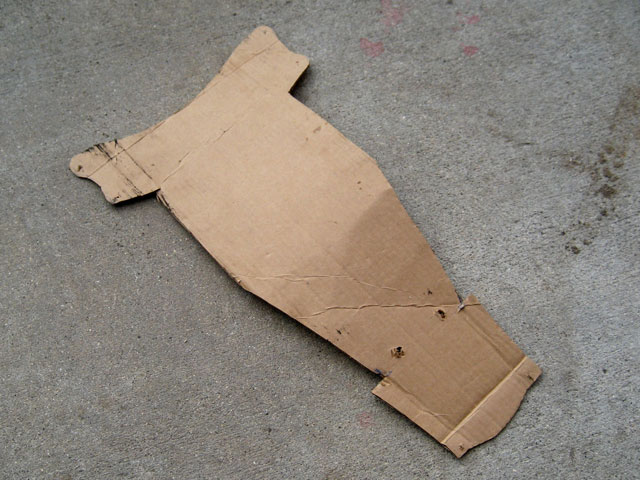
0004.jpg


Starting with a sheet of steel cut to the right width, plenty of length, and tabs that match up with the passenger peg brackets:
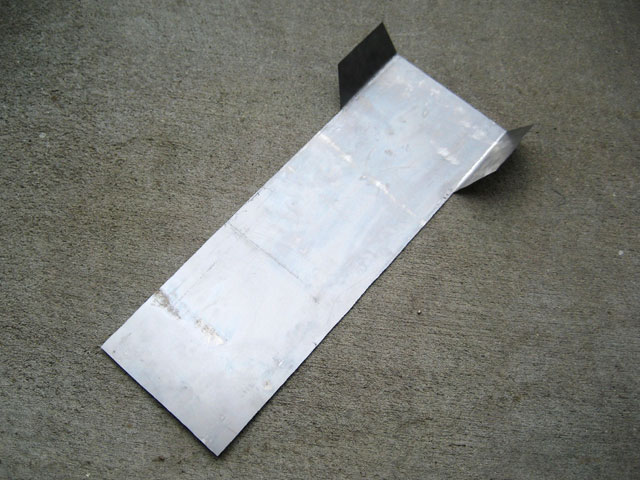
0003.jpg


Trimming and bending to match sub frame, cut an arc for shock clearance, and marked holes for bolting to the brackets:
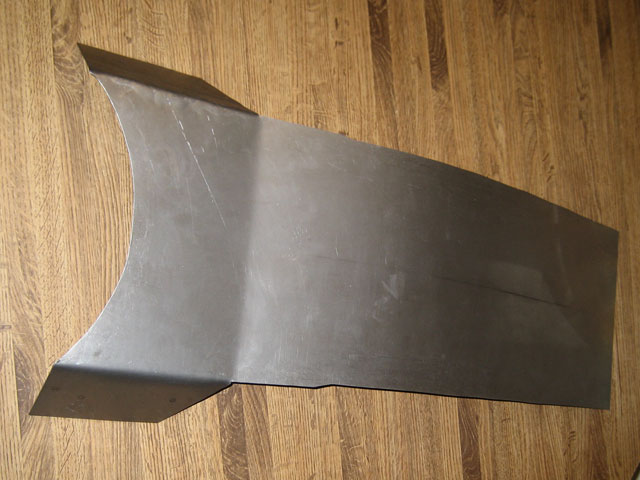
0011.jpg


More trimming and bending, first holes drilled:
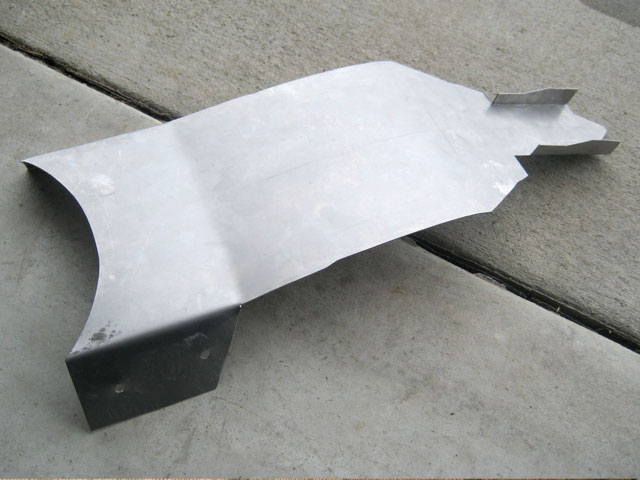
0012.jpg


First complete test fitting with all eight bolts in place:
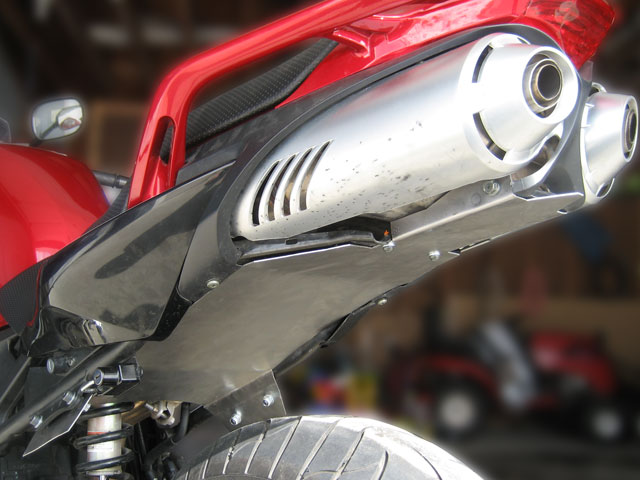
0016.jpg


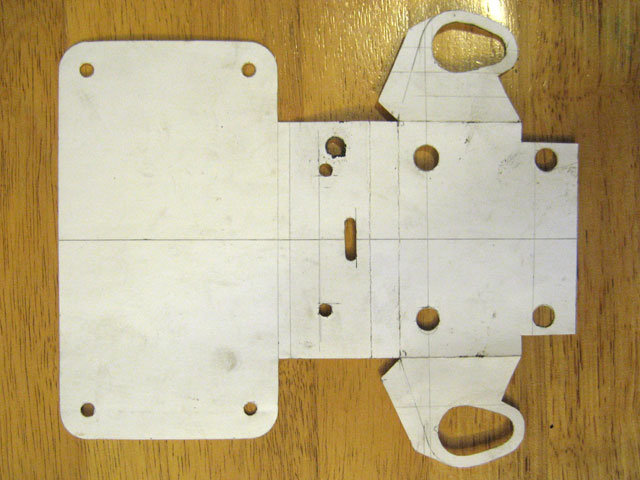
Made a card stock template for the FE, using the FAZR6 kit design as inspiration:
0042.jpg


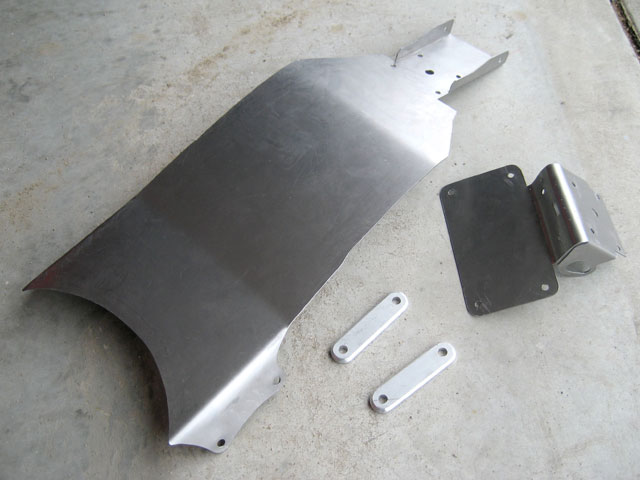
Finished fabricating the undertail, FE, and two aluminum blocks to give a more finished look where the passenger pegs used to be:
0024.jpg


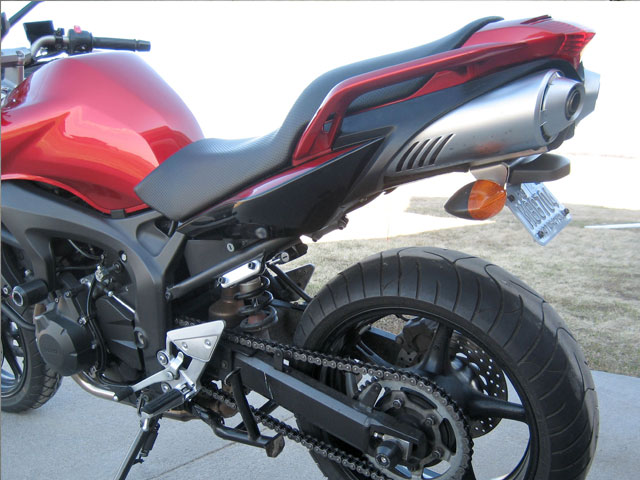
Parts in place for a few days of test riding. Everything seems to be OK!
0039.jpg


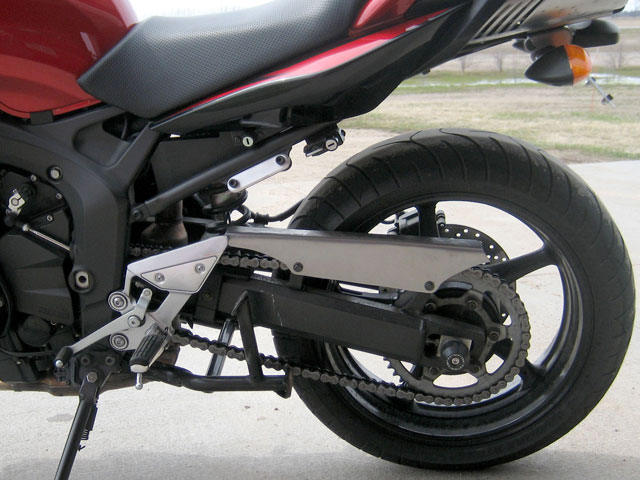
Bent, cut, and bolted a new chain guard into place for some testing.
0067.jpg


Everything powder coated (except the nuts and washers, which I just spray painted black). Great work by Mike at ProTec in Grand Forks ND:
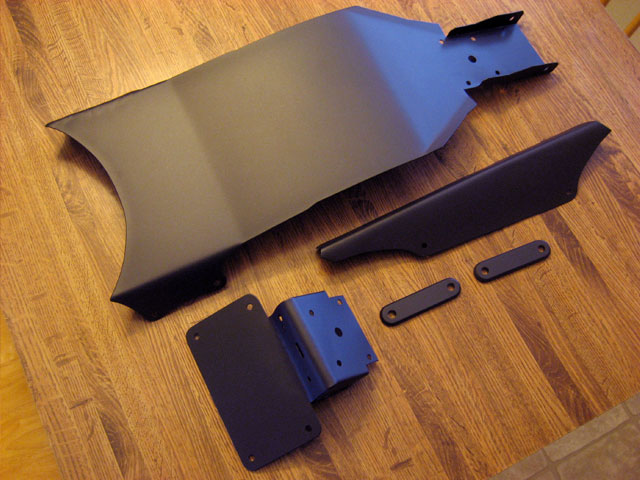
0041.jpg


Part 2 below…

Nice write up, thanks for the how to :thumbup:, I must have missed this the first time around.
 
Top