Gary, that bike looks amazing, not only have you cleaned it up, but doing the rebuild as well has been great to watch, thanks for sharing.

You are using an out of date browser. It may not display this or other websites correctly.
You should upgrade or use an alternative browser.
You should upgrade or use an alternative browser.
My Winter Project
- Thread starter Gary in NJ
- Start date
PauliusD
New Member
Gary, this was quite a journey to follow. Great job and a trully astonishing makeover for the bike
Red Wazp
Super Member
I wish you were my neighbor, I could learn so much.
Top notch write up and finished product. Excellent!
Top notch write up and finished product. Excellent!
- Joined
- May 6, 2014
- Messages
- 1,974
- Reaction score
- 1,925
- Points
- 113
- Location
- Amoungst the Twisty Roads
I wish you were my neighbor, I could learn so much.
I don't possess any special skills or knowledge, just experience. My greatest teacher has been failure, and the willingness to fail - and learn from it. When I was in my 20's I built an airplane (photo below). I had no business taking on that project, but I didn't know enough not to. It was the greatest teacher I've ever had.
Here is what I have learned repairing and rehabing old stuff:
The number one rule is don't break stuff. The key to not breaking stuff is to have the right tools and to know when to use them:
- Never use a 12-point socket. If you have them, replace them with 6-point sockets. A 12-pt socket will ALWAYS round off a nut.
- When a nut is tight, use a breaker bar. If it is still tight, hit it with penetrating fluid and allow it to soak for a few hours. Additional applications help. If it is still stuck with the breaker bar use an impact gun. If it can't come off with an impact gun, it's gonna break or need to be cut or drilled.
- If the fastener has locktite (especially red locktite), you will need to use heat to break the bond.
- Japanese motorcycles don't use phillips head screws, they are JIS - therefore a JIS screwdriver must be used. JIS screws have a deeper reach in the head and a phillips head screwdriver will not fully engage, causing the screwdriver to cam out.
- Have a range of screwdriver lengths. I have everything from 3" stubbys to 24" long screwdrivers (philips, pan & JIS). A longer screwdriver delivers more torque to the fastener and allows for more down force (they wont cam out).
- When possible, replace screws (phillips, pan & JIS) with a button head or socket head fastener. It will make your future life much easier.
- Just like the advice on nuts, if the screw doesn't come out with reasonable force, soak it with penetrating fluid and allow it to sit a few hours. If it's still stuck, use an impact driver. Be sure to preload the handle of the impact driver before smacking it. If it needs to be drilled out, use a circular motion on the top of the head to just drill off the head of the screw. Once the head is off you can usually remove the shank with vice grips.
- Don't use a metal hammer. Use an dead-blow hammer (plastic hammer with BB's). It delivers more force to fastener and wont destroy any bearings that may be in the assembly.
- Always repack roller and needle bearings with fresh grease. Marine-grade grease sits at the top of the grease food chain, so just use that.
- Always use a torque wrench. Use the manufacturers suggested values. Pay attention and know if the fastener goes together dry or wet, and if wet what is the source. If the manufacturer doesn't provide a value, use the standard chart hanging in your shop (hint: you should have a standard chart hanging in your shop).
- If the bolt is going to get wet, use a little never seize on the threads and shank. In fact, I tend to use never seize in applications where grease is called for (axles, brake caliper pins, exhaust flanges). If you use never seize, use a wet torque value (about 0.80 of the dry value).
- Calibrate your torque wrenches (it's easy). It is helpful to have drives in 1/4", 3/8" and 1/2".
- Work clean; keep an organized tool box, a clean shop, use a disassembly table, clean the bike/car/tractor before and after working on it. Use nitrile gloves.
- Bag and tag everything, even the parts you are going to replace. Place parts in boxes in groups of where they were removed, and organize the boxes in the order they were created. Write notes and keep them in the box...it may be a few weeks/months/years until you look in that box again.
Here's the big one - have fun. Enjoy the project. Learn from the project - even a mundane one - there's always something new to discover. It's not one big project, it's 100 small projects that add up in the end.
And here is a piece of advise I got from a guy in his 90's, when I was 26 starting my airplane project (when a guy in his 90's gives you advice, you listen):
"Work on the project every day. Even if it's just for 10 minutes, work on it every day. Even if you are just going down to the shop to sweep the floor - work on it every day. The first day you don't work on the project, is the first day of the end of the project"
That advice came from Bob Sharp, a guy that never finished a project. He had been working on an Aeronca C-2 for 30+ years when I met him, and it never got finished because he always had something else going on. His advice has gotten me through many projects. I learned from his failure.

- Joined
- May 6, 2014
- Messages
- 1,974
- Reaction score
- 1,925
- Points
- 113
- Location
- Amoungst the Twisty Roads
Time for beauty shots. It was a bit cloudy today, but certainly better lighting than the garage. 


Sdaniels
Site Supporter
- Joined
- Nov 17, 2021
- Messages
- 98
- Reaction score
- 35
- Points
- 18
- Location
- Goldsboro, North Carolina
Oh man, I could not hope for a better looking rear fender setup! The brake light is wicked. And I'd bet good money you lowered the rear end a bit, to go along with the 1" drop in the forks? Long & low looks good on the old Honda. Now where is the video clip? Gotta hear that 4-1...
PauliusD
New Member
I don't possess any special skills or knowledge, just experience. My greatest teacher has been failure, and the willingness to fail - and learn from it. When I was in my 20's I built an airplane (photo below).
View attachment 74809
This was the greatest, most jaw dropping, flex I've seen during my 20 years on the internet.
An airplane. In his 20's. What the actual hell, Gary.
I want to hear the airplane story in a new thread, with LOTS of details
- Joined
- May 6, 2014
- Messages
- 1,974
- Reaction score
- 1,925
- Points
- 113
- Location
- Amoungst the Twisty Roads
I want to hear the airplane story in a new thread, with LOTS of details
I have hundreds of photos of the airplane build. Since the build started in 1989 and concluded in 1994, all of my photos are printed (pre-digital photography). I'd have to take apart the build book (which is written like a story) to scan the photos. I can see if it makes sense to take photos of a page.
Going back to my post of the other day...The first part that gets built on the aircraft is the rear spar of the horizontal stabilizer. I got all of the pieces cut to shape and began riveting it together. It didn't go well. I was seconds from throwing in the trash and quitting (in less than just a few days of work) when another local aircraft builder stopped by my house to wish me well on my project. He could see how upset I was and gave me guidance on how to correct the mistake and how to properly drive a rivet. 30 minutes later I felt great about about the project again - and I felt more confident knowing that I had a local resource for help.
My first mistake taught me a lesson that helped get me through the project.
- Joined
- May 8, 2008
- Messages
- 14,991
- Reaction score
- 1,157
- Points
- 113
- Location
- San Diego, Ca.
As a young man I worked in the body shop on commercial buses. Lots a rivets!
PauliusD
New Member
I can see if it makes sense to take photos of a page.
Oh please please do. The airplane story needs to be heard
- Joined
- May 6, 2014
- Messages
- 1,974
- Reaction score
- 1,925
- Points
- 113
- Location
- Amoungst the Twisty Roads
For the next 4 days it will be in the 50's here in northern NJ. As much as I would have liked to get my bike out on the road today - any of them - it is just not possible today. There is a natural stream that runs across my driveway. It is only present after a very heavy rain - which we have had...and since is was in the 20's up until today - it is frozen over. I suspect by Friday I will be able to get a few machines out of the driveway.
I did manage to put 2 miles on the CB900 today - in the driveway (the driveway is 1/4 long). The bike runs real good. And for a big girl she's light on her feet. Here is a short video of the engine running after I got back into the garage.
 www.youtube.com
I did manage to put 2 miles on the CB900 today - in the driveway (the driveway is 1/4 long). The bike runs real good. And for a big girl she's light on her feet. Here is a short video of the engine running after I got back into the garage.
CB900C run video
www.youtube.com
pmmcanon
Site Supporter
") she purrs like a kitten. Congrats Gary.
she purrs like a kitten. Congrats Gary.- Joined
- May 6, 2014
- Messages
- 1,974
- Reaction score
- 1,925
- Points
- 113
- Location
- Amoungst the Twisty Roads
I haven’t posted about my winter project bike in a while. I’ve been trying to track down a few issues on the CB900. Since I didn’t have any experience with the bike prior to rebuilding it, I didn’t know what was right and what wasn’t. It turns out all of the minor issues intersected with each other, masking the other problems.
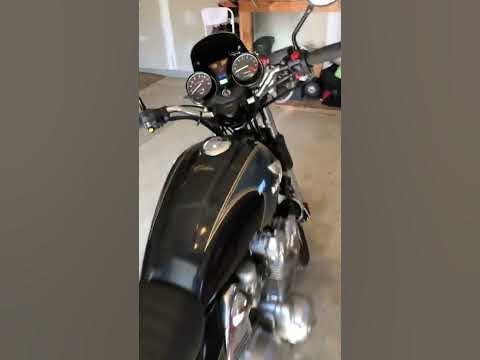
The first problem I noticed was that the bike wouldn’t rev out beyond 5k rpm. The problem got worse after the bike was fully warmed - classic signs of failed coils. Here’s another classic sign:

The OEM coils are a known issue for the DOHC CB’s. I replaced these with coils with coils from a mid-90’s CBR600 (common Honda MP-08 coils). They are physically smaller so I had to create a bracket. The other known issue is voltage drop through the STOP switch. The battery can show 12.7 volts, but you’ll have 11.5vdc at the coil lead. The fix is to run a wire from the battery directly to the coils. A Bosch type relay is used to apply power when the ignition is turned on. The tigger for the relay is the original voltage wire. Along with this change I made new HT leads.
After this was sorted out, I was able to take the bike on longer rides (I was keeping the bike close to home, only going out for 5 mile rides). On longer rides (10+ miles) I started to notice the idle began to hang. I believed this was due to a vacuum leak. A few times I checked the insulators/boots with propane, but never noticed any change in rpm. Then I started to check the throttle shafts with propane and again, no results. I went to the DOHC CB forums and everyone kept saying it was a vacuum leak, but I was sure it wasn’t. I think I angered a few experts as they began to tell me that I didn’t know what I was doing…and then someone suggest I loosen the pull part of the throttle cable allowing an additional 1/8” of throttle play (I had 1/8” already). He said that the CB’s like a lot of free play. He was correct.
Now with all of the problems resolved I took the bike out for a longer ride. At 50 miles I had to switch to reserve. Strange. I stopped at a gas station and took on 4 gallons (4.4 capacity). I calculated that I got 21 mpg. Strange. I figured that I must have accidentally reset the trip meter and didn’t think about it again. Until the next time I had to switch to reserve at 50 miles.
I was consistency getting 21 mpg. That ain’t right. It wasn’t leaking or escaping, so the only other option was too much fuel was getting through the carbs. I had put about 200 miles on the bike now and I started to get a bit more in tune with the bike and I realized that the transition from pilot jet to needle wasn’t right. I also noticed that in order to exceed 60 mph I had to give the bike about 3/4 throttle, or said another way, get on the main jet. The smoking gun was a fuel fouled spark plug. So it occurred to me that the needles or needle jets were incorrect (OEM needles are NLA). And I was dumb enough to throw away the needles and jets that I removed from the carbs back in January. I waited patiently and I scored 4 needles on eBay this weekend. Sure enough, the aftermarket needles aren’t even close to correct.

The OEM needle is 2.57mm at a point that is 25mm from the top.

The aftermarket needle is 2.48 mm at the same point

I won’t bore you with all of the math, but at that 25mm position, the OEM needle allows a passage area through the needle jet of 0.04mm. The aftermarket needle allows 0.40mm of passage area. This profile survey shows that the aftermarket needle had 10X the passage area through the needle jet.
I took the bike out for a quick 15 mile ride this afternoon. The transition from pilot jet to needle is much smoother. Actually it kind of caught me off guard. Before the needle change there was a big stumble (loss of power) right around 2500-2750 rpm. Now, it accelerates through that zone.
I mentioned earlier that the bike seemed down on power. As an example, the bike had difficulty exceeding 60 mph. I would have to get on the main jet (3/4 or more of throttle) to get the bike to accelerate beyond 60. Today while accelerating I blew through 70 at probably 1/2 throttle. Throttle roll-ons from 40 to 60 are now responsive. And I was able to ride through town at 25 mph in 4th without the bike popping and missing. I don't see any exhaust when I blip the throttle.
It's running much (MUCH) better. I still think that the pilot jet is just a tad rich. I may turn in the pilot needle jets in a 1/4 turn so see if that makes an improvement.
I think I’m done shaking down the bike. The Reliability Rally is in just a few weeks. I’ll update this thread with some photos from the rally.
The first problem I noticed was that the bike wouldn’t rev out beyond 5k rpm. The problem got worse after the bike was fully warmed - classic signs of failed coils. Here’s another classic sign:
The OEM coils are a known issue for the DOHC CB’s. I replaced these with coils with coils from a mid-90’s CBR600 (common Honda MP-08 coils). They are physically smaller so I had to create a bracket. The other known issue is voltage drop through the STOP switch. The battery can show 12.7 volts, but you’ll have 11.5vdc at the coil lead. The fix is to run a wire from the battery directly to the coils. A Bosch type relay is used to apply power when the ignition is turned on. The tigger for the relay is the original voltage wire. Along with this change I made new HT leads.
After this was sorted out, I was able to take the bike on longer rides (I was keeping the bike close to home, only going out for 5 mile rides). On longer rides (10+ miles) I started to notice the idle began to hang. I believed this was due to a vacuum leak. A few times I checked the insulators/boots with propane, but never noticed any change in rpm. Then I started to check the throttle shafts with propane and again, no results. I went to the DOHC CB forums and everyone kept saying it was a vacuum leak, but I was sure it wasn’t. I think I angered a few experts as they began to tell me that I didn’t know what I was doing…and then someone suggest I loosen the pull part of the throttle cable allowing an additional 1/8” of throttle play (I had 1/8” already). He said that the CB’s like a lot of free play. He was correct.
Now with all of the problems resolved I took the bike out for a longer ride. At 50 miles I had to switch to reserve. Strange. I stopped at a gas station and took on 4 gallons (4.4 capacity). I calculated that I got 21 mpg. Strange. I figured that I must have accidentally reset the trip meter and didn’t think about it again. Until the next time I had to switch to reserve at 50 miles.
I was consistency getting 21 mpg. That ain’t right. It wasn’t leaking or escaping, so the only other option was too much fuel was getting through the carbs. I had put about 200 miles on the bike now and I started to get a bit more in tune with the bike and I realized that the transition from pilot jet to needle wasn’t right. I also noticed that in order to exceed 60 mph I had to give the bike about 3/4 throttle, or said another way, get on the main jet. The smoking gun was a fuel fouled spark plug. So it occurred to me that the needles or needle jets were incorrect (OEM needles are NLA). And I was dumb enough to throw away the needles and jets that I removed from the carbs back in January. I waited patiently and I scored 4 needles on eBay this weekend. Sure enough, the aftermarket needles aren’t even close to correct.
The OEM needle is 2.57mm at a point that is 25mm from the top.
The aftermarket needle is 2.48 mm at the same point
I won’t bore you with all of the math, but at that 25mm position, the OEM needle allows a passage area through the needle jet of 0.04mm. The aftermarket needle allows 0.40mm of passage area. This profile survey shows that the aftermarket needle had 10X the passage area through the needle jet.
I took the bike out for a quick 15 mile ride this afternoon. The transition from pilot jet to needle is much smoother. Actually it kind of caught me off guard. Before the needle change there was a big stumble (loss of power) right around 2500-2750 rpm. Now, it accelerates through that zone.
I mentioned earlier that the bike seemed down on power. As an example, the bike had difficulty exceeding 60 mph. I would have to get on the main jet (3/4 or more of throttle) to get the bike to accelerate beyond 60. Today while accelerating I blew through 70 at probably 1/2 throttle. Throttle roll-ons from 40 to 60 are now responsive. And I was able to ride through town at 25 mph in 4th without the bike popping and missing. I don't see any exhaust when I blip the throttle.
It's running much (MUCH) better. I still think that the pilot jet is just a tad rich. I may turn in the pilot needle jets in a 1/4 turn so see if that makes an improvement.
I think I’m done shaking down the bike. The Reliability Rally is in just a few weeks. I’ll update this thread with some photos from the rally.
- Joined
- May 6, 2014
- Messages
- 1,974
- Reaction score
- 1,925
- Points
- 113
- Location
- Amoungst the Twisty Roads
The Reliability Rally was this past weekend (May 13-15). The old CB performed perfectly for all 442 miles. I pushed the bike hard - as hard as I have ever pushed any bike on the street. My group leader was on a SV650 and was a very competent rider. Also in my group was Andy Greaser (see post number one in this thread) who is also a very (very!) competent rider. Andy was riding a recently saved '77 R100/7. His article on his RR bike can be found here:

 www.revzilla.com
Chasing our leader and Andy through the twisty roads of south east Ohio was an absolute blast. The CB handles great, and the brakes never faded, but it took quite a bit of effort to convenience the CB to get to the edge of it's tires. But once there, it just railed. The bike sings a song above 7k rpm that is glorious.
Here are some things I learned:
- My bike was too nice for the RR. There were a few of us that brought semi-restored $1,000 bikes to the rally, but a "proper" RR bike is one that looks like you spent under $1,000 on it (the bike voted event favorite was a free mid 90's CBR600 that was dug out of the mud - not a piece of bodywork remained). Notwithstanding, those of us that brought good looking machines to the rally agreed that saving an old machine is what we enjoy - but next year I will restore the bike AFTER the rally.
- We all know this, but it is always nice to see in action; on a twisty road, horsepower doesn't matter. I saw so many sub-300cc bikes just fly through the turns. Sure, they fall behind on the hills and don't have the drive coming out of the corners, but they are always right behind you again. In our group there was a rider on a 250 Virago that was just an amazing rider. He scrapped every part of that bike (and his feet) through the turns and he could keep up with any liter bike in the corners. There was a dude on a early '70's CL175, a very ratty CL175 with enduro tires, that could hang with any bike - in the corners. He never let off the throttle and he never exceeded 63 mph. Great fun to watch.
- South east Ohio has some great roads. Look these roads up on Google Maps
*78
*555 (aka "the triple nickle")
*536
*26
*148
*556
These are world-class challenging roads.
- Motorcycle people are the best people to spend a weekend with. From great stories, fun ball-busting, to lending a helping hand when needed, there are no other people I'd rather spend my time with - especially people on cheap bikes. No egos, posturing - just the joy of riding with like-minded people. It was smiles, fist-pumps, and laughs all weekend.
So now I'm on the hunt for my next cheap bike. I need something that is comfortable, light, and has the means of being made reliable. I did note that there were not any FZ6's at the rally; present or past. So that is my primary choice for a '23 RR bike. I can even swap out the good parts on my daily FZ6 on to the RR FZ6 for a weekend. And when I'm done with it, I can either use it as a parts bike, or restore it. I'll also be looking for a salvage/wrecked Z400 - I think that would be a perfect RR bike. And an SV650 is always a good option.
When Andy posts his article on Revzilla's Common Thread in a few weeks I'll post a link here you you can get his perspective on the weekend.
Thanks for reading this thread and joining my on this journey.
Preparing a drowned BMW R100/7 for the Reliability Rally - RevZilla
Common Tread's resident junk bike guy buys a Beemer that spent some time underwater.
www.revzilla.com
Chasing our leader and Andy through the twisty roads of south east Ohio was an absolute blast. The CB handles great, and the brakes never faded, but it took quite a bit of effort to convenience the CB to get to the edge of it's tires. But once there, it just railed. The bike sings a song above 7k rpm that is glorious.
Here are some things I learned:
- My bike was too nice for the RR. There were a few of us that brought semi-restored $1,000 bikes to the rally, but a "proper" RR bike is one that looks like you spent under $1,000 on it (the bike voted event favorite was a free mid 90's CBR600 that was dug out of the mud - not a piece of bodywork remained). Notwithstanding, those of us that brought good looking machines to the rally agreed that saving an old machine is what we enjoy - but next year I will restore the bike AFTER the rally.
- We all know this, but it is always nice to see in action; on a twisty road, horsepower doesn't matter. I saw so many sub-300cc bikes just fly through the turns. Sure, they fall behind on the hills and don't have the drive coming out of the corners, but they are always right behind you again. In our group there was a rider on a 250 Virago that was just an amazing rider. He scrapped every part of that bike (and his feet) through the turns and he could keep up with any liter bike in the corners. There was a dude on a early '70's CL175, a very ratty CL175 with enduro tires, that could hang with any bike - in the corners. He never let off the throttle and he never exceeded 63 mph. Great fun to watch.
- South east Ohio has some great roads. Look these roads up on Google Maps
*78
*555 (aka "the triple nickle")
*536
*26
*148
*556
These are world-class challenging roads.
- Motorcycle people are the best people to spend a weekend with. From great stories, fun ball-busting, to lending a helping hand when needed, there are no other people I'd rather spend my time with - especially people on cheap bikes. No egos, posturing - just the joy of riding with like-minded people. It was smiles, fist-pumps, and laughs all weekend.
So now I'm on the hunt for my next cheap bike. I need something that is comfortable, light, and has the means of being made reliable. I did note that there were not any FZ6's at the rally; present or past. So that is my primary choice for a '23 RR bike. I can even swap out the good parts on my daily FZ6 on to the RR FZ6 for a weekend. And when I'm done with it, I can either use it as a parts bike, or restore it. I'll also be looking for a salvage/wrecked Z400 - I think that would be a perfect RR bike. And an SV650 is always a good option.
When Andy posts his article on Revzilla's Common Thread in a few weeks I'll post a link here you you can get his perspective on the weekend.
Thanks for reading this thread and joining my on this journey.
- Joined
- May 8, 2008
- Messages
- 14,991
- Reaction score
- 1,157
- Points
- 113
- Location
- San Diego, Ca.
Thank you for sharing this rebuild and this event with us! It's been inspiring to say the least. Sharing that build also builds experience in us as readers.
I've had the best rides in my riding experience with forum members on this forum. The best people!
I've had the best rides in my riding experience with forum members on this forum. The best people!
Red Wazp
Super Member
I have had long discussions from many eastern riders who have convinced me I need to ride SE Ohio someday.
- Joined
- May 6, 2014
- Messages
- 1,974
- Reaction score
- 1,925
- Points
- 113
- Location
- Amoungst the Twisty Roads
If you didn’t see the ride report on Revzilla, here is a link:
 www.revzilla.com
Reliability Rally report: Will my $950 BMW R100/7 survive a 450-mile challenge? - RevZilla
Andy takes a classic BMW airhead rescued from a flood and puts it to the test in the Reliability Rally, an event for sub-$1,000 motorcycles.
www.revzilla.com
Similar threads
- Replies
- 18
- Views
- 1K
- Replies
- 6
- Views
- 182