Vibration! A cure for bad vibrations, Spark Plug Caps!!

corvius

New Member
Joined
Jul 11, 2015
Messages
25
Reaction score
0
Points
0
Location
New Jersey
Visit site
Ok now that I'm in front of my computer...

I have done the following:

Rotella T5 oil (what I had laying around)
Loosen all engine bolts, blip throttle once or twice, tighten to spec.
Loosen/tighten exhaust
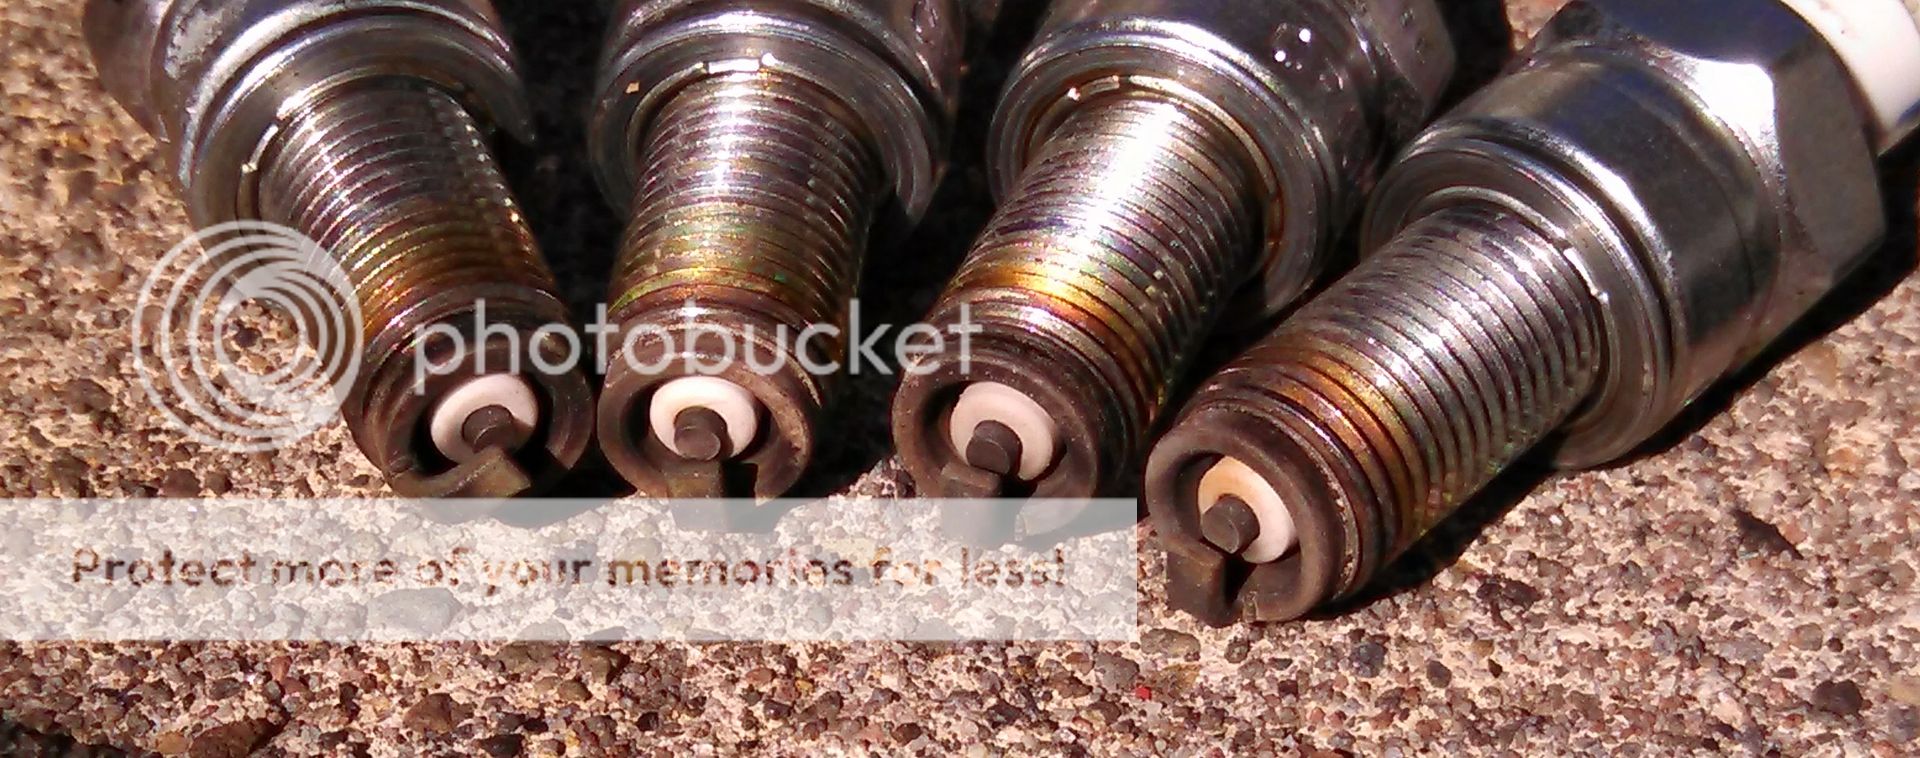
New spark plugs (CR9EK) (now properly gapped)
2006 coils, leads, caps (with copper wire in the leads fanned out and caps securely tightened)
chain lube

Sitting still in neutral, my vibes are barely noticeable at 4k. At 6.2k there's a noticeable, high frequency vibration that ramps up to 8k and then stays the same until redline. It's most pronounced in the bars, but I can feel it in the pegs and to a lesser extent on the tank. Never ever on my butt - the seat has enough dampening to erase them.

I can live with this, since I don't think there's anything else I can do. I had a great ride yesterday evening and after two hours my hands were absolutely fine. And thanks to the upright riding position my back was fine, too.

I really like this bike...it would be nice if it was as smooth at 6k as it is at 3k. It's my first 600 and a commuter at that, so I don't have much to compare it to.
 

SandyN

Junior Member
Joined
Aug 13, 2014
Messages
114
Reaction score
1
Points
18
Location
Deneysville, South Africa
Visit site
This vibration thing is fascinating. I have come to the conclusion that it is also dependent on the ambient temperature.
I noticed this on my previous bike and I've now gone through two winters on the Fazer.
During the colder months the bikes are smoother, even to the extent of being smoother in the morning going to work and vibey in the afternoon when it is warmer.

Has anyone else experienced this?

Sent from my GT-I8190 using Tapatalk
 

FinalImpact

2 Da Street, Knobs R Gone
Site Supporter
Joined
Mar 16, 2011
Messages
11,137
Reaction score
184
Points
63
Location
USA, OR
Visit site
^^ I have observed this also.
I believe it has to do with how hard it is to light and burn the fuel. It takes more energy to jump the gap and burn the fuel as combustion chamber fuel air mixture temperatures increase. Although the engines coolant may be a stable temperature through both summer and winter, the air used for combustion has changed temperature and density. Both effect how it burns and the spark energy needed to start that burn process.
 

FinalImpact

2 Da Street, Knobs R Gone
Site Supporter
Joined
Mar 16, 2011
Messages
11,137
Reaction score
184
Points
63
Location
USA, OR
Visit site
I'm starting to despair. Only thing left is to change plug type from OEM cr9ek. I just swapped coils and leads and caps with a set from an 06 and there's no change.

I feel like the bike shouldn't vibrate like this


When you did this; did you trim back the leads and confirm they screwed down snug?

An update on my situation with used parts.
The used parts took away lets say 65% of the vibe that was annoying me but I knew it could be better as it still had this vibe from 4300 ~7200. So, knowing my old caps had well matched resistors, I trimmed the leads and installed the 08 caps on the early coils. Vibe is now completely gone!

For me it all had to do with 1) knowing it can be smooth. 2) being persistent.

08 CAPS, ohms resistance:

1) 10,700
2) 10,783
3) 10,791
4) 10,716

Noticed I matched the 1 & 4 pair and the 2 & 3 pair. Also, I used MAF cleaner to clean the contact area where where the spring meets the top of the cap as two of them had much higher resistance. Spinning the spring in the cap flooded with MAF cleaner seemed to do the trick.

Plugs after 3,000 mi | AFR @ 13.0:1, Left to right 1 - 4 CR10E and scary clean! :(
IMG_20150908_155023_309C_zpsk44s5deu.jpg


This is a 40 mi test run, not really ripping on it or you'd see it richen up a tad!
1.AFR.40minewCoils_zpstovofm7f.jpg
 

corvius

New Member
Joined
Jul 11, 2015
Messages
25
Reaction score
0
Points
0
Location
New Jersey
Visit site
I mixed and matched the caps from the 06 and the 07 based on resistance, but I may not have paired them 1-4 and 2-3 by closest resistance. I have another theory I'm going to try over the next few days and see if that does anything...I'll keep you posted.
 

FinalImpact

2 Da Street, Knobs R Gone
Site Supporter
Joined
Mar 16, 2011
Messages
11,137
Reaction score
184
Points
63
Location
USA, OR
Visit site
Still I don't think the cap values matter as much as a Good connection to the wire but I ended up making two changes at once so I can NOT say cap resistance doesn't matter.

Repeating myself:
Tossed in used 06 coils, wires, caps. They snugged up tight so I left the cap to wire assembled (no trimming).
Result: Huge improvement, but still some vibes present.

2015-09-08
Swapped 08 caps into bike AND trimmed -0.250" off the 06 wires. Examined plugs to see if I could get a hint of WHO might be different than the rest (no help there).
50 mile test ride and once again, bike is totally vibration free, it pulls smoother, sounds a tad crisper, and performs well.
 

corvius

New Member
Joined
Jul 11, 2015
Messages
25
Reaction score
0
Points
0
Location
New Jersey
Visit site
My plug caps aren't as tight a grouping in terms of ohm resistance, so I matched up the closest ones on 1-4 and the other closest on 2-3. No difference. Also drained a tiny bit of oil (read on sportbikes.net that some people had some success running at 3/4 oil (as read on the dipstick). No change.
 

buzzbomb

Resident Lurker
Joined
May 15, 2008
Messages
136
Reaction score
1
Points
0
Location
Australia
Visit site
This vibration thing is fascinating. I have come to the conclusion that it is also dependent on the ambient temperature.
I noticed this on my previous bike and I've now gone through two winters on the Fazer.
During the colder months the bikes are smoother, even to the extent of being smoother in the morning going to work and vibey in the afternoon when it is warmer.

Has anyone else experienced this?

YES!! I've noticed this problem for the last few years, and I thought it was just my bike. Winter riding was always smoother than warm summer days, and I never knew why. I always thought it was something to do with the frame expanding with heat, but never pinned it down. More recently I've been trying to get rid of the SPL vibes which dominated the ride in winter or summer. Maybe it's just that the ignition system fitted to the bikes is marginal at best and with such a high comp ratio and lean standard mixtures it struggles.

I'm going to tackle the spark plug leads maybe this weekend. I was going to do it a couple of weeks ago but I dropped my bike in a clumsy park (tried mounting a curb but it didn't work out...) Silly really, but a few scratches convinced me to paint the front forks black, which was what I wanted to do for a while. But anyway now the front wheel and brakes are back on I'll start digging the coils out...
 

buzzbomb

Resident Lurker
Joined
May 15, 2008
Messages
136
Reaction score
1
Points
0
Location
Australia
Visit site
Ok, time for an update.

I got a bit excited and decided to replace the HT leads onto the original coils. I ordered 2 metres of 7.0mm HT lead, with 1.35mm square copper crossection, from fleabay, straight from England in fact. It's a lot firmer than the original ones, and just squeezing the end of the lead doesn't distort like it will on the originals.

As per FinalImpact's photos, they've used some grey sealant on the ends, and the coil clips are Brittle! They won't survive removal, so forget trying to reuse them!
I'm trying RTV blue sealant and (dare I say it) toothpicks inserted down the sides between the HT lead and coil body. I screwed in the leads into the coils, and they feel like they're biting in, so with sealant and some mechanical help they should hopefully stay in place. I ran the multimeter over the leads and both coils read the same resistance, so once the sealant has dried I'll give them a good wiggle while connected up to see if there's any change in resistance. If it doesn't work I'll move up to something stronger. Epoxy is a last resort as it sets hard, and this is a bit experimental at the moment.

For the HT plug end, wrapping tape around the end will help fill the 0.5mm difference in diameter, but I'm not overly concerned as the insulation is much firmer than original, and bites down tightly onto the cap.

I cut each lead around 70mm longer than the old ones, so I'll have more lead to play with in future. No photos as yet, but once everything's dried and working I'll take some happy snaps.

The biggest issue of the lead replacement is getting a reliable positive connection on the coils, but this issue has affected many different brands of bikes over the years, and some solutions involved epoxying in new leads, so hopefully a similar solution should work for us.

:D
 

FinalImpact

2 Da Street, Knobs R Gone
Site Supporter
Joined
Mar 16, 2011
Messages
11,137
Reaction score
184
Points
63
Location
USA, OR
Visit site
Good luck with that! Do you think the wires seated fully in the coils?
Did you try to find 7.5mm solid core wire? I applied shrink tubing to the end to make it 7.5mm and it made it near impossible to seat to depth in coil.

As for getting the oem clips out in one piece, its possible once the pair is seperated. Cut the joining link, warm the coil so the tabs are more pliable, open them and pull like mad. I have a usable pair. The first set was not so fortunate.
That said, we lack the tool and force to install it like the OEM process did. You need die that fits them to ram them back in there. Not easy at home. As in, never intended to be serviced. :/
 

buzzbomb

Resident Lurker
Joined
May 15, 2008
Messages
136
Reaction score
1
Points
0
Location
Australia
Visit site
Good luck with that! Do you think the wires seated fully in the coils?
Did you try to find 7.5mm solid core wire? I applied shrink tubing to the end to make it 7.5mm and it made it near impossible to seat to depth in coil.
:/

Thanks! Yeah the 7.0mm HT lead can be felt to 'bite' into the little spike at the bottom of the hole in the coil, and I think this is because of the taper of the inside diameter. I tried a couple of wraps of tape on the HT leads in a mockup but didn't get it to work as well as without any tape. I looked for 7.5mm lead but my search came up empty, apart from the link you found a little while ago. I decided to try 2 metres of this: Black HT High Tension Ignition Lead Cable PER Metre | eBay . The insulation is much firmer so I'm confident the HT caps will stay in place, and hopefully the sealant will dry hard and form help hold the wire against the little spikes in the coils. I retested the coils with a multimeter and got 14.6kohms for one coil and 14.8kohms for the other.
Next step is to put the HT caps back on and label the leads, and time for a test run!
 

FinalImpact

2 Da Street, Knobs R Gone
Site Supporter
Joined
Mar 16, 2011
Messages
11,137
Reaction score
184
Points
63
Location
USA, OR
Visit site
If you wish to protect the wires from abrasion you can cover it with adhesive lined shrink tubing and make pretty much like the OEM install.
Check this out: 3M makes EPS-200 Tubing Adhesive-Lined, 2:1, Flexible, Polyolefin. A 4.0' section 3/8" is $5.00 through Digikey. --> Digi-Key Part Number: EPS2038-ND
EPS-200 3/8" BL48"BX 3M | EPS2038-ND | DigiKey


FWIW: I'm not saying this is the proper thing to do but should I have to deal with the caps again for any reason before years end, those 10K resistors are coming out and being replaced with Brass pin!
The resistors limit current which reduces EMI from the exposed solid core wires. Thus, their removal may impact the bikes electronics and other items in the immediate area. That said, there is still 5K in line (plug itself). This would be a test to see if a single change alters the harmonics issue. For those of you still fighting this battle, you might try it.
HOWEVER - I AM NOT RESPONSIBLE for damages to your vehicle, those with PACE MAKERS or anything/anyone else!
This is YOUR choice should you decide to modify your vehicle! Thus it is your responsibility should anything or anyone be damaged or harmed!

10K Ceramic Resistor dimensions:
Length: 18.4mm (0.725")
OD: 4.90mm (0.193" ~ 3/16")
 

buzzbomb

Resident Lurker
Joined
May 15, 2008
Messages
136
Reaction score
1
Points
0
Location
Australia
Visit site
Ok, update time!

Here are the steps I took in replacing the spark plug leads on the FZ6:


After lowering the radiator and lifting the tank, airbox and battery (At this point it's good to note which leads attach to each coil, so either take a photo or notes, and have the FSM handy to check on reassembly) , remove the coils from the bike, measure the original lengths of HT lead, and cut new leads from 2 metres of 7mm HT lead. The new leads can be 30 to 40mm longer than original, but due to the limited space around the coils you may need to trim the leads back while reassembling.

Cut the HT lead retainer on the coils to separate the two sides. Grab the multimeter and measure the resistance of each coil pair from HT cap to HT cap, and note the resistances, and again after removing the HT caps.

With the help of a small screwdriver, gently pry up the retainer, and pull on the HT lead to remove it from the coil.

Spray brake cleaner into the HT lead orifices in the coils, and use a small blade screwdriver to carefully remove the grey sealant. Be gentle so as to not contact the metal spike. Rinse and repeat until the inside looks clean. Blow dry or let the brake cleaner evaporate.

Test fit the new leads into the coils. With a multimeter check the resistance and compare it to the earlier measurement. It should be very close to the resistance noted after the HT caps were removed. If it's higher, go back and clean the spikes inside the coils again. Using 7.0mm HT lead vs the OEM (and very hard to find) 7.4mm lead wasn't a major issue as you can feel the lead bite into the coil spike.

Next issue is how to reliably seal the HT leads to the coils. I initially tried blue RTV sealant but this didn't set hard enough, and the resistance changed too much when the leads were moved. I settled on using 5 minute epoxy and toothpicks cut down and wedged into the gaps to hold the leads firmly against the coils.

While the epoxy is curing it's time to strip and clean the HT caps. Brake Clean is ok in small amounts but keep it away from any rubber parts. I used it to clean inside the cap, and a long piece of wire. Everything else was cleaned with degreaser. After everything is clean, start reassembling and measuring the resistance of each of the 4 caps. If any of the caps is way out either reclean it or replace.

Measure the resistance of each of the coils after the epoxy has set ( I gave the coils 24 hours to completely cure ) and note the resistances. Next match the caps to coils to try and match the resistance between coils. The resistance should be close. If it's different then back track to find the problem, most times it's down to the contact between the spring and inner brass insert in the cap.

Label each lead to help with reassembly (I used a labelmaker and taped the labels onto the leads)

Reassemble the coil/leads noting how leads 1/4 go down the left side of the rubber mat above the engine, and 2/3 go through the right. Also note which low tension wires go to which coils. If they're mixed up the engine won't run, it'll only backfire. :rolleyes:

20150927_145626.jpg
20150922_163725.jpg

Please note I'm not responsible for any problems if anyone wants to follow my steps. If anyone has a breakdown (mechanically or mentally) I'm not responsible! These steps worked for me but if anyone has anything to add please feel free! This is my first big writeup, I wish I took more photos to make it into a "How To", but at this stage the bike is still being tested. At this point the engine is running smoothly but I haven't ridden it yet to fully test it. Big thanks to FinalImpact for this thread, and everyone who has contributed!

Cheers, Buzz.
 

FinalImpact

2 Da Street, Knobs R Gone
Site Supporter
Joined
Mar 16, 2011
Messages
11,137
Reaction score
184
Points
63
Location
USA, OR
Visit site
I'll add a couple things;

Once all the silcone is out of the coil, use short sections of 7mm wire inserted into the HT lead opening and spin it repeatedly on the coils conductor to clean and remove ALL silicone.

MAF cleaner is everywhere and works great! Contact cleaner is out there but MAF cleaner is at every parts counter.

Lastly, FIPG / form in place gasket cures harder and may be an option. Not sure of the electrical properties tho.

Let us know how the tests go!
 
Last edited:

payneib

Member
Joined
Oct 28, 2013
Messages
622
Reaction score
5
Points
0
Location
UK
Visit site
Could I just ask what the vibrations are like for this issue?

I recently had my reg/rec go, and replaced it. It ran fine for testing that night, but the next day was so rough it felt like a misfire. Like it was running on three cylinders.

I suspected the new R/R may have caused issues in the plugs or coils. So I replaced the plugs tonight. #4 boot literally fell off the HT lead, no sign of core wires inside. I've trimmed it back, and it's better. The engine is much smoother now, not 100%, so I'll go through the boots again in my off shift with some daylight to help.

Is this issue sufficient to cause enough vibes for it to feel like a misfire?

Sent from my E5823 using Tapatalk
 

Murphy

New Member
Joined
Dec 31, 2015
Messages
6
Reaction score
0
Points
0
Location
BELGIUM
Visit site
First of all best wishes.
I've today checked all the four cables and they turned all 4 very easy without any resistance.
I've cut off the cable like in the first post and reinstalled everything.
It's better now but there is still some light vibration on Neutral gear and on his middle stand.
I will do a drive test very soon when I have some replacement parts.
Is it also possible that the stationary rpm is decreased by 200 Rpm?
Best regards
 

FinalImpact

2 Da Street, Knobs R Gone
Site Supporter
Joined
Mar 16, 2011
Messages
11,137
Reaction score
184
Points
63
Location
USA, OR
Visit site
Could I just ask what the vibrations are like for this issue?

I recently had my reg/rec go, and replaced it. It ran fine for testing that night, but the next day was so rough it felt like a misfire. Like it was running on three cylinders.

I suspected the new R/R may have caused issues in the plugs or coils. So I replaced the plugs tonight. #4 boot literally fell off the HT lead, no sign of core wires inside. I've trimmed it back, and it's better. The engine is much smoother now, not 100%, so I'll go through the boots again in my off shift with some daylight to help.

Is this issue sufficient to cause enough vibes for it to feel like a misfire?

Sent from my E5823 using Tapatalk

It has never ever ran poorly in my case. Starts, runs, pulls great but has this numbing vibration into seat that literally hurts your bumm should you be on a long ride.

Of course, anything loose on the chassis is going to rattle and oscillate. Mirrors especially which become hard to see through.
From another post:
The engine is going to make some vibes. The difference is are they high frequency inducing a resonate harmonic or just normal vibes? The normal vibes don't bother us people much, its when they multiply and resonate that they irritate us.

PS - mine has never been burned as in a bad connection where arcing occured. Like i said, it's always ran great but once the issue is corrected the exhaust tone also gets crisper and carries a different note.
 

FinalImpact

2 Da Street, Knobs R Gone
Site Supporter
Joined
Mar 16, 2011
Messages
11,137
Reaction score
184
Points
63
Location
USA, OR
Visit site
First of all best wishes.
I've today checked all the four cables and they turned all 4 very easy without any resistance.
I've cut off the cable like in the first post and reinstalled everything.
It's better now but there is still some light vibration on Neutral gear and on his middle stand.
I will do a drive test very soon when I have some replacement parts.
Is it also possible that the stationary rpm is decreased by 200 Rpm?
Best regards

In my case I have never seen the RPM change but if the connection were so bad as to induce a misfire it would likely drop RPM...

Did i get this right; after trimming it lost ~200 RPM? Test ride and tell us what you know.
 

Murphy

New Member
Joined
Dec 31, 2015
Messages
6
Reaction score
0
Points
0
Location
BELGIUM
Visit site
Yes It's after trimming but I could be wrong.
When I have all the parts so the bike can get back on the road I will let you now what I think of the repair.
 

payneib

Member
Joined
Oct 28, 2013
Messages
622
Reaction score
5
Points
0
Location
UK
Visit site
It turned out mine was vac leak in the end. Another relatively easy fix. Quite satisfying to get it sorted too.

Sent from my E5823 using Tapatalk
 
Top