Vibration! A cure for bad vibrations, Spark Plug Caps!!

Murphy

New Member
Joined
Dec 31, 2015
Messages
6
Reaction score
0
Points
0
Location
BELGIUM
Visit site
Hello,

A week ago I did the test and ... the vibration is less.
But at +8000tr/min there is still a little vibration but less then before.
But for me this was a good solution.

Thx
 

Pplater

Junior Member
Joined
Dec 24, 2012
Messages
31
Reaction score
0
Points
0
Location
Singapore
Visit site
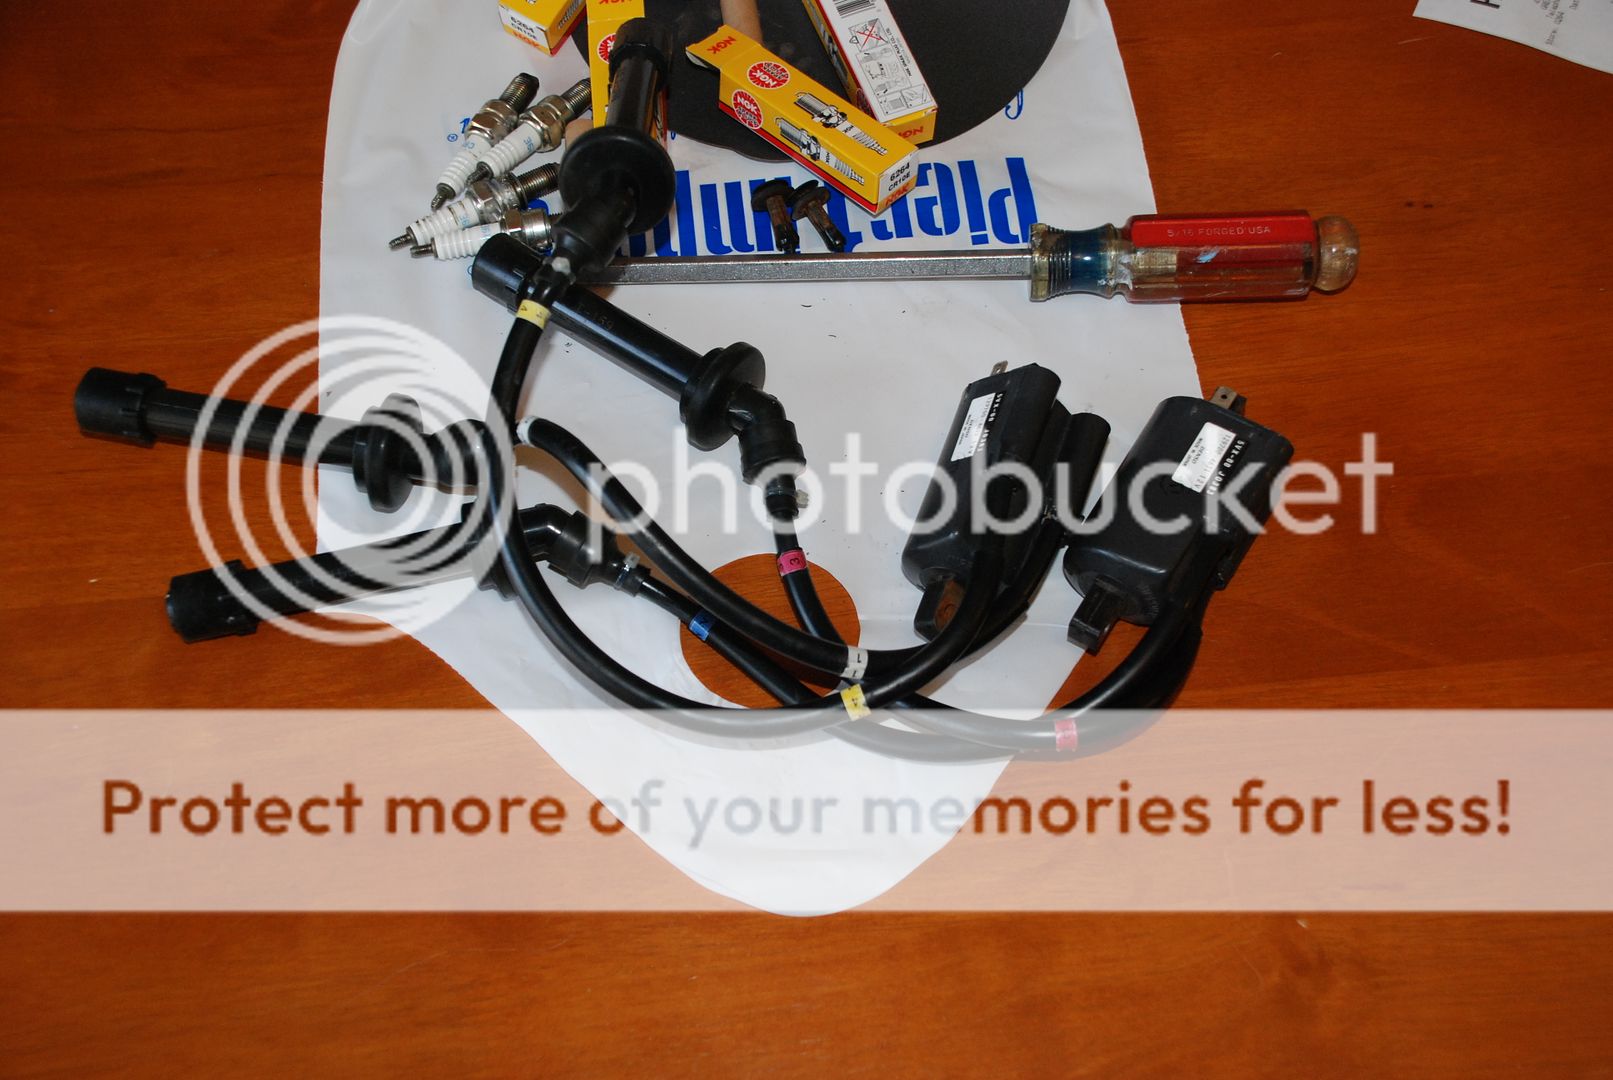
PURE EVIL best Describes the objects below!
DSC_9022_zpsd4ql5t9f.jpg


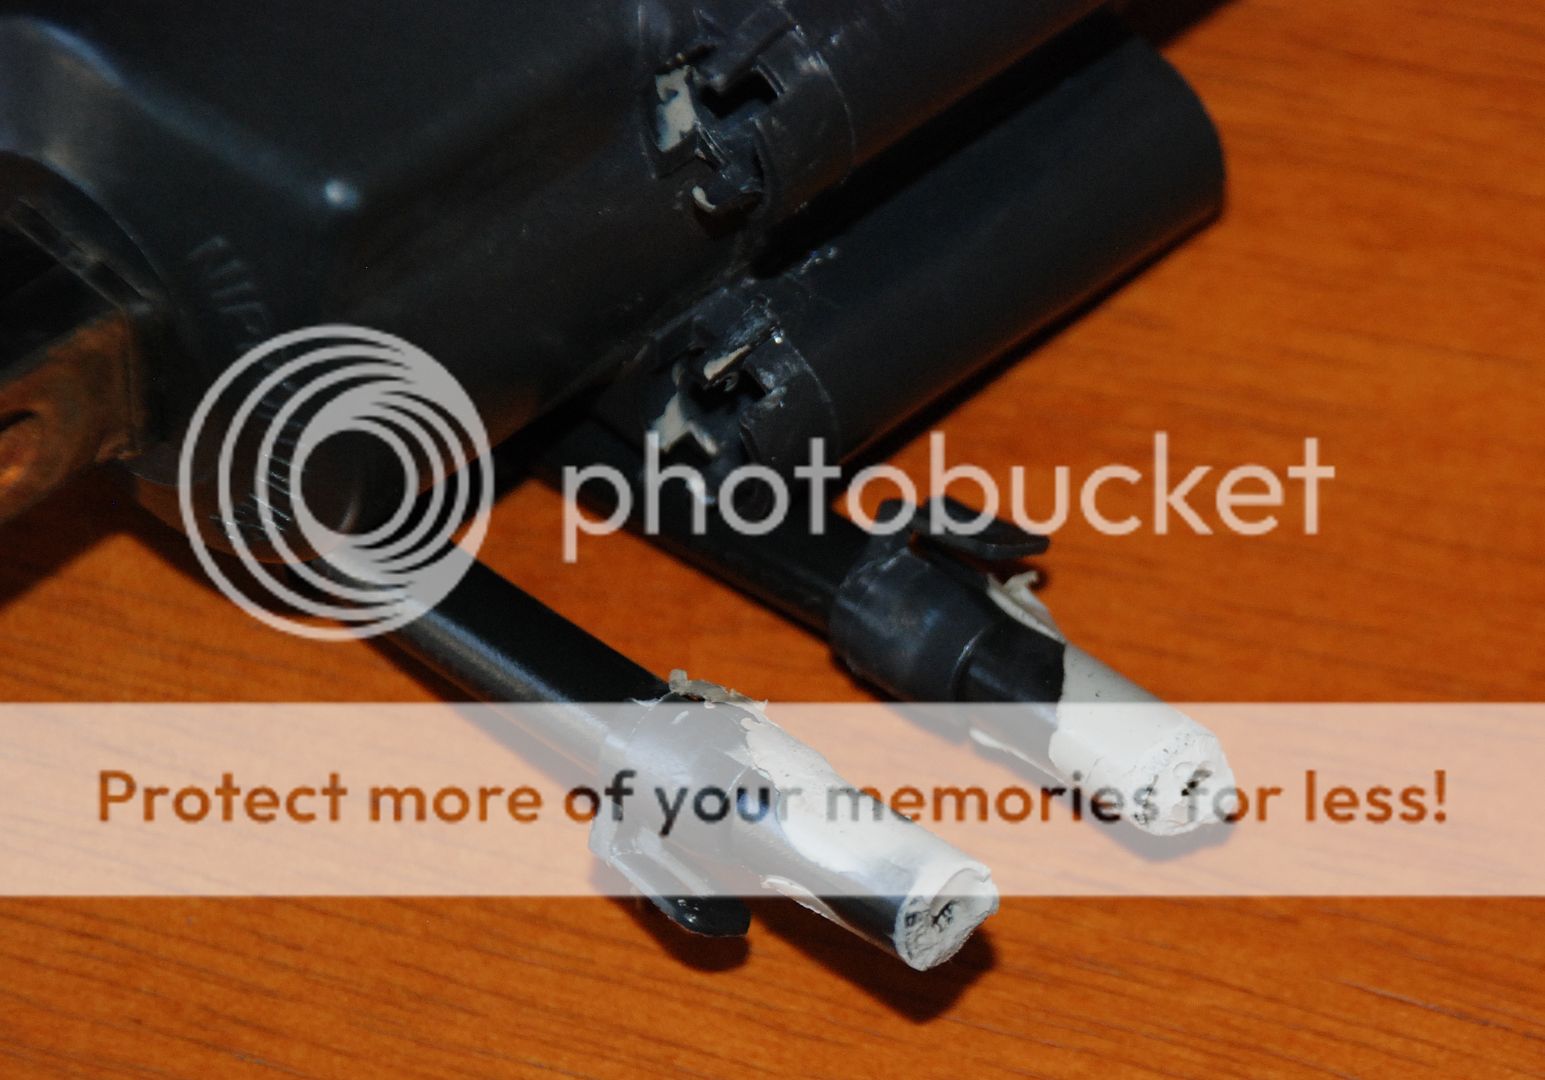
Non-conductive silicone and compression fitting:
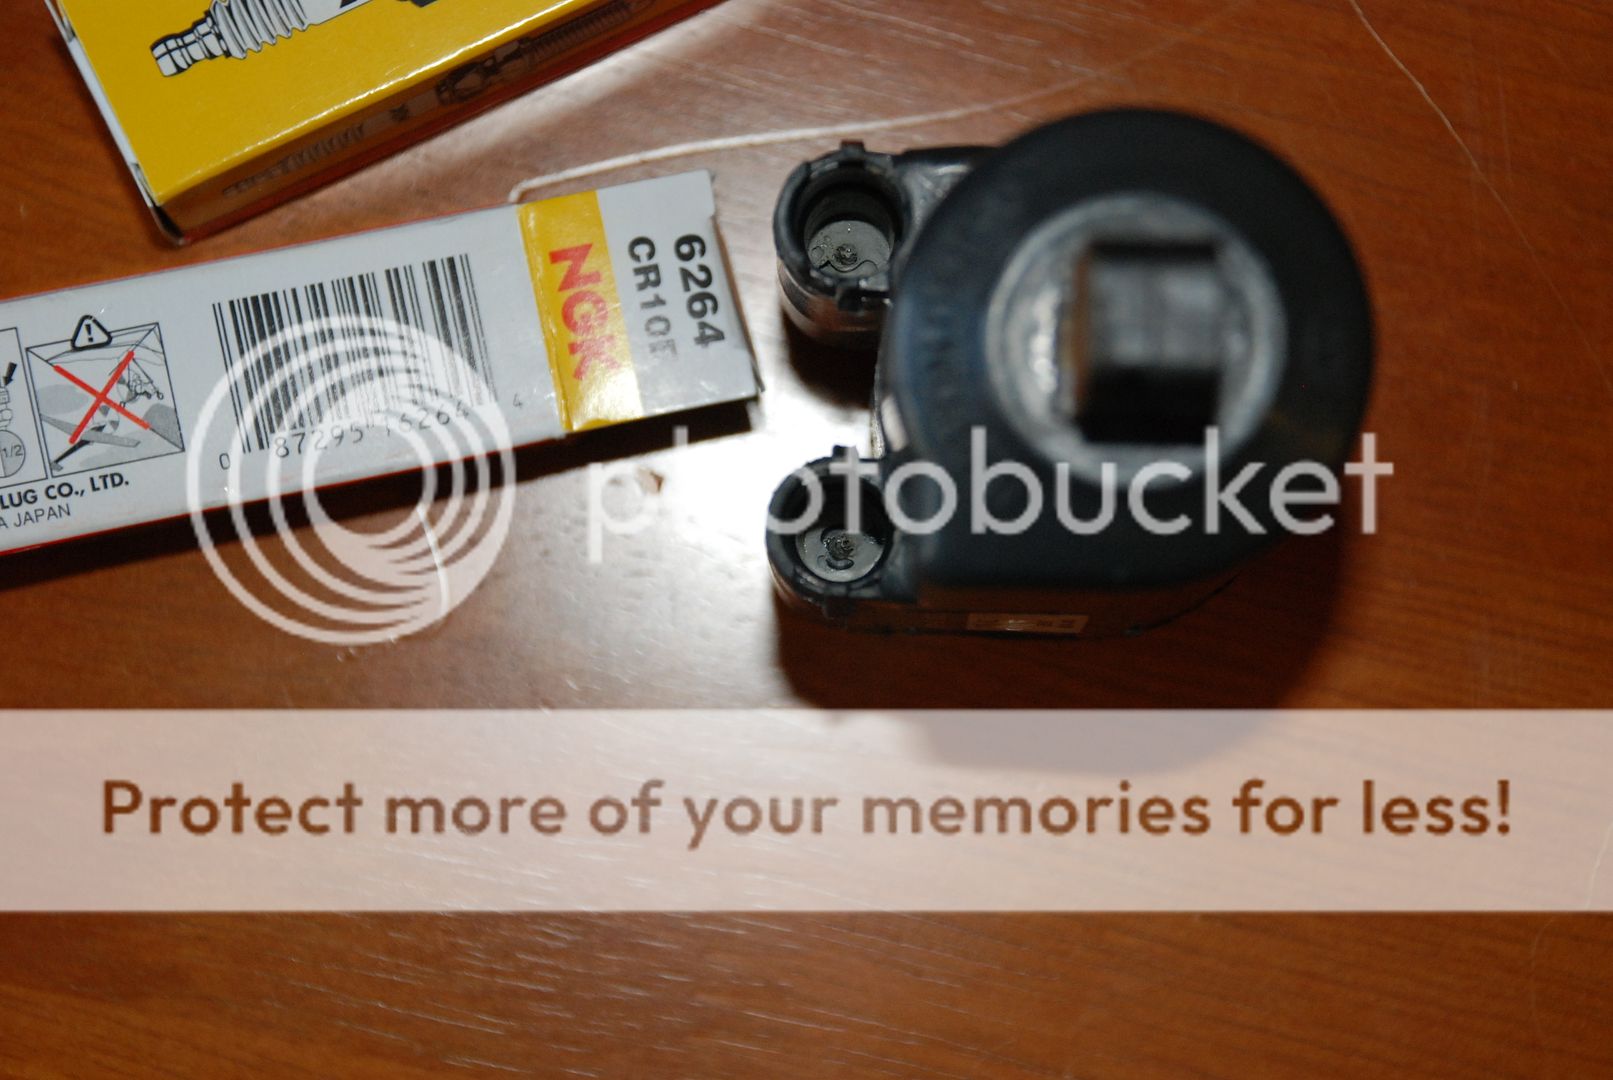
DSC_9023C_zpsgyw69teq.jpg


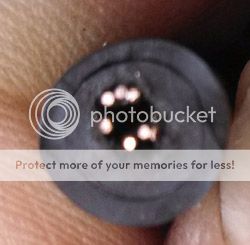
Looking into the coil Secondary output connector:
DSC_9027_zpsifww4t7c.jpg

DSC_9027C2_zpsyexgk6gt.jpg


I replaced the coils with fleebay $29 shipped (Coils, Wires, & Caps). The Caps tightened to the wires with a half twist each, the internal ceramic resistor all measured OK ([email protected] and 1 @10.3Kohms). I pulled the battery tray, connected the the "replacement coils" to the harness, and went into diagnostic mode #30 & #31, toggled the Run/Stop switch and verified they could jump a 0.040" gap (Diag mode fires 5 pulses to the coil to verify operation). They both did. So I installed them!

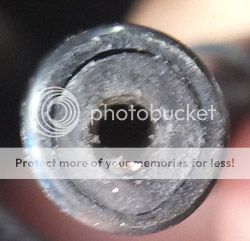
Once again the vibes are GONE! Those original coils/wires have and issues and just induce issues in shorter and shorter time spans. I literally just pulled the wires until they came out of the coils. It left a bunch of what appears to be non-conductive silicone behind (infinite resistance). Its pretty firm and hard to dig out of the coil body. It doesn't look like it but there is a brass post in there. One of the coils wires was maybe 1/2 way seated to max depth, the the other 3/4 of the ways.

Let this be warning to others that you may need to be persistent ESPECIALLY IF YOU KNOW IT CAN OPERATE VIBRATION FREE! This has to be 6th or 7th time I've had to address this issue as it makes me hate the bike. Needless to say the parts installed are from an 06.

Don't GIVE UP! They CAN BE FIXED!

Am i right to say that to replace these 2 ignition coils, I would have to

1. Remove the fuel tank,
2. Remove air box
3. Remove battery
4. Remove battery tray that the battery sits on
5. Lower the radiator to allow more working space

After step 4, I should be able to see the wiring harness, and I can disconnect the ignition coil from the wiring harness and plug in the new ignition coils?

2 identical 2004 FZ6S in Singapore at 172000km and 197000km with stock ignition coils and engines. The bike with 197k kilometres is having more vibrations of late, resulting in 1 of the 2 bolts holding the fuel tank in place to shake itself loose every couple months (thread damage partly at fault).
 

FinalImpact

2 Da Street, Knobs R Gone
Site Supporter
Joined
Mar 16, 2011
Messages
11,137
Reaction score
184
Points
63
Location
USA, OR
Visit site
Sounds about right. Try trimming leads first. Drop the two bolts from the radiator and let it settle. No coolant lines are undone.

If you have to go further; raise the tank and block it. Its happy w a stick holding it up. Battery tray is all that needs free'd. Air box should be fine. As you raise the tank, undo the white and green connections so they are not strained.

That said, air box is 3 or 4mm.... Longer reach is better.
 
Last edited:

Pplater

Junior Member
Joined
Dec 24, 2012
Messages
31
Reaction score
0
Points
0
Location
Singapore
Visit site
Sounds about right. Try trimming leads first. Drop the two bolts from the radiator and let it settle. No coolant lines are undone.

If you have to go further; raise the tank and block it. Its happy w a stick holding it up. Battery tray is all that needs free'd. Air box should be fine. As you raise the tank, undo the white and green connections so they are not strained.

That said, air box is 3 or 4mm.... Longer reach is better.

Thank you for replying. As the bikes are already 12 years old and has close to 200k kilometres milege, we will just replace the ignition coils directly. We'll remove the fuel tank to create more working space since this is not difficult, rather than prop it up. This operation should be done sometime in May/June this year when we can make time for it. Will post up on the results. It will be done in our regular shop, so the mechanics can save us after we **** it up Blah
 

FinalImpact

2 Da Street, Knobs R Gone
Site Supporter
Joined
Mar 16, 2011
Messages
11,137
Reaction score
184
Points
63
Location
USA, OR
Visit site
Thank you for replying. As the bikes are already 12 years old and has close to 200k kilometres milege, we will just replace the ignition coils directly. We'll remove the fuel tank to create more working space since this is not difficult, rather than prop it up. This operation should be done sometime in May/June this year when we can make time for it. Will post up on the results. It will be done in our regular shop, so the mechanics can save us after we **** it up Blah

If you can change spark plugs take an hour of your time and trim the leads cutting back 10mm.
If it works, you're done.
I say this as used coils are gamble. Certainly no guarantee they'll be better than the ones you have now.
 

Pplater

Junior Member
Joined
Dec 24, 2012
Messages
31
Reaction score
0
Points
0
Location
Singapore
Visit site
If you can change spark plugs take an hour of your time and trim the leads cutting back 10mm.
If it works, you're done.
I say this as used coils are gamble. Certainly no guarantee they'll be better than the ones you have now.

Understand your concern. We want to keep our bikes going for as long as possible so we'll get new parts from the local Yamaha dealer. Your thread drew our attention on this component which we previously overlooked. Appreciate it :thumbup:
 
Last edited:

Pplater

Junior Member
Joined
Dec 24, 2012
Messages
31
Reaction score
0
Points
0
Location
Singapore
Visit site
Stock ignition coils and spark plug caps were collected from the local Yamaha dealer for SGD $370 (USD $264) and labor charge of $30 (USD $22) was paid for installation at my regular shop.

No improvement to vibration problem. It is likely something else causing this, but we expect this given the high milege of 198k km.

High idling of 1500rpm resulted from running the new stock ignition coils and spark plug caps, due to carbon built up in the throttle body. We tried to lower the idling rpm but the idling screw came out. The bike kept running without stalling though, at the same high rpm. My regular mechanic suggested to clean the throttle body. This was also suggested by a Yamaha mechanic from the dealer when I dropped by to collect other parts. Throttle body synchronization was also done at the shop. These cost SGD $50 (USD $30+). Idling is now within spec at 1250rpm and bike is running fine, with the same vibration issue present.

We also noticed the sliders on the right hand side was missing, likely lost while riding due to vibration. Footpeg was also getting loose. We'll now check all bolts and nuts more regularly.
 
Last edited:

FinalImpact

2 Da Street, Knobs R Gone
Site Supporter
Joined
Mar 16, 2011
Messages
11,137
Reaction score
184
Points
63
Location
USA, OR
Visit site
FWIW - even new spark plugs can be defective! It is rare but it happens!

My suggestion to you; replace the plugs with CR9E and verify the new wires are in fact tight in the caps. You have everything to gain here... Also verify the gap is NO more than specified. 0.028" / 0.7mm as this can impact how the fuel burns...

Not all OILS are the same! 4 members of this forum have dumped Mobil1 as it induced vibrations!

Valve lash can impact vibrations.
Fuel quality can impact vibrations.

Next item exam and or clean and lubricate the contacts of the Kill switch.

Lastly, fuel cleaner... Run a couple tanks of fuel cleaner. Chevron Techron in the black bottle is OK!
 

ganesh.trg

New Member
Joined
Jul 3, 2017
Messages
2
Reaction score
0
Points
0
Location
Chennai
Visit site
If your bike has vibrations in the seat, handle bars or foot pegs, read on as this procedure "may" help reduce some of those harmonic vibrations. If you can remove the spark plug caps, you can check this and correct this condition.

WHAT IS THE CAUSE?:
The the Spark Plug Cap (SPC) threads into the High Tension Lead (HTL) wire core using a brass screw with a conventional clockwise thread. As the wire ages, the insulation around the wires core may relax allowing the copper core wire to move away from the caps brass screw. This loss of connection translates to vibrations across throughout mid to upper RPM's. Remember this is a waste spark ignition and each coil is responsible for 2 spark plugs firing and a poor connection at either plug can alter the timing, energy, or duration of the spark to a cylinder! We feel this as harmonic vibration in the bars and seat. The good news is, its easy to fix!
IMO - unless the wires core is completely broken, it IS NOT responsible for a misfire! That is, the engine will start, idle, and accelerate fine. But the chassis may have harmonic vibration from about 4K on up.

HOW TO CHECK IT AND CORRECT IT:
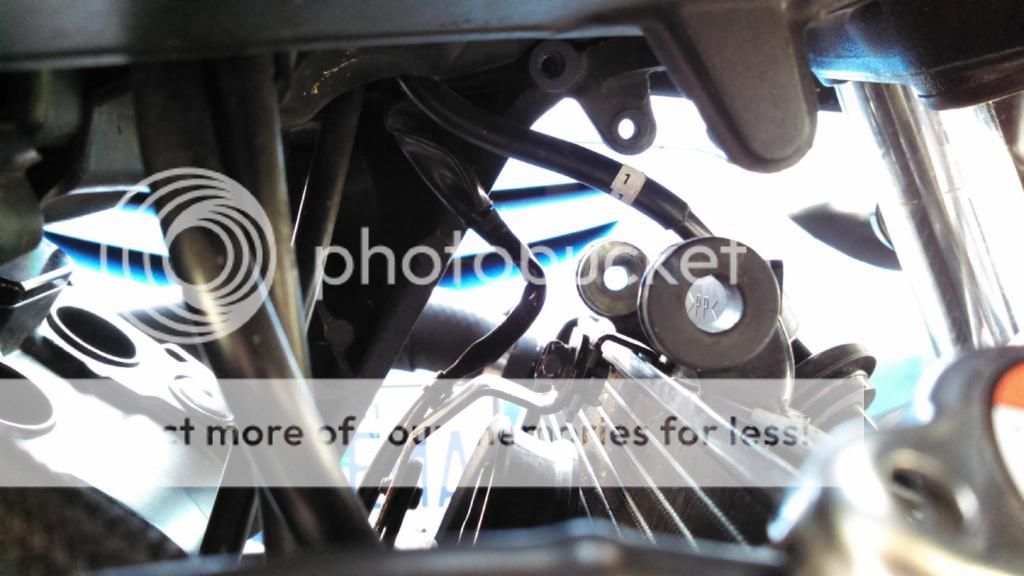
  • From the left side, remove the two 10 mm bolts holding the radiator and let it settle on the hoses. Be careful of the lower bracket hitting the radiators CORE! More info here ->See post 6 for more pictures.
    IMG_20140916_182334_833WEB_zpsf3c8becc.jpg
  • Remove spark plug cap #4 (right side). PULL ON THE THE CAP BODY, NOT THE WIRE!!!
  • With the cap free in hand, hold the HTL (wire) and gently rotate the CAP ASSEMBLY CLOCKWISE. The cap may turn about a half turn on the wire and **should become snug and resist turning.** If the cap SPINS ON THE WIRE IT NEEDS REPAIRED!
  • REPAIR THE WIRE: If the cap spins with no resistance to rotation, unscrew it by rotating the CAP counter clockwise while holding the wire. Using a pair of sharp side cutting pliers, cleanly cut off 1/4" (6 mm) from the HTL.
  • Using small pick, fan out the copper wire strands into a 360° pattern. Do not bend them repeatedly!
  • FAN OUT WIRES:
  • 1CoilHTFanOut_zps9ef062a7.jpg~original
  • Push the SPC onto the wire and turn it clockwise until its snug.
  • Add a ZIPTIRE to the boot! Because the wires are strained once fitted to the engine, the ZIPTIE will extend the interval before coming loose again.
  • 55511d1415035615-final-impact-winter-project-playing-w-trigger-img_20140916_185846_293-jpg
  • Proceed to next cap and remove it for inspection. I find it easier to leave the caps out until all wires are verified/repaired. Turn the bars and hang them over the radiator.

*** ADDITIONAL TESTING; If you have a DMM (Digital multimeter) and want to test the resistor internal to the SPC, see section below for additional testing before installing the cap onto the wire.

SPC INSTALLATION INTO VALVE COVER:
  • Starting on the left side of the engine, insert SPC #1. You should feel and hear the lock on the cap engage the spark plugs conductor. The dust seal should simultaneously seat on the valve cover. If the SPC pops back up any amount after seating it, remove the SPC and move the dust seal up the body towards the HTC.
  • Firmly Seat the SPC onto the plug.
  • Firmly Seat the dust seal onto the the valve cover. Confirm it seals 360 degrees.
  • Proceed to next SPC.

ADDITIONAL TESTING:
The SPC is composed of several parts which should be verified by testing and visual inspection during spark plug replacement or if they are suspect of causing a misfire or vibration. Because these connections are subject to high voltage (15,000+ volts) a bad connections can burn and arc damaging components.
With an ohm meter set to K ohms, insert the test leads into each end of the cap. It should measure 10K ohms. Internal to the cap is a resistor, spring, plug lock, and self threading cable connector. If any of these component have corrosion, arcing, or burning, they should be replaced. Also, the FSM does not list a limit. Mine all measured 10.7 ~ 10.8K ohms.
The resistor spark plugs are supposed to measure 5.0K ohms. My used CR9EK's measured ~ 4.0K ohms each.

COMPONENTS:
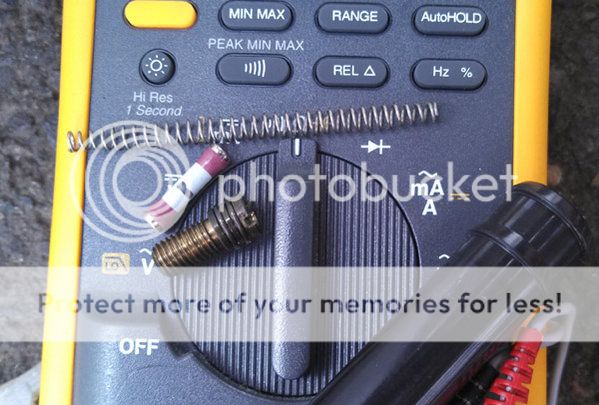
On top of my meter you see the spring, ceramic resistor, locking insert (locks Cap to Plug), and the end of the cap body.
5SPCResistor_zpsb6f3a1de.jpg~original


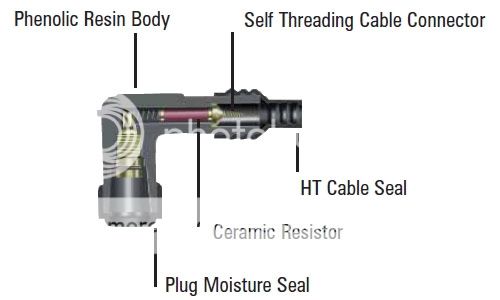
Spark Plug Cap (SPC) Drawing:
2NGKPhenolic-resin-spark-plug-cap_zpsfbc4aed7.jpg~original


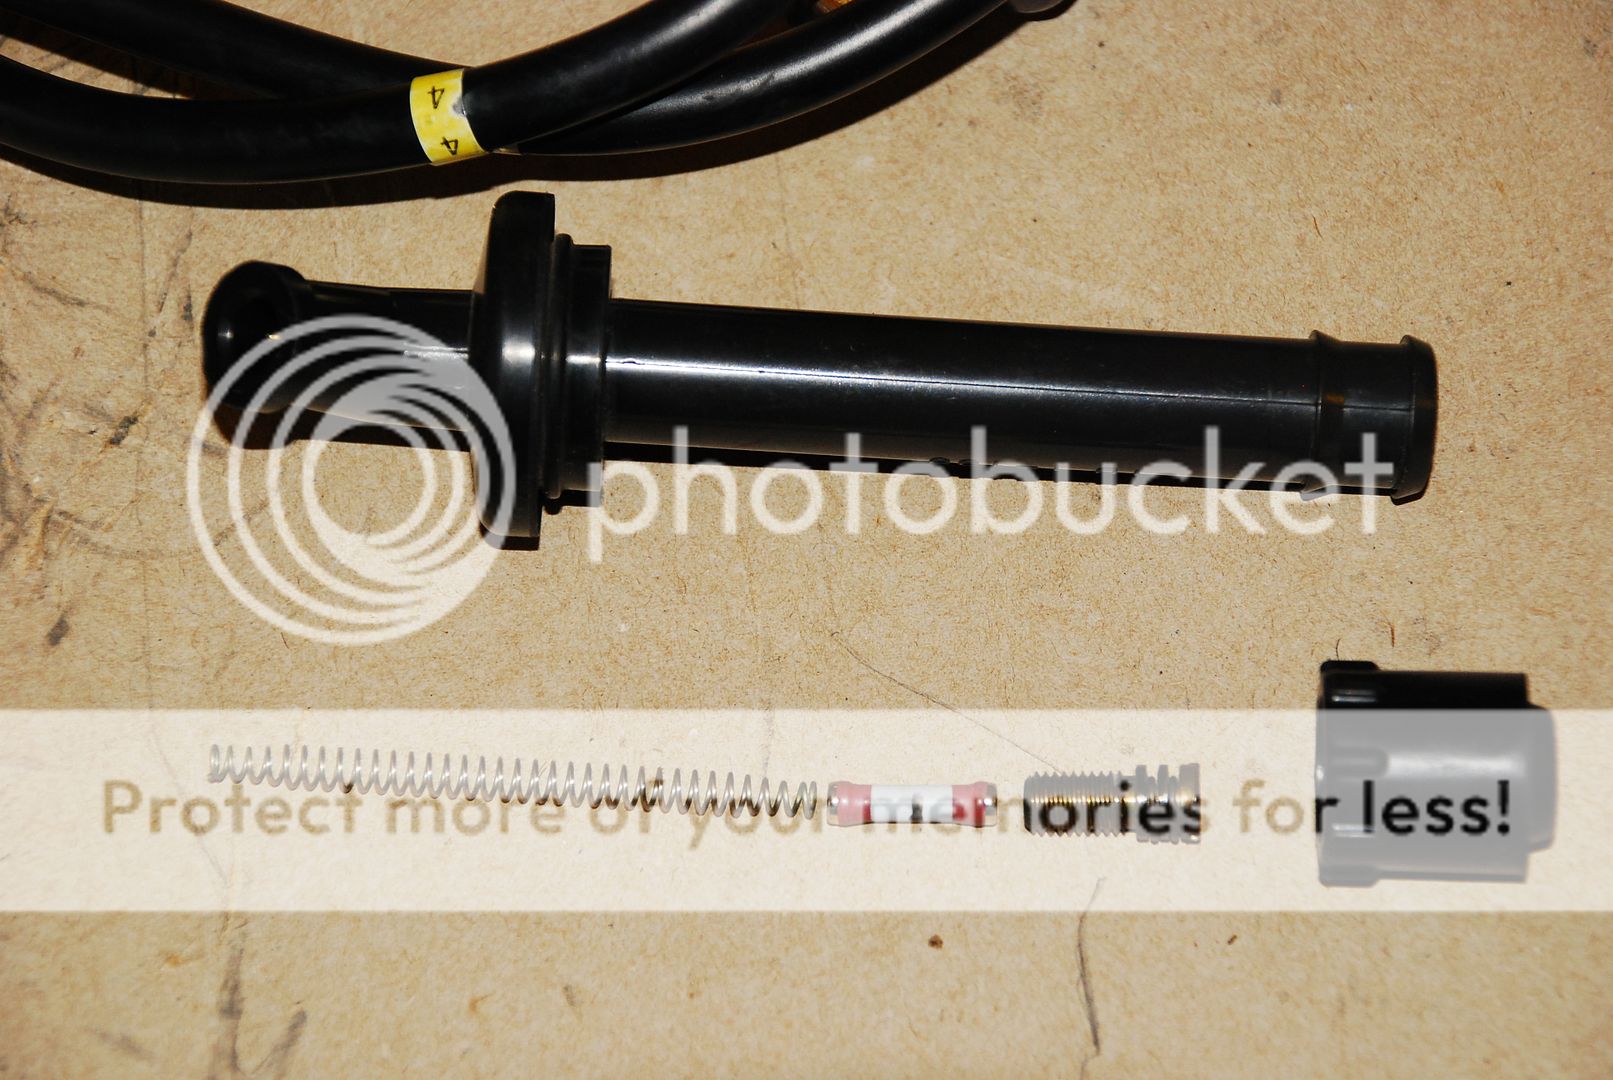
Actual components internal to cap:
Note: use a flat head screw driver to remove the locking insert.
DSC_9014_zpsd122wjmm.jpg


SPECULATION/ROOT CAUSE:
In this photo the wires spiral wound core was pushed off to one side and the this cap spun freely with no resistance to turning. I cannot prove it, but if you read about inductance and capacitance you see were a tiny change can change the timing of how a coil charges and discharges. It may be milliseconds/microseconds, but it correlates to all if the cylinders not being fired at the same time and this induces the vibration we feel.
4HTLBad_zpse70ae5e9.jpg~original

HOW WAS THIS DISCOVERED:
I found that the spark plug wire to cap had gotten loose as described here. Although it didn't create a misfire or make the bike run bad (it ran great), it did make a harmonic vibration across all RPMs which rules out throttle body sync. This vibration was increasing so I went for ONE CHANGE and that was to remove the four plug caps from the head and inspect how the high tension lead was seated to the caps. I DID NOT TOUCH ANYTHING ELSE, JUST THE SPC/s & HTS's.

That's when I found the HTL was no longer tight in the SPC. At first I thought this condition added resistance to the junction and it may very well do that. However, the spark plug and the cap assembly account for 13 to 16,000 ohms of resistance THUS IT IS VERY UNLIKELY that a copper wire against a brass screw has high resistance. i.e. more than 10 ohms total. It is MORE likely there is capacitance altering the coils saturation time (charge rate). Remember this is a waste spark system and one coil is responsible for two cylinders. The capacitance may actually alter when the spark arrives thus inducing harmonic vibrations to the firing as it out of time ever so slightly.

PS - I found that one wire being loose can cause a noticeable vibration!! In the last event, cap #4 (spun freely w/out resistance). Before that it was #2 about 2000 miles ago.

SPARK PLUGS:
Check the gap on your plugs and do not Exceed the Recommended gap. If using conventional carbon plugs (CR9EK side fire or CR9E End Fire) the gap should be set to less than the maximum as it opens as it wears. See picture below.

Spec: 0.024–0.028 in (0.6–0.7 mm)

**********************************
PRECIOUS METAL PLUGS AND GAPING:
Before installing spark plugs, the gap must be checked as the plug has many other applications (not just the FZ6 engine) which means the gap MAY NOT BE SUITABLE for this vehicle!
If the gap is too large it can be the cause of the poor acceleration upon re-wetting the intake.
There is a right way and wrong way to verify the correct the plugs gap. Yes, the wrong way could damage a precious metal plug. Using the proper tools for the job reduces the risk of damage.

Regarding application:
NGK Spark Plugs USA

How to Gap a Plug (precious metal specific):
NGK Spark Plugs USA

Bottom line: the plugs must be gaped to meet the requirements of the engine they are installed in.
Spec: 0.024–0.028 in (0.6–0.7 mm)


**********************************
SPARK PLUG TORQUE SPEC:
18 Nm (1.8 m·kg, 13 ft·lb)
**********************************

Used Plugs ~ 13,000 miles and Excessive Gap from Wear:
Note: Plugs gap is opening up as material wears away (2 and 3).
8SparkPlugErosion_zpsc018ee63.jpg~original


**********************************
THIS DOES NOT FIX: vibrations induced by poor drive chain maintenance, worn sprockets, or kinky chains.
SEE "How to string align your rear wheel!!" for chain and wheel alignment issues: http://www.600riders.com/forum/how-to-s-/40463-how-string-align-your-rear-wheel.html
It is recommended to perform this when changing spark plugs and before performing a Throttle Body Sync.
**********************************

Off Topic but related to ignition testing and from post 33 of this thread. If anyone wants to see the coils unleash on the plug, Place the meter into Diagnostic mode and ground the spark plug bodies.


**********************************
EDITS:
2014-11-08 Added pictures, Zip-Tire and lower the radiator core
2014-05-27 Added link to String Align Rear Wheel
2014-05-09 Check those precious metal plugs
2014-04-11 Embed post 33
2014-04-11 FIX BROKEN LINKS! errr....
2014-03-31 Fix broken links
2013-09-04 Clarify actions, list order of operation
**********************************


Hey could you please help me and guide me to get rid of vibration on my bike. Actually when I ride my bike more than 40kmph it's starting vibration(mainly seat and below body). When I check with the local service center he telling like need to rebouring the engine to get rid of vibration and it will cost me around Rs.5000. He was saying you might ride your bike long distance at the same time or you may ride you bike all the time faster. To be frag I'm not a harsh driver and I try to run my bike smoother always. So could you please tell me what I need to do? My bike went with any too lean mixture which may cause for this vibration? or spark flug? which I need to check please guide me. I will be very thank full to you if I get rid of this vibration.
Bike Details:
Bike: Honda CB Unicorn
Manufacturing Year: 2011
Single hand riding
Mileage: 50+km
 

Motogiro

Vrrroooooom!
Staff member
Moderator
Elite Member
Site Supporter
Joined
May 8, 2008
Messages
14,992
Reaction score
1,158
Points
113
Location
San Diego, Ca.
Visit site
Hey could you please help me and guide me to get rid of vibration on my bike. Actually when I ride my bike more than 40kmph it's starting vibration(mainly seat and below body). When I check with the local service center he telling like need to rebouring the engine to get rid of vibration and it will cost me around Rs.5000. He was saying you might ride your bike long distance at the same time or you may ride you bike all the time faster. To be frag I'm not a harsh driver and I try to run my bike smoother always. So could you please tell me what I need to do? My bike went with any too lean mixture which may cause for this vibration? or spark flug? which I need to check please guide me. I will be very thank full to you if I get rid of this vibration.
Bike Details:
Bike: Honda CB Unicorn
Manufacturing Year: 2011
Single hand riding
Mileage: 50+km

:welcome: to the forum Ganesh!

Vibration can be due to many issues, I think your bike is a single cylinder and it would be prone to vibration at higher rpms because of engine design. I can tell you that boring out the engine will not reduce vibrations if there is no issue other than engine design.

If you have changed the exhaust on a smaller cc engine it can cause the engine to run too lean and you will have problems. This would require rejetting if you have a carburetor change in the ECU settings or returning to stock exhaust configuration. Check that your spark plug is clean and set to the correct gap. also check integrity of the spark plug wire and ignition coil.

Bad fuel and fuel delivery will also cause vibration because of poor efficiency in combustion. Stay away from the guy telling you to rebore the engine...
 

ganesh.trg

New Member
Joined
Jul 3, 2017
Messages
2
Reaction score
0
Points
0
Location
Chennai
Visit site
:welcome: to the forum Ganesh!

Vibration can be due to many issues, I think your bike is a single cylinder and it would be prone to vibration at higher rpms because of engine design. I can tell you that boring out the engine will not reduce vibrations if there is no issue other than engine design.

If you have changed the exhaust on a smaller cc engine it can cause the engine to run too lean and you will have problems. This would require rejetting if you have a carburetor change in the ECU settings or returning to stock exhaust configuration. Check that your spark plug is clean and set to the correct gap. also check integrity of the spark plug wire and ignition coil.

Bad fuel and fuel delivery will also cause vibration because of poor efficiency in combustion. Stay away from the guy telling you to rebore the engine...

thanks a lot :)
 

Koissu

Junior Member
Joined
Oct 20, 2014
Messages
121
Reaction score
1
Points
18
Location
Northfield, VT
Visit site
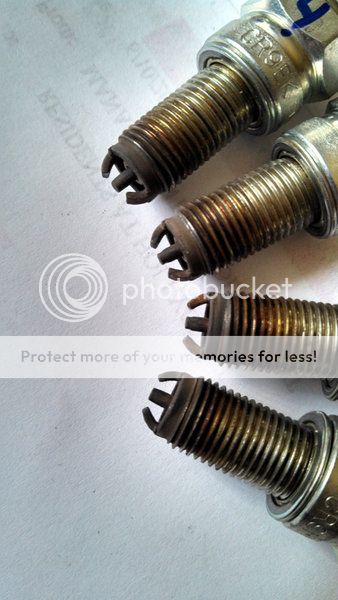
Finally got around to changing my sparkplugs and checking all four caps (after about 2 years..). I only ride a few thousand a year so was in no rush, but the vibrations were there. My bike is about 8500 miles and I wasn't sure if they had ever been changed. I had already tightened caps 3 and 4 in 2015 but they were somewhat loose again, 2 was loose, and 1 was pretty good. I trimmed and reseated 2, 3 and 4, and tightened 1. The wires in 2 3 and 4 were all pushed to the side, just like in the photos in the first post. Getting my hand in there was a bit tough, even with the radiator dropped, but managed to change them all over to the NGK Iridiums. I did not have time to ride it, but I am really curious to see if I can feel a difference. I am not that mechanically inclined, but do these spark plugs look pretty roasted?

n0gBIDY.jpg
 

FinalImpact

2 Da Street, Knobs R Gone
Site Supporter
Joined
Mar 16, 2011
Messages
11,137
Reaction score
184
Points
63
Location
USA, OR
Visit site
Try to focus on the electrode vs plug body. They don't show a lot of wear but it looks like you have nasty fuel deposits. Run some injector cleaner in that and open it up once in a while...

Just pulled these from the IS-350 w 52k mi on them....
Notice we can see the porcelain which tells us the temperature of the combustion gasses. These are seeing enough heat to keep the porcelain clean. This is perfect.20170819_154332.jpg
 

Juan1

Junior Member
Joined
Aug 25, 2008
Messages
65
Reaction score
0
Points
0
Location
San Diego
Visit site
I'm skeptical that the FZ6 engine can ever be made truly smooth in the 6400-7400 RPM range. I've now owned two '07 FZ6's and had the same vibes in the same range with both. Both of those bikes had heavier bar ends added, fresh single-strap spark plugs, engine mounts torqued to spec, a barely needed throttle body sync, and the FZ6 I have now has had the wires snipped and reseated in the caps. None of the professional reviews of the FZ6 state that the engine is exceptionally smooth through out the RPM range, and some note that it is smooth except for a specific engine speeds.

All of that said, with heavy bar ends the FZ6 engine is exceptionally smooth under 5000 RPM, gains i4 vibes up to 6400 RPM's at which point the bike is very buzzy.

To me the strange part is that even when the handlebars are very buzzy the top of the handlebar clamp remains smooth. It makes me wonder if a thick walled handlebar would fix the handlebar vibes.
 

FinalImpact

2 Da Street, Knobs R Gone
Site Supporter
Joined
Mar 16, 2011
Messages
11,137
Reaction score
184
Points
63
Location
USA, OR
Visit site
Swap the coils or install new wires. Mine is buzz free at all rpms but it took perseverance to get there.

Also i recall about 1500 miles into fresh Mobil1 oc it felt horrid crunchy to shift, didnt rev easily and had vibes. Dumped the oil at 1800mi for Amsoil.... all of that went away!
 

agf

Go Naked- Its liberating
Staff member
Moderator
Elite Member
Site Supporter
Joined
Feb 24, 2011
Messages
2,916
Reaction score
288
Points
83
Location
Melbourne Australia
Visit site

cook.675

Member
Joined
Apr 21, 2018
Messages
76
Reaction score
4
Points
8
Location
San Francisco
Visit site
Obligatory appreciatory bump.

Starting 2 weeks ago I started to notice uncomfortable vivrations in the footpegs. It seemed to be getting slightly worse esch time I rode, or maybe I was just noticing it more.

It got to the point where I was not looking forward to riding as it got uncomfortable. Especially on the freeway.

I remember coming across this thread when I changed my plugs about a month back. I had 2 caps that were loose which I tightened, one which I cut, and one which was fine. After doing that the ride is very smooth and enjoyable, and the footpeg vibrations are all but gone.

Thanks alot FinalImpact and all who contributed!


Sent from my iPhone using Tapatalk
 
Top