Aluminum Bars, Vibrations, what to do

KB2WYL

CQ CQ, DE KB2WYL
Joined
Jul 26, 2015
Messages
160
Reaction score
2
Points
0
Location
Ferndale, CA
Visit site
Yeah Scott, I read through all your old posts on that. It's funny because I almost sold the FZ as well, and now I feel like I am an overprotective mother of it ha ha. I absolutely love the bike, and these bars as well. I get up to so many different things in my shop, and don't like getting stuck on one for too long, unless it just happens that the project takes a long time by nature. My vacuum tube amplifiers are like this, sometimes it's close to a year between design and construction. But with the FZ I really thought I was about done. My to-do list, after the bars, was about as short as maybe try out the mother's on the pipes, get some new rubber come May. I too have grip puppies under the tape on my grips, and with the steel bars on, didn't have any problems. It's a motor, sure I could feel vibration, but never bothered me and never noticeable in my seat (with my stock seat or with my newer Gel seat)

But, I'm not a fan of "band-aids", and so with this vibe issue, apart she came again. I hadn't changed the coolant in almost 2 years (still clean as new, and just as full), so I figured drop the radiator, make it easy on the plugs. Now with new plugs in (they're actually between 9-10 as compared to NGK, these ones are just copper Autolites), new gas, new coolant, stock trigger, I'm ready to sync the TBs again.

The way I have it figured (and please, let me know if you see any error in this) is that I will sync it with the homemade job and the stock trigger. That will get me to accurate and even, if not precise. Ride it. If the vibes are gone or at least much better, then I can start back one thing at a time.

First will be checking the plugs again. How is she running on the stock map, with just the normal air/exhaust mods? Second will be putting the modified trigger back in. Third will be adjusting mapping/fuel with the modified trigger. Each one of these three will be with not just an accurate sync, but also precise (actual vacuum levels) as by that time the Carbtune will be here (it ships from California via Ebay).

So, that should get me straight again. Not what I wanted to do, but when I'm done, it should be done for a while this time!

Oh yeah, and I have to make some sort of covers for the bottom corner of the upper fairing on both sides. Someone, somewhere, bumped into her and cracked the fairing so badly that when I loosened that last little screw holding it down in the corner (above and left of radiator cap), the whole corner fell off (everything to the left of that screw, about a 2"x2" piece)!! What a bummer. I super glued it back into place, but no way to effectively hide the scratch. So I'm going to make a little cover, paint it black, and epoxy that over the entire area, and then match it on the other side. It's always something....

Loren
 

TownsendsFJR1300

2007 FZ6
Site Supporter
Joined
Feb 7, 2009
Messages
12,532
Reaction score
1,178
Points
113
Location
Cape Coral, Florida, USA
Visit site
I agree, one thing at a time and monitor the plugs as well... I'd trust your homemade to get you pretty close(within spec at least).

I'm not big on major mods to pick up a couple HP. Love my Scorps, (just for the sound), but when folks start messing with mapping, air mods, timing etc, your going to run into issues. Yep, maybe some more power, less mileage, some backfiring perhaps...

I rarely run the bike to the red line, never checked the CO #'s(they are original as I know the original owner), cats still in. About 47 MPG around town, smooth idle, no de-cel popping, etc. It'll still lift the front wheel in first. I'm not worried about plugs cracking, etc... Should I want more acceleration, I'd do a sprocket change. Easy, cheap, no guessing re the engine "set up", etc... And you'll definitely feel the difference...

IMO, for ME, the factory dialed in the best for performance AND mileage stock..

Lastly, when I fine tuned the sync, I had my large commercial fan right in front of the header/radiator, on high speed.
Only because the bike was run stationary for a quite a bit to get the #'s so close. 10mm's (what the shop would do and then stop and usually only at idle) is a piece of cake and doesn't take 1/3 as long as I spent.. My local private shop, (I've known the owner and main mechanic since 1982), also check/adjust the sync at 4K(as I asked out of curiosity)..

As FI mentioned, vib's above 4K, the sync really won't affect anything when the butterflys are 1/3 or more open... A misfire, bad wire/plug, fuel, etc, that's likely across the board (RPM range).
 
Last edited:

FinalImpact

2 Da Street, Knobs R Gone
Site Supporter
Joined
Mar 16, 2011
Messages
11,137
Reaction score
184
Points
63
Location
USA, OR
Visit site
FWIW the Carbtune major graduations are in cmHg vs mmHg so it reads 18 cmHg, 20, 22, ect. and its resolution is 5mmHg on the smallest graduations... it can not measure a steady state vacuum like an actual vacuum gauge as it relies on the pulse of a cylinder (intake valve open, piston moving down the bore) to operate and the user must average where the rods dance at....

I think they have a video on their website to give you you a better idea.

I have one, it seems to work well but it does operate on the principle of flow as it is a controlled air leak that allows those rods to move and not be hydrostaticly locked in place... so it does meter a very small amount of air in to the engine but they seem to have normalized it and the rods which are always pulsing in motion appear to average out to the same value as that vacuum gauge I posted early.
 
Last edited:

KB2WYL

CQ CQ, DE KB2WYL
Joined
Jul 26, 2015
Messages
160
Reaction score
2
Points
0
Location
Ferndale, CA
Visit site
Alright guys so....

Yes Randy, hooking up one vacuum to all 4 lines on the motion pro. This is how it is supposed to be calibrated, and how I have been doing it. Problem is that lets say you do that at idle, mess with it and get all 4 meters reading the same, like they should be. Now, increase revs (increase vacuum) and all 4 meters go up, BUT NOT EQUALLY! Hence my not liking it.

As for the Carbtune, yes it reads in cmHg, but on a scale of 0-72 cm. At least that's the pics on website. I think you may have added some zeros, 180 cmHg :rolleyes:
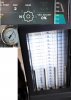
? Most of the vacuum gauges out there are on this scale as well, 0-30 in and 0-76cm, Hg. How much resolution depends on the size and scale.

But, I agree, the Carbtune does limit you to 5mm resolution, as there are 3 hash marks in-between every 2cm on the scale.

And yes, website even says they bounce a bit, but that they have changed the design to allow a little less flow, to aid with this.

Either way, those were the only reasons I was shying away from buying it, or any other one like it. I would like to find nice precision gagues that are more in the area of the vacuum we encounter here. Maybe 0-15in, or 0-40cm, that would allow me something more along the lines of 2mm resolution. Do I need all that for the FZ? No. As you have both said, the resolution and accuracy of something like the Carbtune is just fine. But the cost is probably about the same (good gauges, whatever the scale), so why not get something with good resolution in case I ever do need it. Also, I like vacuum gauges, because the vacuum I'm measuring may not always allow a little air in behind it, as the Carbtune does.

I just need to find some to at least compare prices and resolution. So far, I've only found the 0-76cm, and higher.


Scott, I respect your opinion, but personally, I like to play. It's not about getting a couple of extra horsepower for me, but just that I enjoy tinkering. Just MY opinion, but I don't think that these bikes, or any other motor vehicles under EPA and state restrictions, come from the factory running their best. When I modified the airbox, took out the cats, put on my cans, gave a bit more fuel via mapping..etc etc...all of these things made a positive, noticeable difference for *me*. And I try to be mindful of the bike's health, always. If I was racing, for example, and planned on rebuilding the motor, I might go leaner and get more power. But I'm not, and although I still have much to learn, I know enough about engines, mechanics, and electronics that I haven't killed anything yet :rolleyes:. Sure, sometimes I run into issues. This vibration is one. But it's not an "oh gosh I wish I wouldn't have done that, the bike is ruined" It's more of an "I really like the way that mod changed the bike, let's figure out how to get it working properly". In the process, I learn things I didn't know, and the end result is a bike which runs more to *my* liking.

We will see what the sync yields. You have both noted that only up to around 4K, 1/3 throttle opening. On the trip, seemed to me got better around 5.5K, and for what it's worth, a lot of the time throttle was 1/4 or less. Its hard to tell exactly what's going on after my hands are already stinging from the vibration and the way it affects my CTS, which is a real, scary, and annoying problem. Whether it helps or not, the tank is up from draining that fuel/additive, so I just want to cross it off.

And, one last thing that I think it important to remember. As far as other bikes, how this bike or that bike is running and the vibrations or lack thereof. With the steel bars on, this was not an issue. I, or anyone else riding the bike, would have said that the mods and general health of the bike seem to be fine, as she felt smooth as can be. Every motor has some vibrations, and this issue may very well still come down to those aluminum bars. Many, many riders have had this happen before, where they tried to switch bars and encountered a bad vibration situation from bar resonance.

Thank you both again for all your info and insight. It is always, much appreciated. Here in a couple of minutes I'm going to get into the sync. I'll take some pics and see what we can find out, about the sync.

Loren
 

KB2WYL

CQ CQ, DE KB2WYL
Joined
Jul 26, 2015
Messages
160
Reaction score
2
Points
0
Location
Ferndale, CA
Visit site
Well darn. So a few things. The homemade Manometer works great, but it is too slow. I had wondered about that, seeing other examples using 2 stroke oil like this....but in any case it worked....
But...

Ok so test conditions:
New Plugs
New Coolant
My oil is only 500miles old and full and clean
Stock Trigger
PCFC taken out so just running the stock ECU

I could get it to balance at idle, but when I went to rev up, immediately there is a huge misbalance. Seemed like #1 (which I did not touch) was nowhere near the vacuum of the others. It's hard to tell with this setup and so better meters are on the way, I'm tired of not having them.

But, when I went to rev up, I noticed what sounds to me like a misfire. I do not remember this from before. Not like I sit in the driveway and hold it at 4K, ever, but doing the sync before I do not remember this. Vibration at low RPM and revving up a little was not dependant on the sync, that's not what's going on here, I don't think.

I made a recording. Going from idle, up to 4K at the very end.

https://soundcloud.com/loren-coty/new-recording5

Thoughts?? What to look for? I'm thinking first thing first is pull those darned plugs again. They only had about 10 minutes of playing around with the sync, but should tell me something?

Thanks guys...

Loren
 

KB2WYL

CQ CQ, DE KB2WYL
Joined
Jul 26, 2015
Messages
160
Reaction score
2
Points
0
Location
Ferndale, CA
Visit site
[MENTION=15974]FinalImpact[/MENTION], I'm glad you had me make the recordings of the new exhaust. Going back and listening, there is definitely a lack of smoothness. The vibration I feel in the handlebars now, at low RPM testing in the garage, I don't think was even there when I left on that trip. Feeling it today as I was attempting the sync, seems I would have noticed it/or the rough idle.

Before I even pull the plugs to see cylinder per cylinder, I'm going to check some common culprits. Wiring to/connection of the Kill switch for starters. I'm racking my brain trying to think what could have changed, but the only thing I had unhooked during the handlebar change was the front break switch. Searching through posts here I see the kill switch, and dirty injectors, that I can try. Seems like the coils almost never fail, and if they do, they fail all the way and throw a code 33, right?. The gas that I took out of the tank (forgot to mention that in test conditions) was perfectly clean, and no water, and I did get it all out. Replaced with name brand 91. There was that number 2 plug that looked slightly different than the others when I pulled, but that could be from so many different things. .

So I suppose before I really dig in again I should just try a little seafoam (no one seems to have problems with this product, used as directed), and give a good check to every connection/ground I can think of.

'Til tomorrow,

Loren
 

TownsendsFJR1300

2007 FZ6
Site Supporter
Joined
Feb 7, 2009
Messages
12,532
Reaction score
1,178
Points
113
Location
Cape Coral, Florida, USA
Visit site
I can hear some of the "missfire" at the higher RPM's and the RPMs generally won't vary much when held steady.

I doubt you'll find anything at the handlebar kill switch, that usually kills the entire ignition system, nothing like what you have.

IMO, loose the 91 octane and run the recommended Regular fuel..

Your engine is back to stock right now. If you changed your CO #'s, put em back to the original #'s.

FI has a thread about checking spark plug wire ends. They can be an issue, check those. Fine vibs thru the entire RPM range IS how they behave.

Lastly, wait till you get the carbtune to proceed.

#1 TB is your baseline TB to sync to. Plz check and see what it's set to.
Page 3-7, S2 manual. The stock setting for the base screw is 3/4 a turn out.


.
 
Last edited:

FinalImpact

2 Da Street, Knobs R Gone
Site Supporter
Joined
Mar 16, 2011
Messages
11,137
Reaction score
184
Points
63
Location
USA, OR
Visit site
True dat! Stupid spark plug caps can be a PITA causing this. Although it is more prevalent under load than just doing static revs. The bobble / misfire during static revs is less of a concern unless it wasn't that way before. Is that new?

JM2C but if you have a vacuum gauge with real numbers on it, get idle speed to 1300 rpm @ 218mmHg ( 8.6 inHg ) and balance out all 4 sync screws as needed. The only tricky part is to make sure you still have control of your idle speed. As in, when done w/ sync screws and engine hot, make sure you can lower and raise idle speed using the thumb screw and vary it from say 800 to 1600 RPM. If not, you may need to open or close the sync screws equal amounts to center the volume of idle air available to regain control of idle thumb screw....

In the end you do not want the sync screws or thumb screw seated or out too far. Just a nice balance where the combination of the two find the happy spot.
In this picture you see the engine has 8.6inHg, all 4 holes are at ~218mmHG and the o2 sensor reports an AFR of 12.2:1.... it seems a bit rich for me so I later leaned it out so its not as stinky and its never died coming down from high rpms. I see on the FZ6R they leaned it out too... 236mmHg vs 218 which if an o2 sniffer were reading it would be 4.5% co2....

attachment.php


Going back to the cracked plugs, I didnt see a clear answer about what method was used to check ignition advance. Did the total movement exceed 0.100?
 

Attachments

  • IMG_20150427.Tuning1.jpg
    IMG_20150427.Tuning1.jpg
    83.9 KB · Views: 103
Last edited:

KB2WYL

CQ CQ, DE KB2WYL
Joined
Jul 26, 2015
Messages
160
Reaction score
2
Points
0
Location
Ferndale, CA
Visit site
Thanks Guys...

Scott, I am surprised you say that you doubt the handlebar kill switch could kill the entire ignition. Before this, the only problem I ever had with the bike was that switch. Showed up feeling like slipping clutch at high RPM. I happened to be perusing posts, saw someone else had that problem. So I took apart my switch and man, was it dirty! Heck with that, I soldered the two wires right together. Problem solved, no more "clutch slip". For that reason, I am 99.9% on the switch not being the problem, but I'm still going to check. I've been soldering for a long, long time, but we all make mistakes, and the handlebar area was only thing fiddled with before this showed up.

No, Randy, This was not present before, it is new. I went back and listened to those soundcloud recordings I made, just to be sure it wasn't me. Shoot, in the recordings I have the advanced trigger in, and the idle is STILL much, much smoother. Yes, Advance was verified. When I did it I came up with 4.5 degrees. When I just put new trigger back in, and did another 4 or 5 measurements, different ways, every time I came up with numbers ranging no lower than 4.4 degrees and no higher than 4.6 degrees. Total movement was in the 0.044" area, and methods used were both comparative (old wheel to the new wheel) and direct (old wheel, THEN new wheel, on the shaft, where a given tab ends up being) measurements.

I understand what you are saying about static revs not being as much of a concern, but the vibration is not "light", it is more of a heavy buzz. Remember what it felt like as kids riding a minibike with a lawnmower engine on it, It's got that centrifugal clutch that surely isn't completely balanced? There you go, that's similar.

CO numbers are back to stock, I should have just said: Test Conditions: Stock

And, both of ya, the spark plug caps were checked when I did plugs couple days back. Good connection there. I did not take them apart and measure boot resistance, but I seriously doubt that. I have had ignition problems in many vehicles from boots being loose (wires not screwed in, like happens here), but not once from a resistive boot becoming open (and losing resistance wouldn't cause this)

As for the sync, I have never messed with #1, but it is surely more than 3/4 turn out, looking at where some of the others are. I always wondered about that page in the FSM, it says "turn the screw 3/4 turn in". Did you guys find out that was a typo for turn all the way in, then 3/4 out, or did someone test the actual vacuum and find out 3/4 is in the area? Regardless, I will take them all to 3/4 turn out and start from there. When the gauges get here. Thank you both so much for the recommendations, Carbtune and dial gauges. I went with the dial gauges, only because when spending the $ I wanted to have a tool that can be used for other vacuum testing. They offer the same resolution as the Carbtune, and although not as convenient as having all 4 bars right next to each other, gauges don't let any air into the system. I know with Carbtune it is a very small amount, not harmful to testing the sync, but that might not be the case testing other equipment in the future.

When I do get them and am doing the sync, starting with all screws 3/4 out, where should I have the idle screw set to? Half way out?

Oh, and the 91 octane, I can't see where that would cause any problem? I always ran 91 octane and never had any issues. Obviously the octane boost was a mistake, and I won't be using it again, but I do still think that whatever gas is in there, the recommended amount of Seafoam would not be a bad idea. Maybe that octane boost gummed up the injectors a bit, and I have never seen so much as one negative review with Seafoam...


Thanks as always guys, I really do appreciate it,

Loren
 

TownsendsFJR1300

2007 FZ6
Site Supporter
Joined
Feb 7, 2009
Messages
12,532
Reaction score
1,178
Points
113
Location
Cape Coral, Florida, USA
Visit site
3/4 a turn out from lightly seated for #1 throttle body is about right. **The only time you would change it is if you run out of adjustment on one of the other cylinders...
(I messed with mine years ago trying to get the over suggested overall pressure what the book says. I'm at sea level and no way will it go that #).

The most important thing is to get them even-obviously.

I keep my idle at 1,100 normally but for the sync, I turn it up to 1,300 (it's still pretty close even when I turn it back down).

I also prefer to do the sync on straight reg fuel (probably not necessary), but I don't want anything else effecting what I'm reading.
Re the 91, unless your engine is knocking, detonation, etc, it's not needed. Regular fuel burns faster, high test slows down/helps prevent the fast burn/detonation.

*As a side note, on a Yamaha outboard forum I frequent, the issue came up on a certain engine.. The Master tech (30 years experience and KNOWS his stuff), brought up , for that engine, to lose the 91 and put in the recommended fuel...It can make a difference (at least in that particular engine).

Set #1 there, and adjust accordingly...
 

KB2WYL

CQ CQ, DE KB2WYL
Joined
Jul 26, 2015
Messages
160
Reaction score
2
Points
0
Location
Ferndale, CA
Visit site
Thanks. I also like to keep my idle low, around 1200. And yeah, I understand the octane difference, I just didn't think it would make that much of a difference in a static environment, as long as the two being compared were both known to be ok for the engine under normal circumstances. I wouldn't say that for additives+fuel vs 87, but thought that 91 vs 87 in a no load environment would be alright. Point taken, luckily I have a nice siphon pump that makes changing gas a 5 min operation, and, I am able to get down to a few oz left in tank.

Also, disconnected battery, to see if/what ecu reset effect has. This serves the functions of resetting ecu, and, checking battery connections off the list.

Thanks again,

Loren
 

FinalImpact

2 Da Street, Knobs R Gone
Site Supporter
Joined
Mar 16, 2011
Messages
11,137
Reaction score
184
Points
63
Location
USA, OR
Visit site
I can tell you from first hand experience that the cap to wire junction can indeed screw together snug and not turn AND you can have harmonic vibes that start about 4500 rpm. I cut the wires back several times only to have it come back again. Replaced coils and wires with 06 parts and have not messed with them since....

This isn't about resistance being lost. Its about inductance which changes the time of the spark delivery ever so slightly. Making the I4's firing sequence out sync and that is the vibe felt that got many of these bikes sold as they couldn't stand the vibe or fix it!

Try unscrewing the caps and triming the wires. You've had the plugs out several times and this could have compromised that connection.

You may as well measure the cap resistance and pair the low and high values to 1&4 and 2&3....
 

KB2WYL

CQ CQ, DE KB2WYL
Joined
Jul 26, 2015
Messages
160
Reaction score
2
Points
0
Location
Ferndale, CA
Visit site
Hmm...well it's definitely worth a shot. It is not happening any more above 4500 RPM though. From Idle on up. But yes, when I get the chance I will check them completely. Have they're been many reports of problems on the coil side, as well?

Thanks again,

Loren
 

KB2WYL

CQ CQ, DE KB2WYL
Joined
Jul 26, 2015
Messages
160
Reaction score
2
Points
0
Location
Ferndale, CA
Visit site
Randy, I'm doing the caps right now. None were "loose", but looks like a bit of wire detereoration, so hopefully it will help....

In that thread, you show your 4 plugs (original dual ground strap) and #2 having a bit more deposits than the other plugs. I coldn't find any mention of what you found the next time you took out your plugs, when you put in the CR10e's. Did it end up being the loose wire from the cap that caused there to be more deposits on #2?

Thanks,

Loren
 

FinalImpact

2 Da Street, Knobs R Gone
Site Supporter
Joined
Mar 16, 2011
Messages
11,137
Reaction score
184
Points
63
Location
USA, OR
Visit site
I beleive that was that cause but that cylinder also had the larger lash values on the exhaust. That said it could be a combination of things....

So, if you never changed sync screw #1 and had the CO values jacked, I can't imagine the idle was so good.

In short they verbally locked #1 sync in an effort to retain the factory set AFR in that, "IF" all things remain equal, a shop could easily set it and forget it without using an O2 sniffer. Remember if too lean, they die coming down from rpm and stall when cold. Too rich, they pollute and foul plugs if never opened up.
You changed the AFR the moment the CO values changed. If a vacuum gauge and/or O2 sniffer were connected while moving CO values, both would have reported the changes....

As it richens up the idle speed decreases and the vacuum drops. When CO values increase, you end up adding air via the 4 sync screws to maintain harmony among the 4 cylinders.

My idle sync is within +/-5mmHg across the board but the idle speed varies a bit at 1100 as the ignition is over advanced for that rpm. I'm fine with that as I don't idle from point A to B... You know! Also, on mine turning all 4 screws out an equal amount easily put them within 5mmHg of each other. It was pretty well balanced in terms of turns out to cylinder vacuum.

To your other point; yes, I do believe the coil side of the plug wire can be compromised! It is a push in straight pin, held by some kind of silicone and compression bushing. It is unfriendly to remove and assemble and there is no immediate source of 7.5mm solid core stranded wire that I have found unless I want to buy 100ft roll....
 
Last edited:

KB2WYL

CQ CQ, DE KB2WYL
Joined
Jul 26, 2015
Messages
160
Reaction score
2
Points
0
Location
Ferndale, CA
Visit site
Understood, Randy, about the screws. Makes sense, although, my idle was nice before. Listen to the soundclouds, it's a good idle even if I hadn't done the wheel.

And no, Scott, sorry for the mixup. I was not saying that anything had changed in the last day or two. I was saying to Randy hat the vibration is not happening MORE above 4500 than at idle or anywhere last below 6k. In his sticky for the plugs, he says vibrations from 4500 up. Still, I had wanted to check all the TB hoses and connections, and as it turns out a few plug wires WERE in not so great shape (though we'll see if it actually makes a difference in This case).

Long story short, there's things I suspect and want to check, and there's the stuff You and Randy have suggested. Doing all of it hopefully will squash the vibes, and a lot of it (all the connectors, the hoses, etc) was stuff I had wanted to get done anyhow before big riding season. Got halfway there last night. Plugs (caps) all measure within spec (9.2-10k ohm) lowest values to 1,4. Coils measure within spec, 1.8 ohm each.
And of course, doing it from topside to check coils, battery out.

We'll get it, and every last corner of the bike I hadn't yet explored or checked, now I'll know about it and it's condition as well.

thanks for everything guys,

Loren
 

KB2WYL

CQ CQ, DE KB2WYL
Joined
Jul 26, 2015
Messages
160
Reaction score
2
Points
0
Location
Ferndale, CA
Visit site
Hey guys, one more thing, then off to a Job for the day (putting in architectural posting/fencing in the rain, YAY!!). I was looking at youtube videos, it seems like no one does the 4K part of the sync....seems I remember that from before...but anyway that's not the point, I found this device:

https://tecmate.com/products/vacuummate/

Now, no, I don't want a digital vacuum meter, mine are already shipped and on the way. But I saw that this thing had a feature, checking vacuum pulses for noticeable differences in valve seating. Nice feature, makes sense, probably didn't take too much extra circuitry to add it. It got me to thinking:

Guys have been doing this with boats, cars, bikes, any multi-cylinder vehicles, for many years. I'm sure there are some tricks. Maybe if one of the vacuum gauges is fluttering more than the others? Maybe if one isn't as crisp on the up-rise when you rev? It struck me as it might be the kind of thing that someone wouldn't mention, but if they saw it when doing their own testing might say "Oh, I know what that is, looks like....."

So, I figured I'd ask you two. Any old knowledge like that, that comes to mind?

Also, Randy got me to thinking about the O2 sensor, and the F/A Ratio. Now, without my fuel controller plugged in for this testing, the closed loop should take care of it, but....I know in cars I've had plenty of them start to go without throwing any codes yet. Is there:

1.) One way over another you'd recommend testing it, or even worrying about testing it?
2.) Can I piggy back off if it to my VTVM, to actually measure F/A while I'm testing? I know some of the aftermarket controllers, like yours Randy, monitor F/A. And I'd have to assume that is what they are doing, monitoring the voltage return and just displaying it as a ratio. I know, it wouldn't do anything for real world under load riding, but it would offer a lot of insight as to what's going on with the sync/static running of the motor. "You've got this vacuum, good spark, stock ecu, stock gas....do you have stock F/A ratio?".....


Alright, off to work, hopefully get an hour or two in tonight.

Thank you both very much. This is the kind of stuff I was talking about, Scott. I know enough not to do something catastrophic, but still need to learn enough that I get to do things like this. I guess it's fun because of the fact that once I learn it, I know it, and then the next time or next bike, I'm starting from a point further ahead :)


Loren
 

FinalImpact

2 Da Street, Knobs R Gone
Site Supporter
Joined
Mar 16, 2011
Messages
11,137
Reaction score
184
Points
63
Location
USA, OR
Visit site
A couple of things: a set of 4 needle gauges on these engines does allow you to see timing events on a cylinder by cylinder basis (how far/wide does the needle swing).
Just like the carbtune you have to visually identify the average for each cylinder. It works. It is effective. Try it with one gauge and most can get them with 5mmHg of each if the valve lash is decent.

Its too much text for return on effort to go into detail but if you want more info about health and events a cylinder power balance test is a good real world test to check balance of a running engine. Although I'm not sure what the waste spark would think of that.

Next is testing at 4k.... for one, 4k static and 4k pulling 3rd gear are two dramatically DIFFERENT THROTTLE POSITIONS..... That said if you want to do your own test, screw two of sync screws in or out a good bit (20mmHg off) and go for a ride in 2nd / 3rd gear. Use your ear to establish where all 4 holes are happy again. Under load the throttle opening is much greater allowing air through the throttle body and If I had to guess Id say 2500 rpm maybe 2000 and you cant feel a TB sync imbalance of even 20mmHG as most of the the air needed for combustion is going through the TB...

When there is no load, ya, throttle plates are now 1/2 what they were and yes, TB sync gauge can read it and feel it.

Im just saying it is the idle circuit and having it perfect at idle is better than having it perfect at 4k. If a tiny compromise makes them both happy, great!

The biggest bang per buck making the engine smooth is taking the time to properly set the valve lash so the intake, compression and exhaust events happen in time with each other. Take the time to fit the right shim and you are rewarded with a smooth running engine and the sync will be a breeze because all 4 holes are doing the same thing at the same time..... Well assuming all holes have near equal compression and fueling and all that jazz!
 

TownsendsFJR1300

2007 FZ6
Site Supporter
Joined
Feb 7, 2009
Messages
12,532
Reaction score
1,178
Points
113
Location
Cape Coral, Florida, USA
Visit site
Short story re what you read on the net, what's true, what's not, dealer experience's...

What Randy and I have posted are what we have learned over the years. Myself, self taught, some help from the net. Randy's experience, way more than mine with mods(as I don't screw with it).

My 04 FJR, when still under warranty, had an intermediate running issue/misfire... Brought it to the local dealer to fix it.

They refused to touch it until I paid $125 for a sync..(didn't have the sync tool then). Of course I ok'ed it, issue still not fixed.
many calls to CA, mama yamaha main tech. Many hours later, still no fix. Home I go, crappy running bike...

Went to an FJR forum I frequent and found the potential issue. Lift my tank, a non sealed connector allowed water inside and lots of green corrosion. Cleaned, dielectric greased it, problem solved!!

2009 I buy the FZ and subsequently the Carbtune.

After dealing with the FZ, for S&G's I check the FJR. The FJR has FOUR separate TB's with a butterfly shaft adjustment screw between them.. Each of those screws have WHITE PAINT on them are NOT TO BE ADJUSTED (just like the single adjuster on the FZ). It's in big BLACK, BOLD LETTERS in the shop manual.

Guess what I found. My "professional" factory authorized TB sync (which I paid $125 for), the paint was broken on ONE of those screws-very obvious. The FJR is sync'ed the same as the FZ BUT access to the air screws is kind of a PIA and all on each TB. They were LAZY and changed the throttle blade (white screw) vs doing it correctly.. I put the screw back where it should be and re-sync'ed.

Point being, pay big bucks for a "PRO" to do something and occasionally (I have MANY MORE stories), sometime it DON'T happen and they make things worse. Do you think these "mechanic's would bother with a 4K check? It's NOT in the manual and time is money.. Do just what you have to, get it within 10mm's and get the bike out of there...

Lastly, I had, as I was getting ready to leave the shop with a poor running new FJR, a "mechanic" comes out and tells me the throttle lag was normal for all in-line 4 bangers. I told him to leave as he had no idea what he was talking about (BSing me big time).

You doing what your doing, spending the $ now for a good tool, to know it's done right is critical. My $125 was literally a waste of money, and I forgot, they SCRATCHED my nice silver frame while doing it...No extra charge...

You should be able to get the 4k pretty darn close and at idle. The 4K basically confirms the idle settings are close.

That's why I mentioned re-setting the CO #'s to stock(if you have them), syncing yourself, etc, just to get back to normal operation, vib free.
Then play all you want modding...
 
Last edited:
Top