Speedo backlight works but no info

austindv

New Member
Joined
Aug 20, 2016
Messages
31
Reaction score
0
Points
0
Location
College Station, TX
Visit site
If you set the clock, will it hold the time OR RE-SET as if you disconnected the battery?

Somewhat sounds like either a bad ground or a bad hot line (connection) going into the unit.

I'd double check all the wires from the meter back, again, while it's running and see if handling the wiring changes anything..


Just to clarify, did the bike ALWAYS SPIN OVER, but just NOT start?? OR, NOT SPIN OVER AT ALL.. (BIG difference).

The bike has not been spinning over at all. That was what made me think the battery was bad. But I knew that when I put the new one in and it didn't fire right up that something else was going on.

I feel like i've checked the wires from the meter down a thousand times, I made sure that all connections were solid and not 'kinda on there' but really good connections.

I can't mess with the meter right now as I have the battery out, trying to swap this starter motor which has been quite a headache this morning. But as soon as I can get the new starter motor in and everything put back together I can start playing with it.
 

austindv

New Member
Joined
Aug 20, 2016
Messages
31
Reaction score
0
Points
0
Location
College Station, TX
Visit site
Im not sure how someone could bypass the battery but this foolishly sounds like the gauage only has power when the bike is running. Is that possible? Thinks not... but.

What are you using to make these wire connection repairs? What are you using for insulation? If you pull firmly on these wires, will they pull apart? A good connection can withstand a tug.

You need a volt meter to diagnose this going forward. Check the off and running voltages. Verify connections can withstand a pull test and not fail.

Previously the gauge has worked fine without the engine running. This started right after I decided to put in the new battery box.

As far as making the repairs, I am mostly soldering the wires together and then using heat shrink insulation to cover the connection. All repairs go through the pull-test before I insulate them.

Voltmeter will be here tomorrow and hopefully this will all be resolved by tomorrow night.
 

austindv

New Member
Joined
Aug 20, 2016
Messages
31
Reaction score
0
Points
0
Location
College Station, TX
Visit site
Also, something doesn't add up. Putting the bike in gear has no impact on the starter. It is connected via a Sprague clutch which means the electric motor has to spin to make a connection to the engine....

It seems more likely the act of moving the bike / steering the bars acted on the wires poor connections...

Just throwing ideas out as we have no solid conclusions at this time.

That's what I thought! It wouldn't make sense for the bike to be constantly spinning the starter motor. Something has to be loose somewhere. It's just going to be a matter of tracking it down.
 

FinalImpact

2 Da Street, Knobs R Gone
Site Supporter
Joined
Mar 16, 2011
Messages
11,137
Reaction score
184
Points
63
Location
USA, OR
Visit site
For the record; soldering wires which see a lot of vibrations can lead to imbrittlement whereby the wire strands crack. This would be more prominent on those around the bars being turned constantly.

Troubleshooting: an option is to key on, hold starter button down and physically move wires looking for change.

Lastly a simple 12v test lamp can be used to see voltage potential.... you might grab one.

Did you download the FSM?
 

TownsendsFJR1300

2007 FZ6
Site Supporter
Joined
Feb 7, 2009
Messages
12,532
Reaction score
1,177
Points
113
Location
Cape Coral, Florida, USA
Visit site
Plus 1 ^^^. Put a volt meter at the starter terminal itself when trying to crank.

If your getting 12 volts there, then PULL the starter. You can pull the starter W/O yanking other parts (per the manual) but it is tight...
 

FinalImpact

2 Da Street, Knobs R Gone
Site Supporter
Joined
Mar 16, 2011
Messages
11,137
Reaction score
184
Points
63
Location
USA, OR
Visit site
That's what I thought! It wouldn't make sense for the bike to be constantly spinning the starter motor. Something has to be loose somewhere. It's just going to be a matter of tracking it down.

Before I pulled the stater motor I would jumper the solenoid a dozen times. If it spins every time you know its something else. How many miles on this bike and why was the battery box replaced anyway?

The solenoid can be jumped by using one of the clamps from a jumper cable and straddle both of LARGE studs with the battery cable going in and out. It will throw sparks but the starter motor should operate every time.
 

austindv

New Member
Joined
Aug 20, 2016
Messages
31
Reaction score
0
Points
0
Location
College Station, TX
Visit site
For the record; soldering wires which see a lot of vibrations can lead to imbrittlement whereby the wire strands crack. This would be more prominent on those around the bars being turned constantly.

Troubleshooting: an option is to key on, hold starter button down and physically move wires looking for change.

Lastly a simple 12v test lamp can be used to see voltage potential.... you might grab one.

Did you download the FSM?

I do have the FSM and have been using it as a guide. I pulled the starter motor before seeing your replies and have the new one in. I tested the old one with the battery and it did not seem to be working correctly. (Sometimes it would spin, but not every time) but the new one spun every time I tested it, so that should solve one problem. The bike came without a battery box so I had to put one in myself. I'm very much a newb at all of this so I'm kinda just learning as I go. I've worked on cars plenty but usually not electrical stuff.

Would it be worth going to autozone today and borrowing a voltmeter? My dad will have one here tomorrow but I wouldn't mind just knocking out these electrical problems today so that he and I can do what we need to to get it ready for inspection.
 

TownsendsFJR1300

2007 FZ6
Site Supporter
Joined
Feb 7, 2009
Messages
12,532
Reaction score
1,177
Points
113
Location
Cape Coral, Florida, USA
Visit site
You knocked out a bit.. Great, sounds like the starter was bad...

I'd just wait for your dad, another set of eye's doesn't hurt.. And he should know how to operate it.

Patience grasshopper, your getting closer!!!
 

austindv

New Member
Joined
Aug 20, 2016
Messages
31
Reaction score
0
Points
0
Location
College Station, TX
Visit site
You knocked out a bit.. Great, sounds like the starter was bad...

I'd just wait for your dad, another set of eye's doesn't hurt.. And he should know how to operate it.

Patience grasshopper, your getting closer!!!

I'm so excited! The new starter motor made SO MUCH OF A DIFFERENCE. The bike starts right up every time now!

Also, I was able to replicate the issue with the speedo by unplugging the regulator rectifier and then plugging it back in. Where is that thing supposed to bolt up? I know it's supposed to be close to the ECU on that bracket thing but does it go underneath or something? And how exactly does the thing work?
 

TownsendsFJR1300

2007 FZ6
Site Supporter
Joined
Feb 7, 2009
Messages
12,532
Reaction score
1,177
Points
113
Location
Cape Coral, Florida, USA
Visit site
Excellent!.. IDK off hand but look for mounting holes in the area. It can only reach so far...

It not being bolted down may not provide a ground ALSO causing some issues.

Look in the manual and a parts fisch (Partzilla) may help...

Playing with that plug, you may a wire going into it that's internally almost fully broken. Manipulate those once it's bolted down..


Looking at the parts fisch, it appears, the VR, part #18 has a retainer plate and it should be very close/above to the ECU which is under the seat:

Yamaha Motorcycle Parts 2005 FZ6 - FZ6ST ELECTRICAL 2 Diagram


.
 
Last edited:

FinalImpact

2 Da Street, Knobs R Gone
Site Supporter
Joined
Mar 16, 2011
Messages
11,137
Reaction score
184
Points
63
Location
USA, OR
Visit site
Sorry to post the whole thing... pictures are in here. On a mobile device. PITA to edit....

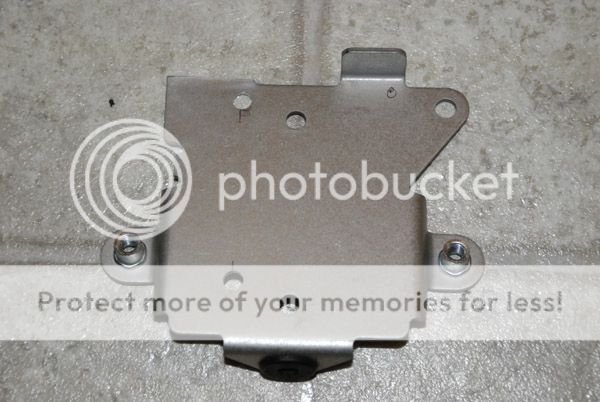
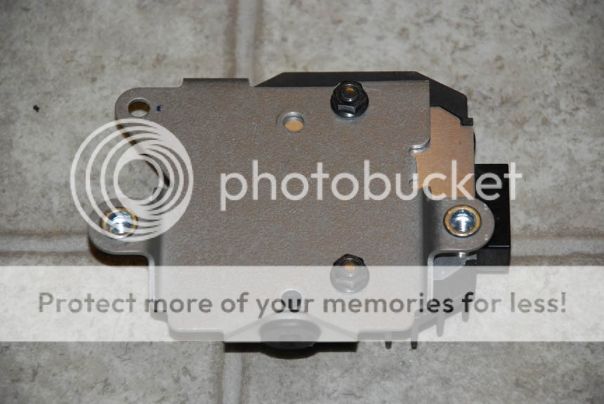
RR is on this aluminum plate. Do you have this?
See the tank mount. Those two bolts secure that plate to the chassis.

I'll delete the extra when on PC...
**********
R1 shock install....
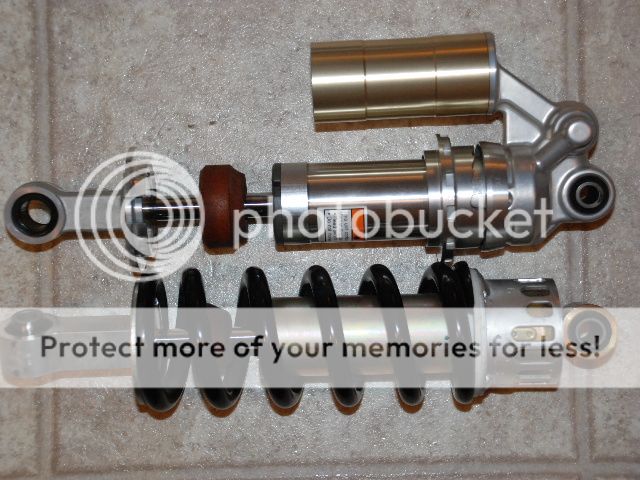
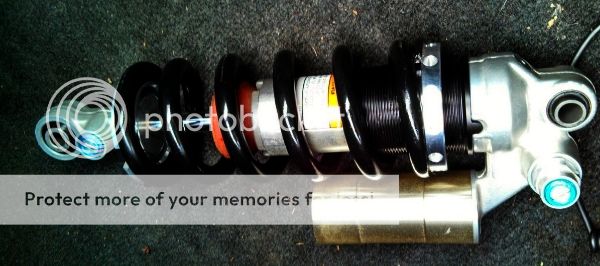
This has been done before but most chop up the hugger and under seat storage area to fit this shock to the bike. I did not wish to chop on mine as I need the storage and the hugger keeps debris off the shocks stem so it will last longer and not tear up the seal from debris being thrown at it. Out of pocket expense was $260. Modifications to the FZ are NOT invasive and can be undone. Plastic is the only thing trimmed out of the way for adjusting the compression and rebound. The shock bolts on once the upper bushing is replaced and is about ½ the cost of an Ohlins or other after market replacements unless you find them used. The catch; "for best performance" you need someone to take the shock apart and valve it for your needs and install an after market preload adjuster. This is NOT Required but Highly recommended!!!
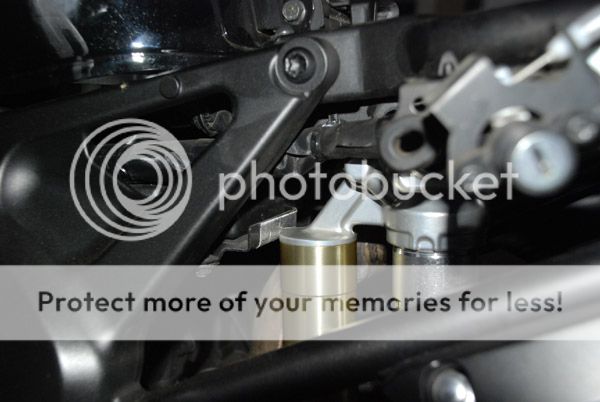
If you spin the shock around as I have done here, you retain all of the under-seat storage. The bike will look stock except the added nitrogen reservoir on the shock.

Me, I'm 205Lbs w/gear, ride aggressively in the corners and have R6 forks. Also I seldom ride 2 up or longer than 300 miles. I like my suspension FIRM but in contact with the road at all times. The Stock shock was on setting #5 and yielded 29mm of sag. So I kept my OEM spring and installed it on the R1 Shock. With the adjusting collar, the SAG was returned to 29mm which is good for me. You can not use the Yellow R1 spring its rates are to light. You can use your stock spring or you could use an after market spring. This is where a choice must be made as the installed SPRING HEIGHT for the R1 and the FZ6 is not the same. The "installed height" (space where the springs sits), must be returned to the same height the FZ shock body was at or your SAG will be altered.
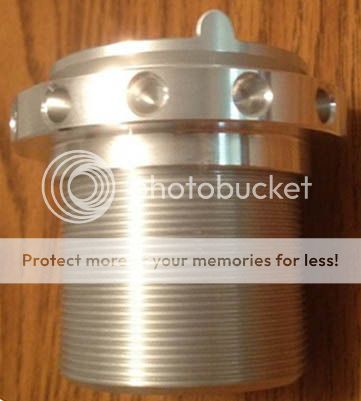
Options: Modify the R1 pre-load adjuster, Replace pre-load adjuster, install a custom spring, or for some, use as is. i.e install FZ spring on R1 shock - FZ6 setting #7 is equivalent to R1 Setting #1!

I went with an after market adjuster and installed the FZ OEM spring. However, this requires the shock be taken apart. We can discuss other options if someone does not wish to take the shock apart. Results may vary.

PAID LABOR:
Suspension person to revalve shock, fresh oil, fresh notrogen charge, install preload adjuster, install FZ6 Spring. My cost was $170
Your Labor:
Remove old shock, install replacement shock. Also, R&R tank, hugger, seat, etc.

Parts:
R1 coil over shock w/vertical reservoir 2001-2004 top/FZ6 bottom
SSC_566WEB_zpsa36766d1.jpg

IMG_20130608_105036_zpsb806d07e.jpg


30mm M6 X 1 bolt X2
20mm M6 X 1 bolt X2
Blue Loctite for these bolts
20mm spacer X2
12mm spacer X2
Large Zip ties to hold wire loom

Shock bushing P/N 34L-22216-00-00 ((Need a press to install this))
Shock Preload Adjuster Collars R1, RaceTech SYPA S4001 <<MUST TAKE SHOCK APART TO INSTALL!!!!
racetech1web.jpg


Shock bearing P/N 93315-31758 NOT Required unless yours are bad!!
Shock bearing seals P/N 93109-17071 NOT Required unless you replace 93315-31758

Tools:
Sockets, extensions, box wrench, screw driver
Drill & bits, sharp knife for plastic trimming / side cutters
Press to install upper bushing // mandrels for shock body-bushing
File - large
**

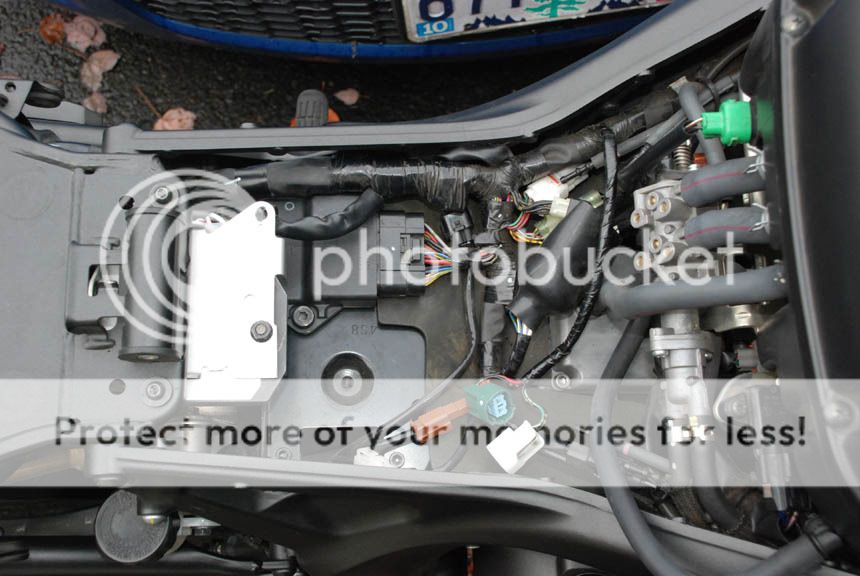
To begin; remove the seat, rear pods, fuel tank and disconnect the battery. Remove Rear hugger. This is up to you, but the under seat tray can be left or you can remove it. It's much easier if out of the way, but I suspect the work can be done with it in place. Its your call. Remove the ECM and Regulator Rectifier mounting pan.


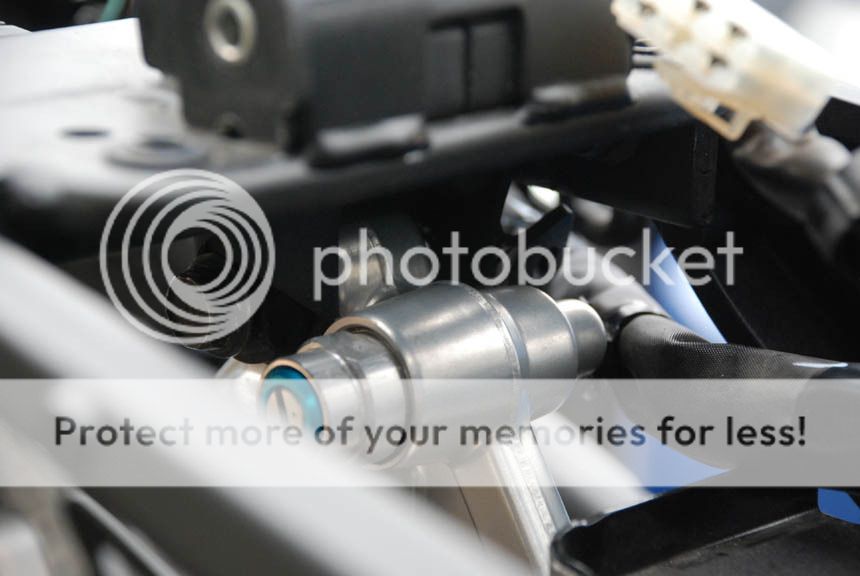
To spin the shock around and retain under seat storage, RAISE the ECM tray!
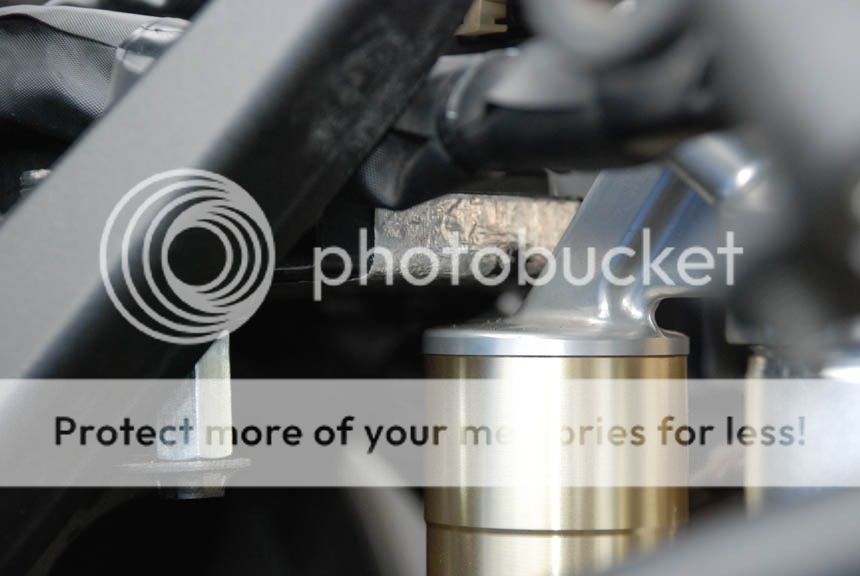
Here you can see the shock will not fit until the tray is raised. Once done, all is well.
_DSC5627WEB_zps4e232d30.jpg


The shocks compression adjuster will hit the Regulator Rectifier so it needs moved just a little. Shave off the tab on the mounting tray and drill some new holes moving it over and forward as far as possible.
_DSC5700WEB_zpsc60bd003.jpg


Also, bolt it on the proper direction, It be backwards in that shot!
_DSC5704web.jpg


Add a spacers to ECM tray:
Add 20mm spacers to the rear and 12mm spacer to the front of the pan. Install new longer bolts through pan and spacers with Loctite on the bolts. This will allow the shock reservoir to tuck nicely under the pan and still allow clearance of hoses and wires under the fuel tank. I unbolted the ECM, just to make it easier.
DSC_5705web.jpg

DSC_5711web.jpg


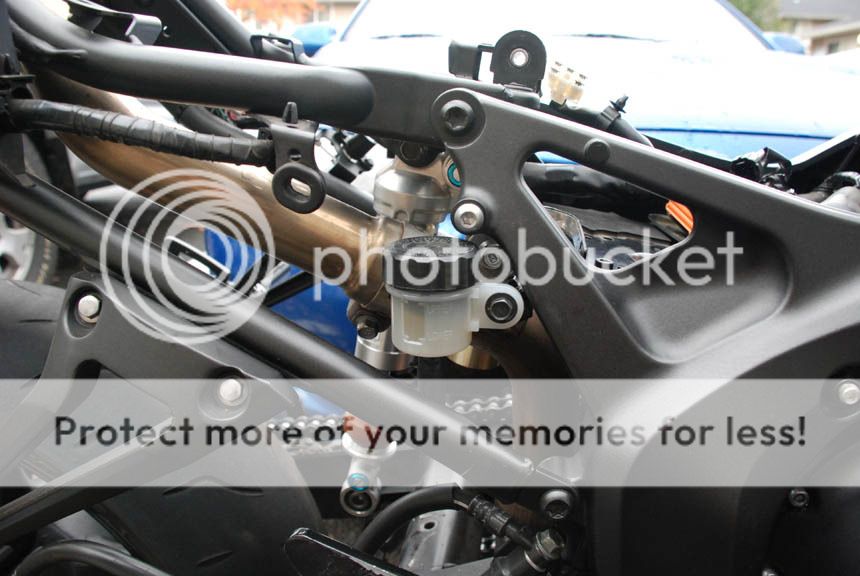
When the pan goes up, it hits the rear brake resivour. Unbolt it and bend the tab out slightly. Install resivour.
DSC_5707web.jpg


There is one tab for the ECM loom which needs bent. Bend tab so it does not contact shock or abraid wire loom.
DSC_5708web.jpg


Install and connect the ECM and RR. Work under the tank and seat is complete.
DSC_5710web.jpg


I have no pictures, but you need to press out the TOP BUSHING and replace it with PN: 34L-22216-00-00, as the R1 uses a smaller bolt.
Install RaceTech SYPA S4001 (must take shock APART) and FZ6 spring. NOTE: I paid someone to do this as I lack the proper tools. While the shock is apart; i'd suggest you have it revalved to center the rebound adjustment and tailor this shock to our bike. Remember the R1 uses linkage thus the metering to control motion has a different requirement.

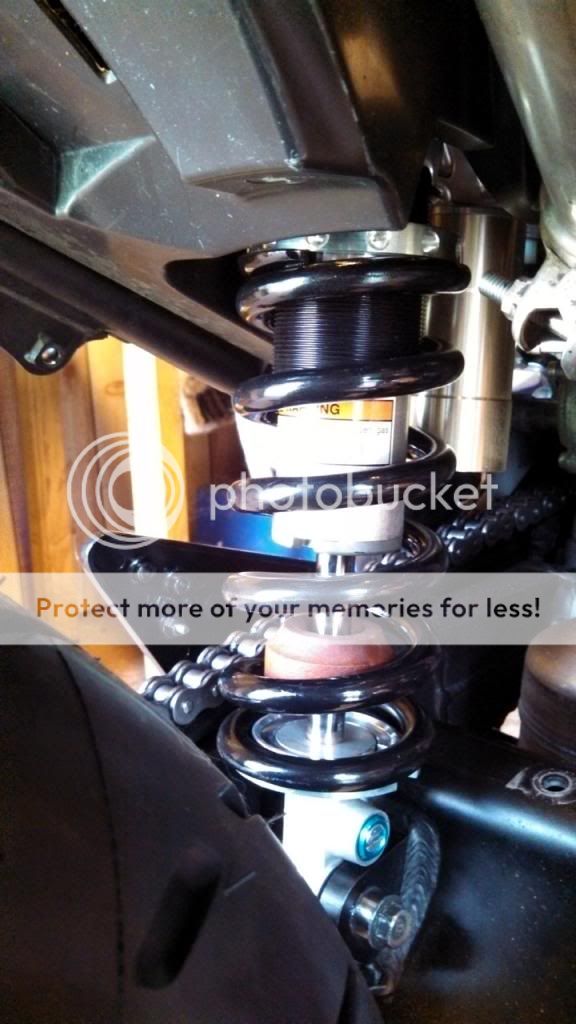
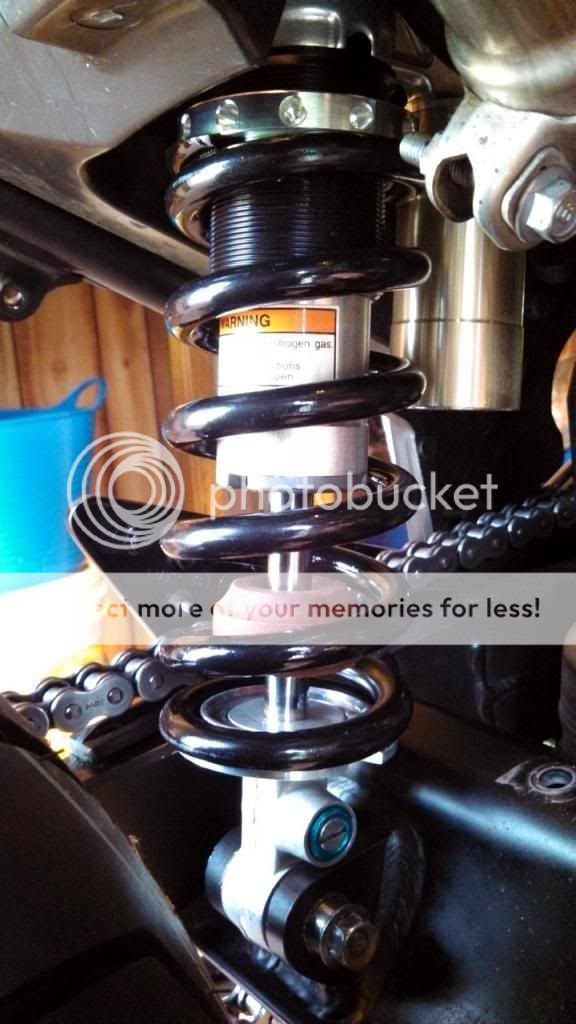
Installed:
When fitting the shock, use the longer machined shaft from the FZ6 lower bearing. Grease it, inspect the bearings and install the shaft and bolt.
IMG_20130329_142736_789WEB_zps6752db4f.jpg

IMG_20130329_142723_583WEB_zps9d0df3f2.jpg
 
Last edited:

austindv

New Member
Joined
Aug 20, 2016
Messages
31
Reaction score
0
Points
0
Location
College Station, TX
Visit site
Excellent!.. IDK off hand but look for mounting holes in the area. It can only reach so far...

It not being bolted down may not provide a ground ALSO causing some issues.

Look in the manual and a parts fisch (Partzilla) may help...

Playing with that plug, you may a wire going into it that's internally almost fully broken. Manipulate those once it's bolted down..


Looking at the parts fisch, it appears, the VR, part #18 has a retainer plate and it should be very close/above to the ECU which is under the seat:

Yamaha Motorcycle Parts 2005 FZ6 - FZ6ST ELECTRICAL 2 Diagram


.

Got it, there was a bracket missing. I ordered one on ebay so hopefully that helps with the issue.

I took the bike out for a quick ride around the neighborhood to celebrate the new starter and it ran great. No problems with the speedo the whole time. We'll see what happens as time goes on!
 

Motogiro

Vrrroooooom!
Staff member
Moderator
Elite Member
Site Supporter
Joined
May 8, 2008
Messages
14,998
Reaction score
1,166
Points
113
Location
San Diego, Ca.
Visit site
I'm so excited! The new starter motor made SO MUCH OF A DIFFERENCE. The bike starts right up every time now!

Also, I was able to replicate the issue with the speedo by unplugging the regulator rectifier and then plugging it back in. Where is that thing supposed to bolt up? I know it's supposed to be close to the ECU on that bracket thing but does it go underneath or something? And how exactly does the thing work?
Please don't run your bike with the regulator rectifier unplugged as you may cause serious damage. Wait for Dad and the Volt meter. Start the bike and gradually increase RPM while watching the voltmeter. If you're seeing above 15 vdc shut the bike off and find the R/R problem and repair it.

Sent from Moto's Motorola
 
Last edited:

austindv

New Member
Joined
Aug 20, 2016
Messages
31
Reaction score
0
Points
0
Location
College Station, TX
Visit site
Please don't run your bike with the regulator rectifier unplugged as you may cause serious damage. Wait for Dad and the Volt meter. Start the bike and gradually increase RPM while watching the voltmeter. If you're seeing above 15 vdc shut the bike off and find the R/R problem a d repair it.

Sent from Moto's Motorola

I didn't ride the bike without it, more just unplugged and plugged right back in to observe the change. I won't do it anymore! Where am I measuring from when I'm testing this? Over the battery or into the speedo or?
 

austindv

New Member
Joined
Aug 20, 2016
Messages
31
Reaction score
0
Points
0
Location
College Station, TX
Visit site
You did have the VR plugged in correct with your test ride, just not bolted down?

Did the PO move the VR more forward or ??

Yes, plugged in, not bolted down. The PO just has the thing unbolted and dangling down in there.

I started the bike tonight when I got home (mostly just to enjoy the fact that it fires right up now) and saw that the speedo wasn't showing anything. I waited for 30 seconds or so to see if it would come on by itself. It didn't so I reached down to grab the regulator so I could fiddle with it and it was very warm. Like way hotter than it should be after 30 seconds of just idling. Also when I picked it up and moved it around the speedo would go on and off intermittently. Should I go ahead and order a new one?
 

FinalImpact

2 Da Street, Knobs R Gone
Site Supporter
Joined
Mar 16, 2011
Messages
11,137
Reaction score
184
Points
63
Location
USA, OR
Visit site
New one, as in speedo?
No.
Lets see some pictures of the repairs. My thoughts are one or more of the repairs are not healthy. As in, when the gauge gets proper inputs from the system, it works. Yours works. Point, it is something else.

With a new RR that has proper control of the system voltage and current, then you can assess the remaining faults.

Hang in there. You are getting closer.

So tell us us some history here. What was the condition when you met this fine lady!?
 

austindv

New Member
Joined
Aug 20, 2016
Messages
31
Reaction score
0
Points
0
Location
College Station, TX
Visit site
New one, as in speedo?
No.
Lets see some pictures of the repairs. My thoughts are one or more of the repairs are not healthy. As in, when the gauge gets proper inputs from the system, it works. Yours works. Point, it is something else.

With a new RR that has proper control of the system voltage and current, then you can assess the remaining faults.

Hang in there. You are getting closer.

So tell us us some history here. What was the condition when you met this fine lady!?

When I first got her she was looking pretty rough. Wires all over the place, mirrors broken, sh%tty cheap amazon headlight rigged up to the front with hose clamps, just really rough. She's been laid down a time or two, but I got a good deal on her. So far I've put in a new battery, replaced the clutch, repaired the wiring, put in the battery box, and put on some new mirrors, as well as changed the starter motor yesterday. The speedo started working once I repaired all of the wiring and was working fine until this last week.

In the morning I'll be putting on a (slightly) less sh%tty headlight and I'm waiting on the new RR unit and a tail light socket. I'm hoping that those things will be on and working properly so I can get it inspected and registered in my name.

Future plans include a MT-03 headlight, new front turn signals, a new tank, and a new seat. I want it to be reliable enough to get me to school and work and then back home. So right now I'm just trying to work out all of these little kinks.
 

TownsendsFJR1300

2007 FZ6
Site Supporter
Joined
Feb 7, 2009
Messages
12,532
Reaction score
1,177
Points
113
Location
Cape Coral, Florida, USA
Visit site
Yes, plugged in, not bolted down. The PO just has the thing unbolted and dangling down in there.

I started the bike tonight when I got home (mostly just to enjoy the fact that it fires right up now) and saw that the speedo wasn't showing anything. I waited for 30 seconds or so to see if it would come on by itself. It didn't so I reached down to grab the regulator so I could fiddle with it and it was very warm. Like way hotter than it should be after 30 seconds of just idling. Also when I picked it up and moved it around the speedo would go on and off intermittently. Should I go ahead and order a new one?

Sounds like it's charging more than it should, thus, the excess heat. The new VR should fix that.

I don't think I'd run it till the voltage is checked, It should be around 14 volts up to 5,000 RPM's.

Check at either at the battery or at the VR itself.


Here's a video I made of mine showing the charging voltage (with dual operating LB headlights)
to give you an idea:

https://www.flickr.com/photos/147134237@N06/29303851750/in/dateposted/


.
 
Last edited:

Motogiro

Vrrroooooom!
Staff member
Moderator
Elite Member
Site Supporter
Joined
May 8, 2008
Messages
14,998
Reaction score
1,166
Points
113
Location
San Diego, Ca.
Visit site
Make sure you carefully examine the plug wiring for regulator/rectifier. The regulator on the bike is what is termed a shunt type regulator. This means as the battery reaches it's top off voltage, the regulator conducts the current to ground. This creates a lot of heat at the regulator heat sink.
This is also why you should never jump start a bike from a car which has its engine running. The car alternator produces too much current for the bike regulator to handle and can be damaged. You can jump start from a car, but no engine running. Double check the r/r connections.

Sent from Moto's Motorola
 
Top