• Welcome to the Yamaha FZ6 Forums. Member registration disables ads and allows you to post and share. Register Here.

Error 33 breaking my bike abroad- urgent help please

I'm not familiar with Nikasil so perhaps you made the correct decision.

You didn't happen to do a compression test before disassembly did you? (IE, #4 low)

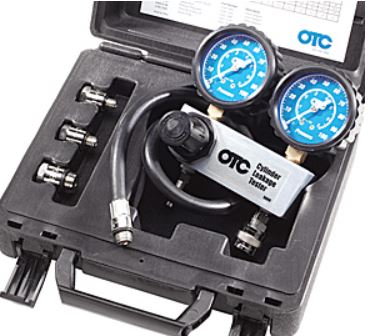
Once you button up the crank, piston and head, you can do a LEAK DOWN TEST. This is normally done at TDC, valves closed but your "issue" is towards the bottom of the cylinder... (The engine doesn't need to be installed)

With that cylinder sealed, get the crankshaft towards the bottom (or at the bottom) of it's stroke, valves CLOSED. Then test it. You'll need about 100 PSI air compressor. The gauge on the tool will show the % of leakage. If leakage at a valve, say an exhaust valve, you'll hear it come out the head where the header bolts up to. Ring leakage you can hear air in the crankcase. If leakage is minimal for your test, (I suspect it will be), you should be good to go..

This is the tool I use:

https://www.otctools.com/products/cylinder-leakage-tester-kit

 
Last edited:
Thanks!

Unfortunately I don't have an air compressor as I wouldn't have the space to store it. And suppose I did put it all back together and found out it was leaking- then what. Bang my head to a wall for wasting new parts on a compromised block :( . It's not like it'd be possible to then open it up and replace the sleeve.
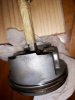
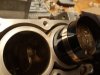
What is upsetting is that I've found out only now, AFTER spending all those hours and close to 1000$ in parts. Unless the light shines from a certain angle, it is impossible to see it. Could have just gotten an used engine for about half that money and replace it in two hours (and even gotten back some $$$ by parting the old engine) , but I chose to rebuild it hoping to get it nearly as new. Especially with the factory honing intact, it seemed like the cylinders were in excellent condition.

So now it is what it is. At least it's in the first half of the stroke, before where it starts to really pick up compression.
 
I think your going to fine with it.

Yes, your going to have to get it at the right angle with the light but if it's bad, you'll see light.

Movement in the cylinder is (obviously) just up and down.

That "stain" doesn't seem to be like a ring scratching the cylinder, or part rattling around when the engine wasn't 100%.

I assume the #4 piston, in that same area doesn't show anything unusual? There should be a cylinder to piston gap spec.
Checking that might let you know if anything is really amiss...
 
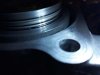
I've checked the corresponding area of the #4 piston- it's the polished corner of the skirt, see attached. Perhaps there was some excess material in the piston from manufacturing?

And I've tried the light gap test you suggested but it's inconclusive. With oil that spot gets fully covered, and without oil it's too risky to scratch the cylinder with the one of the ring's edge. All rings from #4 look evenly worn.

Remember that I got a "new" complete ebay gearbox with low miles (and low wear) as the old one had the sprocket's retaining clips quite loose. Managed to fully install it today- though I only put very little oil (wouldn't want it to become a dust magnet) it seems that the axles rotate more freely than originally. Also replaced 2 of the bearings, and put some retaining compound inside the ID of the bearing where the axle was free spinning in the bearing's ID. Shift drum is a bit rough to rotate in some spots, but perhaps that's because of the low oil covering it and it being designed to be moved in quick and precise maneuvers, not slowly rotated by hand. Selector fork dogs looked almost like new.

Tomorrow I wish to at least mount and plastigauge all bearings, and ideally also put the new rings and install the pistons + crank.
 

Attachments

  • photo_2018-04-20_03-15-23.jpg
    photo_2018-04-20_03-15-23.jpg
    71.6 KB · Views: 43
Installing pistons is easy, right? Lube everything, wrap the piston with the tool, screw tight, position above cylinder, keep the tool flush, and gently tap in. WRONG!

Today I've struggled for 2 hours, with no success, to insert the pistons. Even tried to keep the pistons in the freezer- that almost worked, but not quite- the oil rings got in, but not more. And though I didn't try to force them in, at least the oil rings likely got fiddled with way to much for a new engine.

Turns out- the POS adjustable tool came crooked from the factory, not sitting flush with the engine block. Ordered another tool from another brand. Yes I am aware that it's probably best to use a tapered tool, and second best a pliers type tool, but neither type is available locally.

I'm getting tired of these curved balls. Friday my road inspection is due. Unless I get it working and at least partly broken in (50-100km + oil change) by then (slim chance), I'll need to trailer the bike to an inspection center, and there it'll get revved the **** out of it on no load for noise and emissions recordings while being on a freshly rebuilt, not broken in engine. So long for any break in theories. The alternative to that is breaking it in on the streets- riding with an expired inspection, and if caught getting a big fine + license plate and registration confiscated + getting the registration suspended + having to pass a mandatory inspection at the state automotive registration agency (extremely strict, 10x worse than the privately owned inspection center down the street).
 
Your getting close... Stuff happens..

Assemble it correctly, then if there's a track around, take the bike there. That or some streets out in the boonies...

Heat cycles are the biggest thing as well as running up and down thru the rev range. All your really breaking in are the piston rings.

I did a semi "Moto-Man" break in with my 04 FJR, (up to 8k new, red line was 9K). Lot's of silvery but the oil was changed at 30 miles, then again at 500, then normal times.

In your case, everything is NOT new, "metallic's" inside will be very minimal.. Obviously, don't use synthetic for awhile...


Did you try bending the compressor back square? You have nothing to loose...
 
I've tried everything, even fitting it upside down and finally even cutting it down (the excess material also made it oval). See the attached picture- while it is upside down (and oval), you can see one of the spots where it is warped. Bending it back in shape just creates waves in other areas, and I'd try to beat it against a vice (used as an anvil) but it is riveted and won't just pull out.

The track is a good idea. There is a go-kart track within an hour from me but it will be tricky- there is no preset schedule for motorcycle access, only 10-30 minutes between now and then, announced after phone inquiries (and as I've heard, not 100% reliable). Add that to having to book a trailer at least 3 days in advance, and see why it could be "fun". But I'll delay stressing about that until I get it all in one piece and running.
 

Attachments

  • photo_2018-04-24_02-35-20.jpg
    photo_2018-04-24_02-35-20.jpg
    56.5 KB · Views: 42
I have a similar ring compressor (collecting dust but always worked).

If you have a "cut off wheel-air grinder", perhaps shorten that ring compressor so the tightening strap is MUCH closer to the rings. Yours appears to be like 25mm's away from the actual rings.

I gather your using lots of motor oil on the rings, bore, tool, etc?

*Looking real close at your pic, seems the block has a slight taper at the top for assembly. Did you make sure the tool didn't slip into that taper?
 
Last edited:
I did finally cut out of it, all it took was a (likely ikea) regular household scissors. No success.

See this video from linked time: https://youtu.be/Lb9uFWRSdbs?t=488 . Yes this is not the same engine as our FZ6s (being a 08 r6), but it is very similar. Notice how easy the piston got in? I must have used at least 4 times more engine oil, still with no luck.

As for the top cylinders chamfer- it didn't have anything to do with the tool, but since you've mentioned it, I did take a look closer look at it. Compared to the chamfer from that r6 video, mine is much larger (and by checking on ebay, so are all others from FZ6 engines).

It's like a real life soap opera with all these plot twists- placing the piston flush reveals that the lowest oil ring and half of the oil expander are sitting below "ground zero", where any piston compressor tool could reach them. See the attached pic. And here is a diagram showing what really happens https://www.techtips.ie/Pierburg/cylinder-chamfers-during-engine-reconditioning-work.pdf

So actually I do need a tool that gets inside the chamfer. Apart from custom ordering one made on a lathe, I really don't know what to do. I'm surely not willing to ram it down with the hammer, and neither "help" it get in with a thin flat screwdriver. If anyone has fitted new rings on this engine, please show me what tool you used for the insertion.

ps:just got the idea of (again) freezing the pistons while wrapped with the new tool (which should arrive tomorrow)., perhaps that will work
 

Attachments

  • photo_2018-04-25_01-18-43.jpg
    photo_2018-04-25_01-18-43.jpg
    37.5 KB · Views: 32
Last edited:
The one on that link is what I have... I never had an issue with it (small engines, not an FZ).

At this point, I'd probably look around for a better unit, (you get what you pay for) and go from there....

Most of the small engines I currently work on (2 strokes with retaining-keeps rings from rotating), the piston goes in from the bottom of the cylinder using ONLY the cylinder chamfer.

Not in the S2 manual, but the S1 manual, the ring compressor used:
(Admin, below pic expires in 7 days):

 
Last edited:
I did order another (should be better) tool, but now I don't think it will do much good.

Couldn't find a real life pic of the yamaha tool, but here is a very similar one for hondas
ring-compressor_medium079542830000-01_4123.jpg

You can clearly see that it is made is such a way as to get inside that chamfer.
 
If you want something even funnier- ALL yamaha tools going by those codes are discontinued, without any direct replacement.

After "reverse engineering" all those honda tools - finding out what model they are for, and searching the specs for the models bore, it turns out that neither are close to the fz6 bore.

One final effort- one guy told me to use the tin from a beer can + zip ties, and shove that inside the chamfer. After wasting 2 more hours for nothing, that didn't work either. In total I've got about 6 (six) hours wasted fiddling with the cyl 1 piston, and about 1,5h researching about the magic tool.

Also at this point I'm beginning to think about the integrity of those rings (there are no visible marks, but even so...).

Now the only thing left is to order a custom piece made on a lathe. Looking at my calendar- adding the time to get the part and the time I'll be away with work, the soonest I'd be able to use it and hopefully get those pistons inside the block is 12th of May.
 
Finally some good news- dad knew a guy who knows a guy, and arranged for an "gentle inspection"- bike will be revved up to 2000rpm and for a minute at most. So at least the "bike will get it's guts reved out on no load while on a fresh engine on inspection" part is settled. :D
 
The saga continues- there were some complications with the machining of the ring insertion tool; long story short it still is not ready, and hopefully I'll be so by the end of next week.

While I'm still not giving up on the FZ6, I'm done being bikeless. For a second bike, I did originally intend to get a more touring suited bike (even started a thread for that), but with the local market lacking in good sporty-tourers and the budget not really allowing something like-new (costing 7-8000€), I could only narrow it down to a VTR 1000F and CBR600 f4i.

Especially the VTR seems appealing, having both the best service history - full log on a forum since 2015 with lots of things done such as new CCT, brakes and forks rebuild, new battery- and the best price (very unpopular model). I'm not the biggest fan of 2 cylinders, but I've only ridden twins not Vs- some GS500f and a ER6n, so not really comparable. Should it still be on the market by next weekend and check out fine, I'll probably get it. Regardless of it lacking 2 cylinders, provided that it's as advertised, nothing would give similar value for money.
 
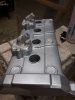
One more little update: I've started to paint the engine. Here is a little teaser: the valve cover primed and painted (will matte clear coat it tomorrow). Have the engine block fully masked; I'll degrease the side covers, lightly sand them and perhaps fill the small scrape from the stator cover, and will paint it all in one go. The engine head will get done last.

Also- perhaps I forgot to mention, but 2 weeks ago I've also lapped the valves.
 

Attachments

  • photo_2018-05-21_17-26-43.jpg
    photo_2018-05-21_17-26-43.jpg
    65.7 KB · Views: 34
I had some decent scrapes in my stator when I got the bike.

They sanded out with a random orbit sander (no bondo).

Re-painted and sold it as it looked stock (with the mention of the repair).
 
Turns out power tools weren't needed- after 10 minutes of hard applied elbow grease with the 80 grit sandpaper I got the scratches smoothed out (took about 1mm off).

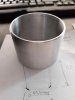
I've (finally) just gotten the piston tool. Bad news is that it wasn't build to my specs (ID is 0,1mm too small and not enough bevel)- it wasn't the same guy who did the axle spacers. Good news is that at least it's made out of aluminum, so it will be quicker to sand down than to have it rebuilt. After all something is better than nothing.

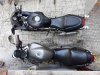
Bonus photo: top view of the fz6 next to the VTR1000F I've just bought today.
 

Attachments

  • photo_2018-05-24_17-53-58.jpg
    photo_2018-05-24_17-53-58.jpg
    47.1 KB · Views: 39
  • photo_2018-05-24_15-40-28.jpg
    photo_2018-05-24_15-40-28.jpg
    99.3 KB · Views: 38
Back
Top