• Welcome to the Yamaha FZ6 Forums. Member registration disables ads and allows you to post and share. Register Here.

Error 33 breaking my bike abroad- urgent help please

Can you measure the colored ones you have and get a general Idea of what size say a red bearing is? Then go from there getting new bearings?

**I posted, on a Yamaha Out Board engine forum, a question re your bearings (click below link). Several members are EXTREMLY knowledgeable in this particular area. I believe the OB engines use similar color codes. If anyone knows, they would-no doubt.

Follow that thread, they respond pretty quickly....

Main Crankshaft bearing colors / spec's - follow link please - Yamaha Outboard Parts Forum
 
Last edited:
Thanks for forwarding this issue on the other forum.

What exactly should I measure? Should I close the 2 halves together, say with masking tape, and then measure the ID?

Also, if the bearings specs aren't to be found, journal specs for each number code should also prove helpful- though it's not too likely that the journals simply got ground down a few sizes and then got perfectly polished.
 
I believe, properly, pull the crank, insert the main bearings and torque the caps back(actually, I guess that'd be the entire lower engine case).

There IS a response from a 30 year MASTER TECH (EXTREMLY knowledgeable) on the Yamaha OB forum / link. That should help...

He does EVERYTHING, including cranks/bearings, etc...
 
I've read the reply- he says that there are no undersize bearings - I am aware of that, however if my logic is correct, an undersizing effect should be achieved by using a tighter bearing code.

I did manage to find some bearing specs, but for 'busa: https://motorcyclemaniac.files.wordpress.com/2011/11/busa_bearing_chart.jpg . I wouldn't want to take a decision under false assumptions, but there seems to be around 0.004mm gap between each color, meaning 0.008mm for the pair.

As for torquing the screws before measurement- I must add that the plastigauging was done at moderately tight (about 180 degrees after full contact/finger tight). Everything I've read of engine rebuilds stated that when plastigauging a snug tightening is sufficient. I will however repeat the plastigauging and tighten to specified torque.
 
Ok, I've just remeasured, this time with the torque wrench. Turns out my "moderately tight" was about 60% of the book torque.
Now all bearings measure just under 0.05mm (0.046-0.048), nearing the upper limit of 0.052. New bearing of the same size will probably give me an extra 0.006 or so, yielding a final clearance of around 0.04mm (manual says 0.028-0.052mm), which should put it right at the middle of the spec :D . Especially since this is a quite high rpm engine, too tight wouldn't be that great either.
 
Sounds like you can start buttoning her up!!

Pretty big difference in ID tightened down that 40% more!!


Bunch more info on the OB forum, the guys eat this stuff up!!
 
Last edited:
Yup!
I've placed the order on partzilla, it should take about 7-10 days to ship + probably 5-7 in the customs.
In the meanwhile I'll strip and primer+paint each engine part, and finish the last checks remaining on this engine.
Apart from the exhaust camshaft (intake one check out fine) and the flywheel and starter clutch, for which I still don't have a puller (but those could also be checked with the engine on the bike) I've checked and measured every single part on this engine.

I don't like playing the "what if" game, but if it still won't sound right after all this, then I really don't know what more I could check or do to it.

A final report after all this:
-hard to spin gearbox bearings > replaced with new
-bit excessive slack due to worn gearbox cogs clips > replaced full gearbox with one from ebay low milage bike
-oil pump at the upper limit > replaced with one from ebay low milage bike
-all plain bearings nearing the upper limit > replaced with new
-a few leaky valve seals > replaced all with new
-loose timing chain > replaced with new
-moderately worn timing chain guides > replaced with new
-timing chain tensioner with marks of not working 100% right > replaced with new, manual APE
-crank, rods, cylinders looking like new
-pistons almost like new, pins and pins bores in spec

-all replaceables such as piston circlips, piston screws and nuts, head gasket, etc bough new
 
If It literally sticks out, (can catch it with a finger nail), that noggie needs to come off or it'll eat the aluminum journals..

Id probably hit it with a very fine file, but if scotch bright works, even better. Just maybe check with a micrometer. Worse case, a new cam but it doesn't loo that bad.. Obviously, you don't want it "eating / tearing up the head as it spins..

That chain tensioner looks like it has a bit of wear on it, you can see the factory edges, AND edges where the chain wore it a bit..
 
Yes those grooves do catch the fingernail. There are also some grooves in the "bearings", especially the top cap. It seems as if it caught a few particles of something, and those just made their way through the aluminum. Perhaps the previous owner opened the valve cover under improper conditions, because I couldn't find any indications of what could have caused that.

As for the tensioning chain guide, I probably didn't mention but I got a new OEM one already.
 
Yep, I read you got a new guide... Real important, lots of tension on that guide..

Agreed, sounds like some crap got in there (when possible apart) at one time... There's not much you do with the head with no separate / independent bearings.

Dunno what the plastic gauge spec's are on the cams-wouldn't hurt to check..

Just smooth things down, just enough, you should be ok..

Certainly doesn't look bad enough to replace the head and camshaft..
 
For the most scratched journals it plastigauged at 0.055-0.06, with the upper limit being at 0.08.

I've also ordered the cheapest brand name mineral oil I could find (repsol moto rider 10w40), as everywhere I've read suggested that anything better than 100% mineral makes it too smooth for proper rings sealing. For the break in, I'm planning the 1st oil change at around 50kms, and the second at 4-500.

PS:partzilla just emailed me, they'll ship the parts on Friday, so they should clear the customs and get to me by mid Feb. Dunno how tight time will be, esp with a 1 week work trip already set, but hopefully this engine will all be in 1 piece by 1st of March. Then, if the weather allows, I'll put it back on the bike.
 
Sounds great!!!

IME, do lots of heat cycles initially... And obviously, various RPM's

Years ago, (2004), I did a semi "moto-man" break in procedure on my FJR (just shy of red line when new), plus many heat cycles. Changed the oil at 50 miles (bunch of silver crap came out) and again at 500 miles (very little if any metal). Then normal oil changes..

Worked great, never had any oiling/burning issues and would do it again on a new bike..

Just my 2ct's, something to consider..
 
Last edited:
I know about the motoman break in procedure, however due to traffic (I live quite close to the city center) and cold asphalt (it will likely be 12-15 Celsius) I might not be able to load it that much- though the fz6 is not a turbo 'busa, it still gets to 100kmh in 1st gear.

Also, to aid the ring setting I'll "deglaze" the cylinders with a scotch-brite pad, manually following the original cross hatching marks.
If all goes well, this engine should probably last at least 100k more kms :) .

Quick to do list for myself:
-polish exhaust cam journals
-strip, mask, prime and paint the engine case- for better results I'm thinking of doing that with the engine case parted (hopefully GF will quickly get over me doing all that inside the house :)) )
-plastigauge all new plain bearings
-perfectly clean the work area, all parts and reassemble
-contact spray all connectors
-put the engine back in
-put the radiator, coolant, engine oil, connectors and exhaust
 
Had some delays- first it was the returning winter, then some other issues, then the easter break. Now I've finally made some progress- the engine is almost fully stripped, by tomorrow I should get it fully masked, and should it not rain I'm hoping to at least prime it by the end of Sunday.

Can't wait to get it properly running again! Took off the covers for "inspection" today, and to my embarrassment (GF and dog had to witness that), I couldn't help pretend riding the engineless bike today. Even made acceleration sounds :disapprove: . Gutted of engine and all attached parts, the saddle felt like an enduro bike, at least 6cm higher than stock
 
I re-read part of this thread.

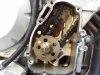
Post #39 shows a pic of the cam chain. I did not see the FRONT GUIDE, just the rear guide the CCT pushes on.

There is a cam chain front guide in there correct??

Also, it looked rusty INSIDE, just beyond the chain, ??
 
Here is a better picture. All 3 CCT guides are present.

The plate behind it is bare metal and though it is a bit oxidized, the rusty appearance was because of a thin (removed it with a rag) layer of engine smudge and RED engine oil (motul 7100).

Should anyone got any opinions of anything regarding this engine, please say now, BEFORE I put it all back together :Flash:
 

Attachments

  • 20170729_152734 - Copy.jpg
    20170729_152734 - Copy.jpg
    165.5 KB · Views: 32
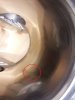
Just finished the manual deglazing/light honing with the red scotchbrite pad, following the OEM honing. There were some very light pitting that went away after a few passes, but the worst is a line in cylinder 4 - can't even tell if it's scoring or excess material. If I'm very careful I can feel it with a fingernail, and it fells probably 30% of a "medium" scratch from the screen of my phone.

There's no way I'm throwing away the whole block for this, but how bad do you think it is?
 

Attachments

  • photo_2018-04-19_00-50-34.jpg
    photo_2018-04-19_00-50-34.jpg
    59.1 KB · Views: 45
A real honing tool is not that expensive... It's also MORE ACCURATE than "scotch brighting" by hand.

I'd get the correct tool, with the correct stone.

Before running the tool down the bore, I'd probably pull at least the top compression ring off that piston, insert in the cylinder and measure how tight or loose that cylinder is. That'll give you some idea how much you can hone.

For all that you have invested in that engine, and the initial issue, I doubt that cylinder imperfection is a deal killer... It's not like you dropped a valve in the cylinder and that bounced around tearing up the insides.

BTW, enlarging the pic, it doesn't look bad.

Also, with the piston ring in the bore, can you check to see IF you CAN SEE LIGHT BETWEEN THE BLOCK AND RING (in that area).
 
Last edited:
The reason for not using a honing tool was mainly because I was afraid I'd take off too much nikasil, unnecessarily. The OEM honing marks were all intact, so mainly I was hoping to achieve some deglazing.

Also, I don't know what is the proper tool for that. All I could find was debate ranging from "one should NEVER rehone nikasil" to "nikasil is extremely hard and never loses honing" to "just use whatever".

I will check for any possible cylinder-ring light gaps tomorrow, using the old rings (wouldn't want to mess up the new ones by fiddling with them).
 
Back
Top